Photos have the power to bring your mission to life in the minds of your visitors. In this article, we outline the steps to add and format photos on your website pages.
Make Your Photo Upload-Ready
Using large, high-resolution images on your site will negatively affect the time it takes to load pages—frustrating your visitors. While you want your photos to look sharp, the quality can actually be sized down significantly to appear nicely on a screen compared to the size you’d need to print them.
Small images should be under 100KB, and larger header images should be under 350KB. If you don’t have a program on your computer to crop and resize images, we recommend free tools like Pixlr or Canva.
Finding Photos to Use
If you’re short on photos, give Envato Elements a browse. It’s included in your website platform subscription! Simply send us the links of photos you like. We’ll get those downloaded and over to you to use on your website.
Add a Photo to an Existing Page
The easiest way to add a photo to a page is by using the Image block.
Once you are logged in to your website, open the page where you would like to add a photo and make sure you are looking at the editing view on the back end.
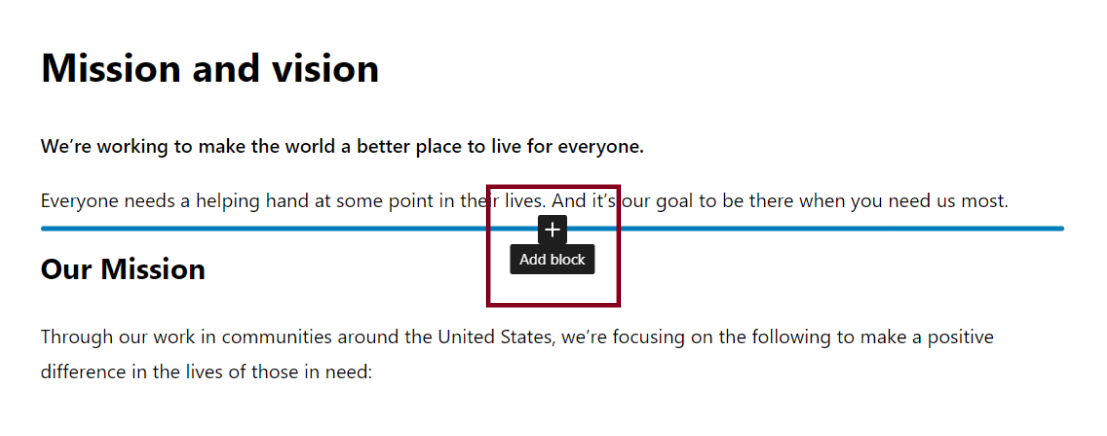
- Locate the position on the page where you’d like to add the photo and click “Add block.”
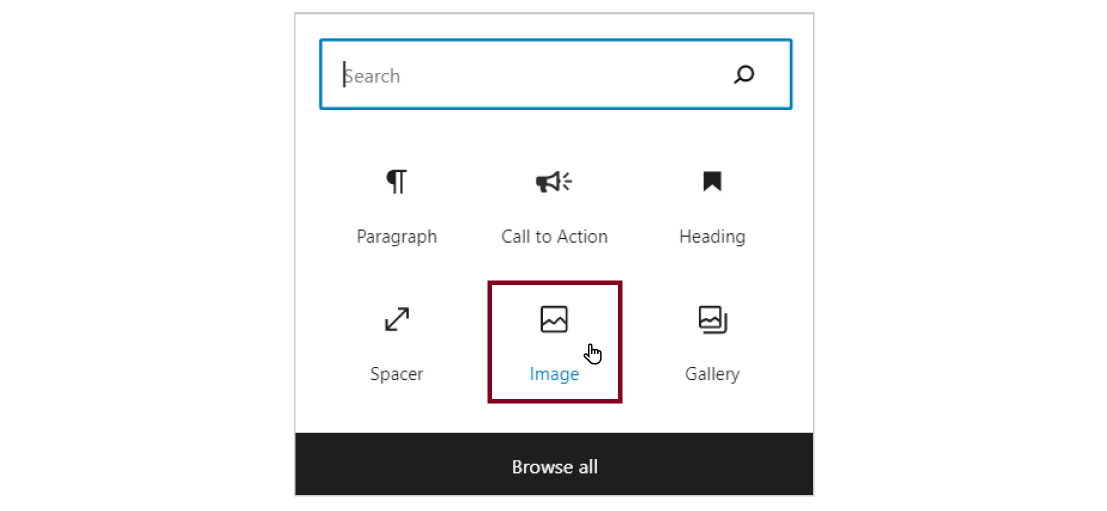
- Choose the Image block.
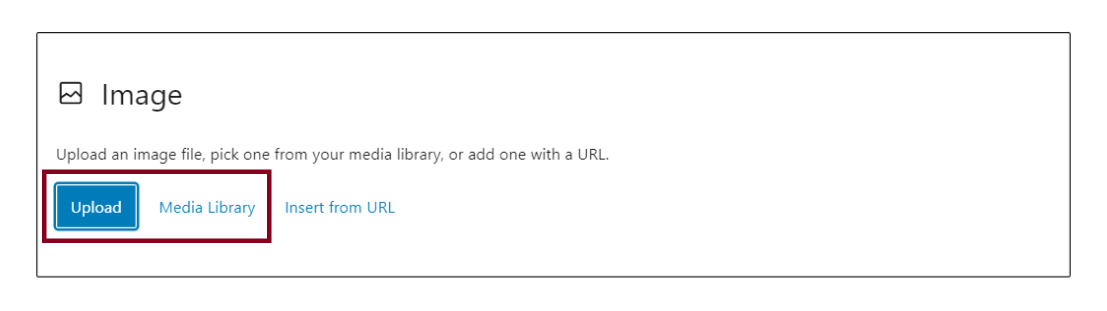
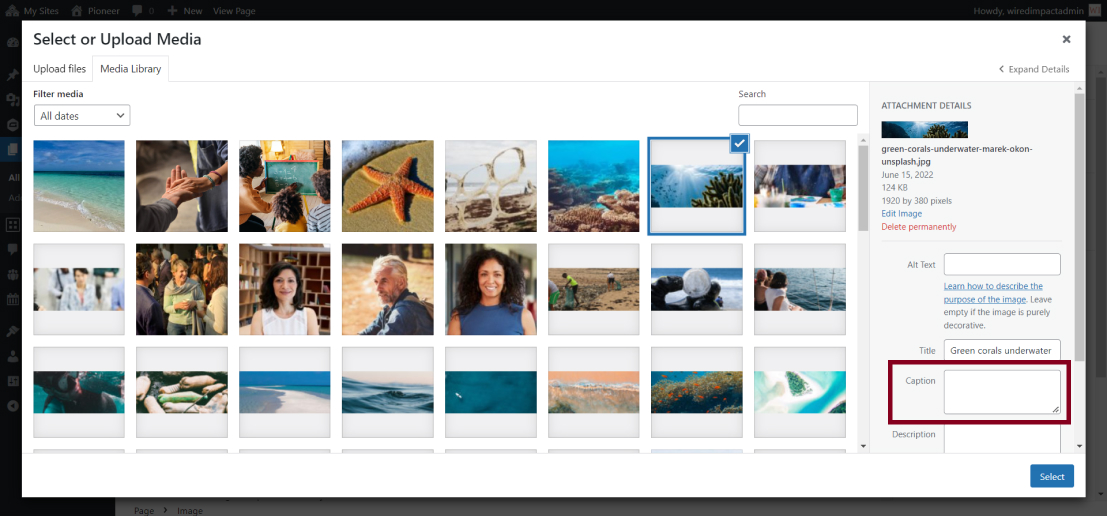
- Access the photo by uploading it from your computer, choosing from an existing image in your Media Library, or via an offsite URL (not recommended).
- If you’re choosing an image from your Media Library, adjust the Attachment Details on the right of the screen to add a title, caption, alt text and description if you prefer. For accessibility, we suggest adding at least a title and alt text for images that serve more than a purely decorative purpose.
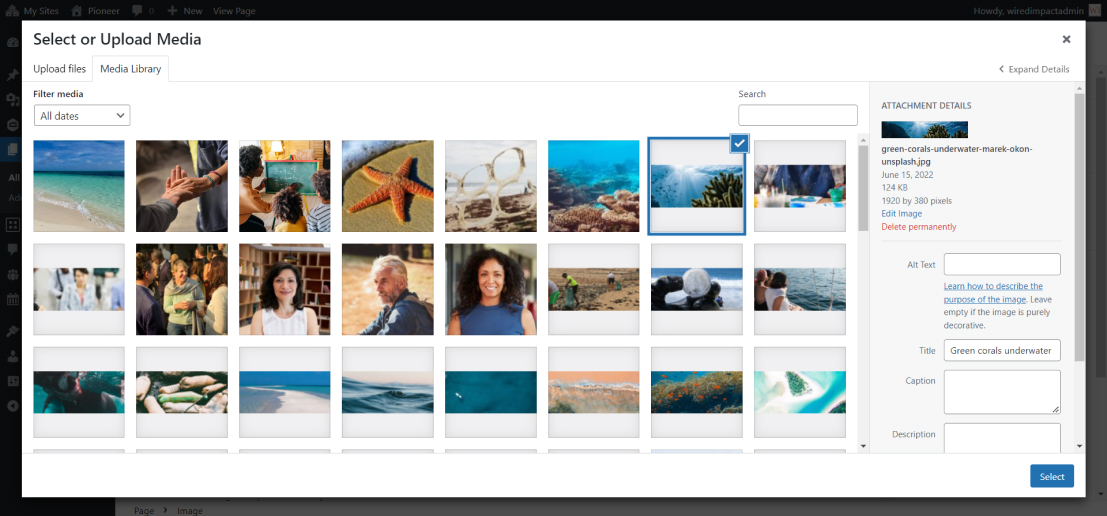
- When you’re ready, click the blue Select button at the bottom right of the media window and the photo will be added to your page.
Preview your page to see how everything looks and publish or update when you’re ready for everyone to see the photo.
Update Image Styles and Settings
When the Image block is selected, you can make a variety of adjustments so it displays correctly.
These settings can be found in the toolbar above the image or the block settings sidebar on the right side of the editor.
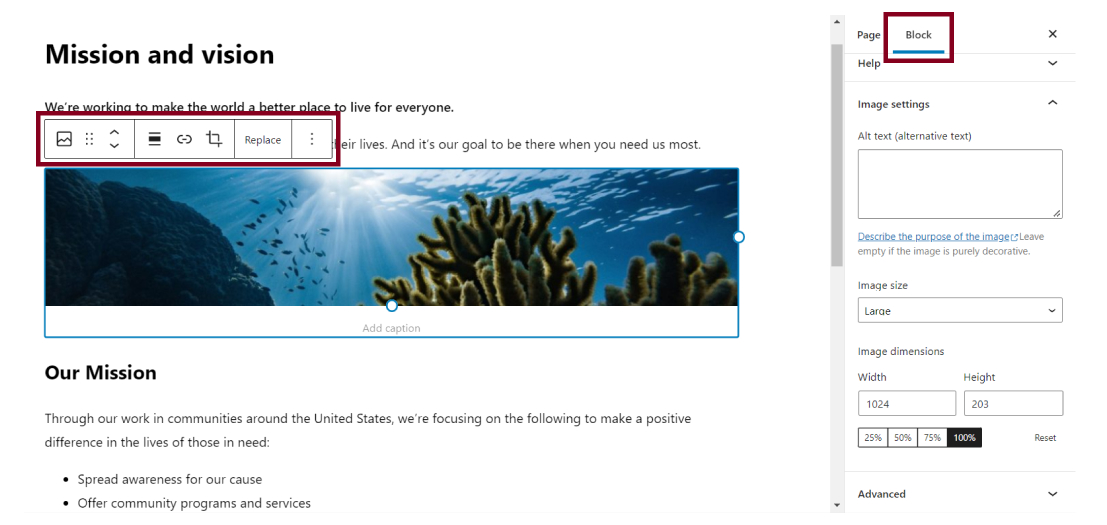
In the Image block settings sidebar on the right, you’ll see options to change the size, dimensions, alt text, and more.
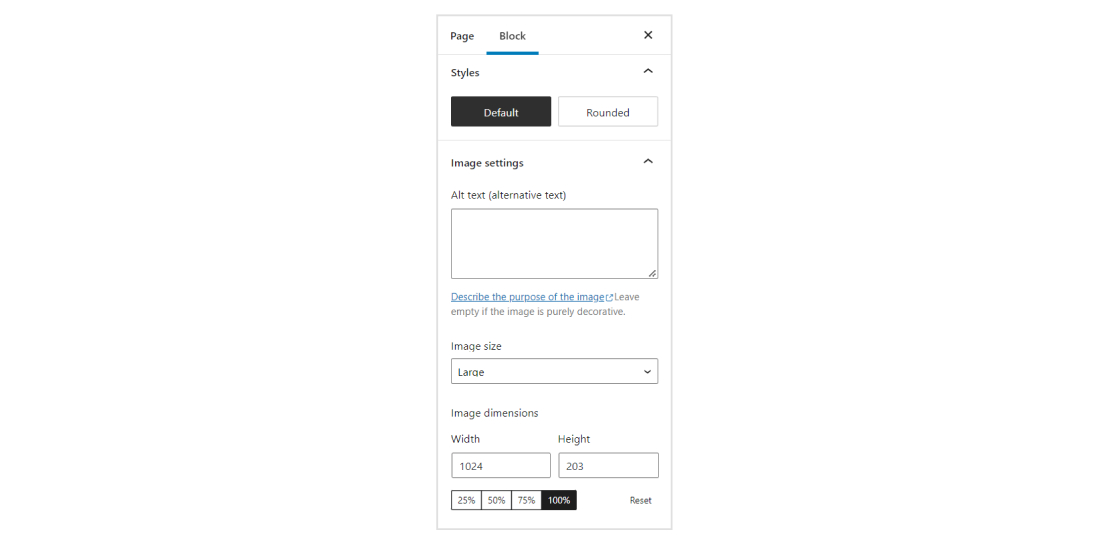
Styles
You can choose between “Default”, so the image appears as you inserted it, typically with square edges. “Rounded” will make the edges of the image rounded.
Alt Text
Alt text controls the text that replaces an image in case of a slow internet connection or for readers using screenreaders and other assistive technology.
There is a difference between images that are informational and those that are purely decorative. If the image is important to the content, the alt text should briefly describe the image. And, if the image is linked, it should note where the link goes, rather than describing the image itself.
If the image is purely decorative, there is no need to include descriptive alt text.
Image Size and Dimensions
You can adjust the width and height of the image by selecting predetermined options, or setting custom values. You can also adjust it by selecting a percentage of the original image size.
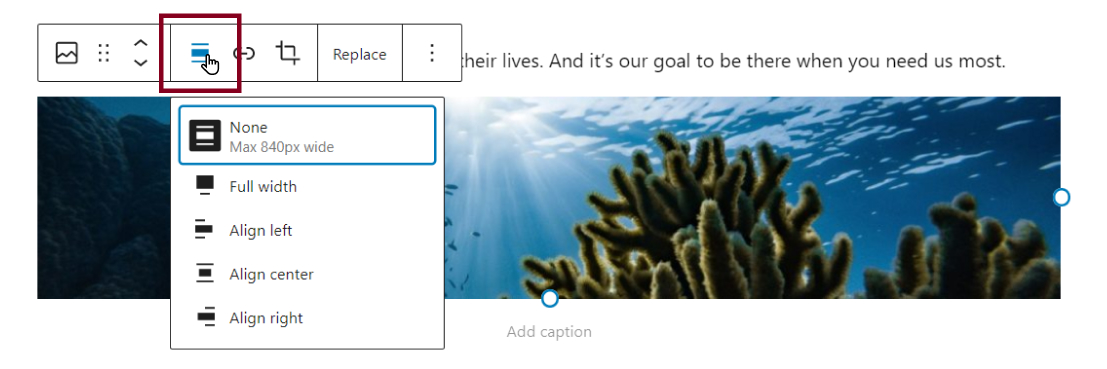
Change Alignment
If you want to change the alignment of your photo to left, center or right, those settings can be found in the toolbar above the Image block.
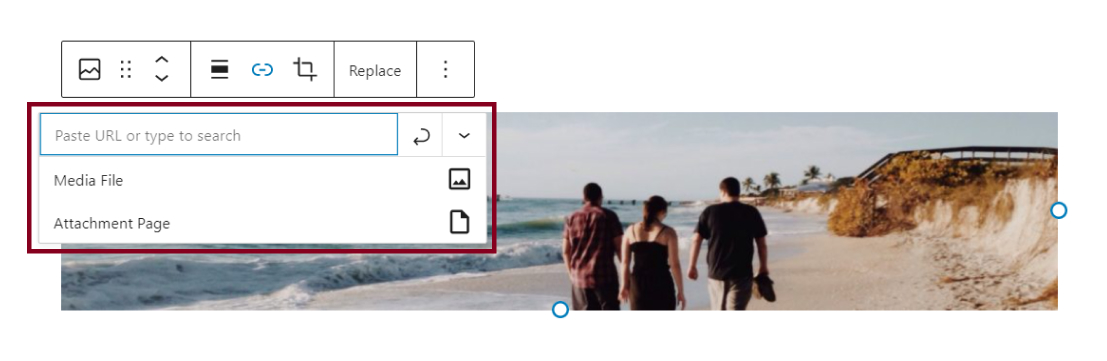
Insert Link
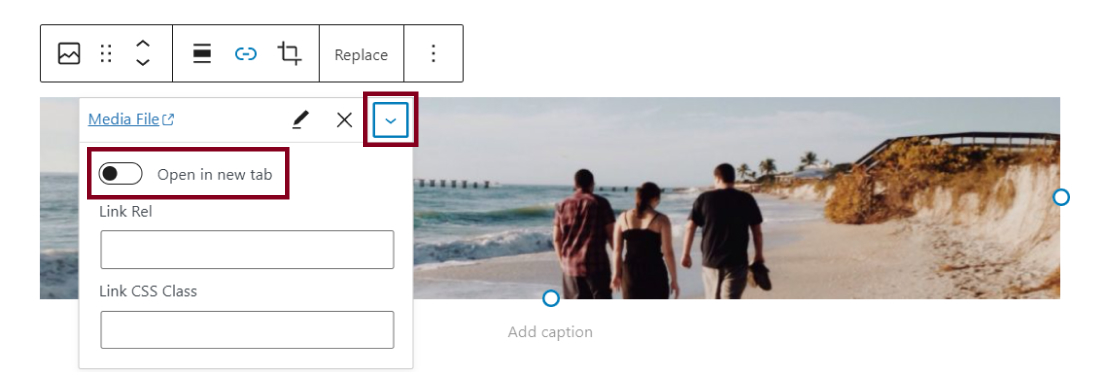
If you want to link the image to another page, you can select the “Insert link” icon in the toolbar, and a box will pop up where you can paste your link or search your site for an existing page or post.
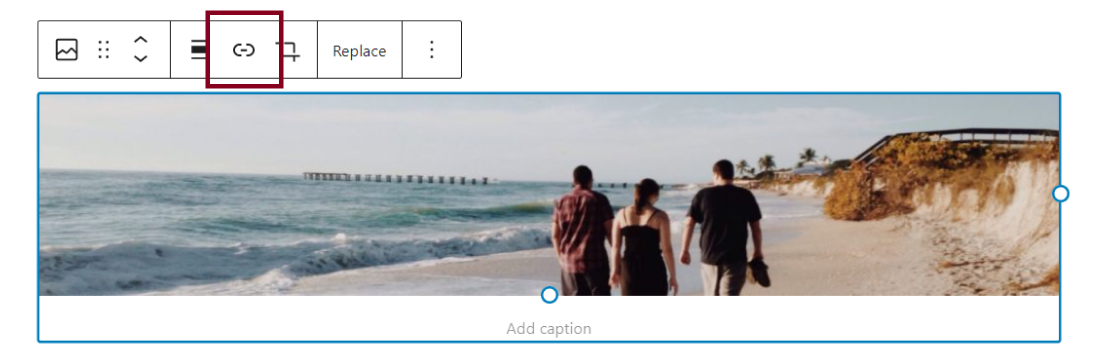
By clicking on the arrow, you can access other options, like “Open in new tab”.
Crop a Photo
If you want to adjust the proportions of the photo, click the “Crop” button in the toolbar.

In the cropping menu, you’ll be able to adjust the zooming of the image or select a different aspect ratio. After making the desired changes, click on “Apply” to save them.


Swap a Photo
If you’d like to change a photo but keep the block where it is on the page, click the “Replace” button at the top of the block.
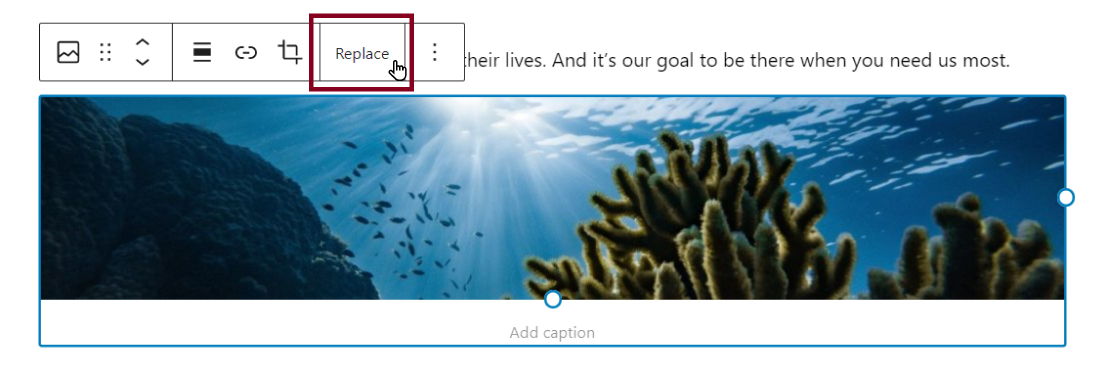
From here, you can choose another photo from the Media Gallery or upload a new file.
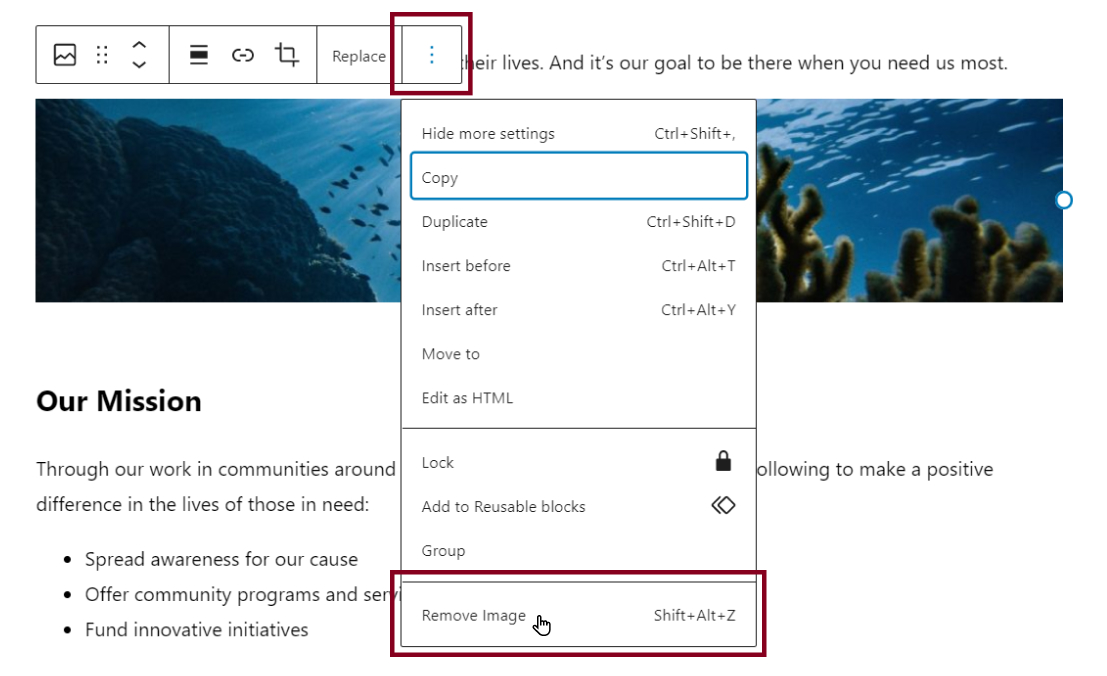
Remove a Photo
To remove a photo altogether, click the three-dot icon at the top of the Image block and select “Remove Image.”
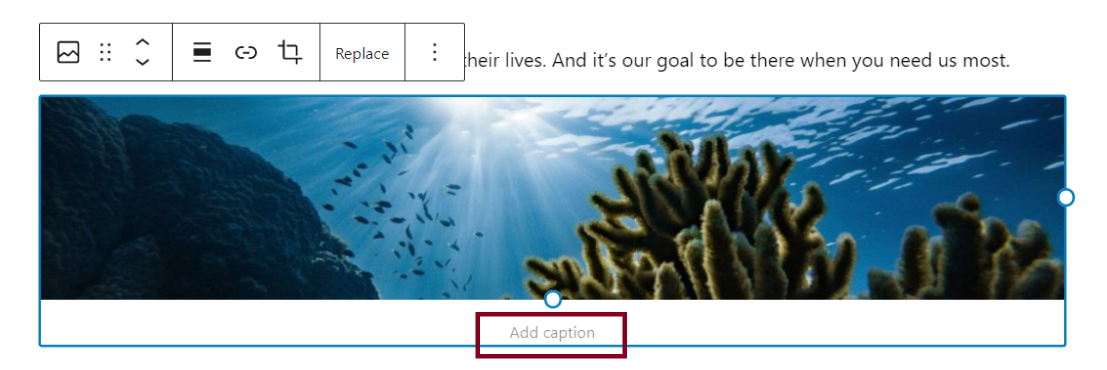
Add a Caption
There are two ways to add a caption to an image:
- Using the right panel in the “Select or Upload Media” popup
- By clicking on the Image block and adding the caption below
Add Multiple Photos
You can add multiple photos throughout a page by using the Image block wherever you need it. If you’d like to display multiple photos together in a grid view or with columns, use the Gallery block instead.
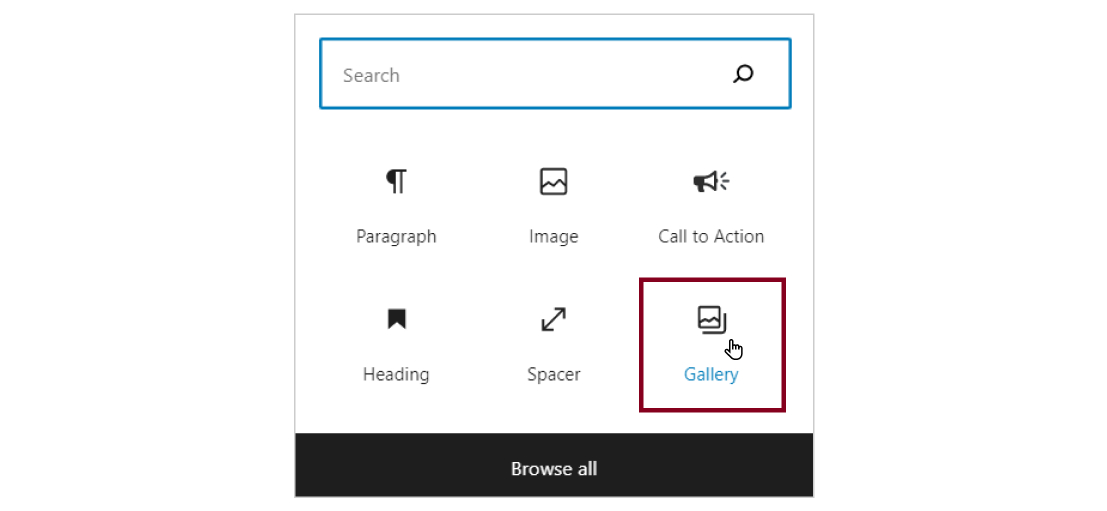
With a Gallery, you can:
- Display multiple photos in columns
- Choose how many images should appear in a column
- Automatically crop images so that they fit nicely together

Add a Featured Image to a Page
A featured image is also called a header image. It’s the photo that shows at the top of your page or post. Learn more about adding a header image.
Still Have Questions?
The quickest way to get support is to reach out to us within your website’s admin dashboard. Log into your website and then fill out the Request Help form. You’ll hear back from us within one business day.