From time to time you may want to freshen up the content on your homepage. And we get it… it can be tough to remember where to add every little detail. In this article, we’re outlining exactly how to adjust all of the homepage content on your Airy theme website. If you’re not using the Airy theme, check out how to adjust the homepage content in other themes.
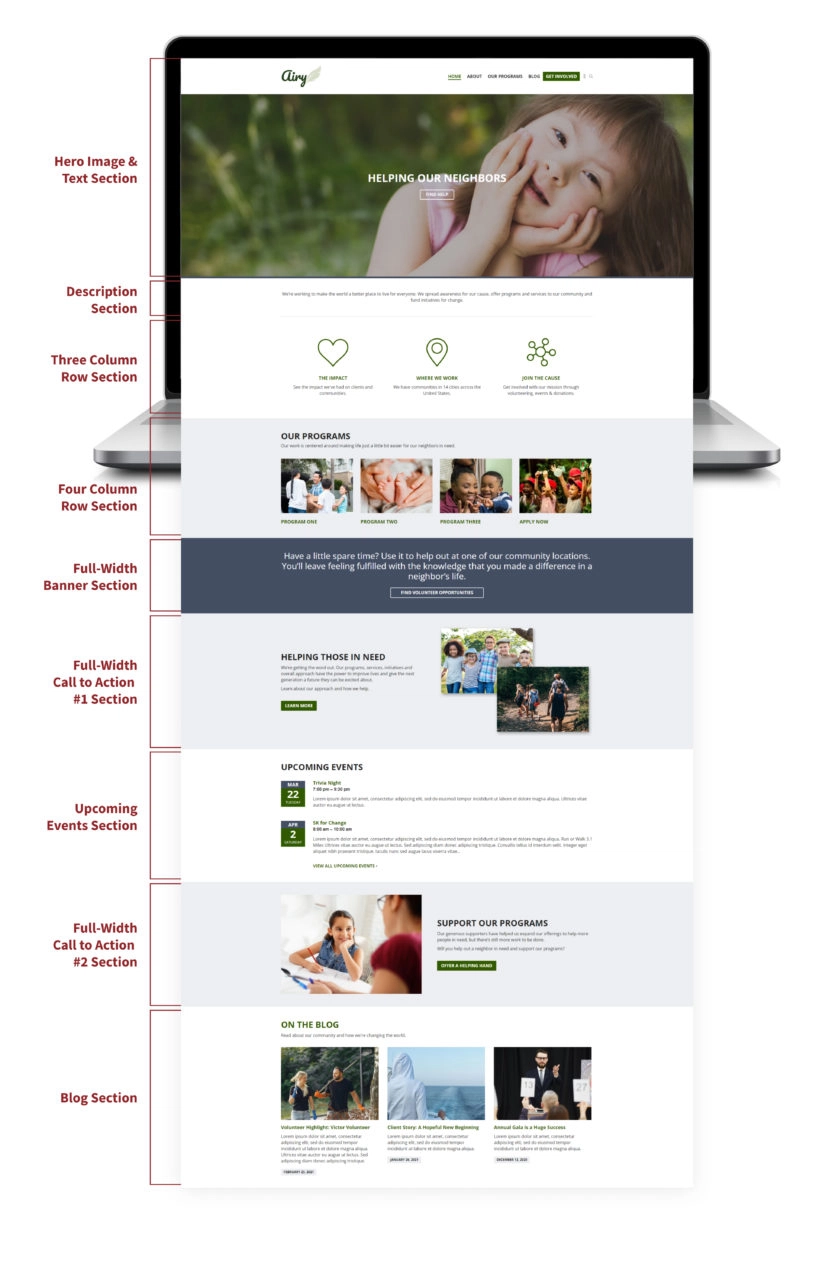
To update anything on your website, you’ll first need to be logged in to your website. Use the labeled photo for reference and the jump navigation below to find instructions for how to revise the specific section you’d like to update.
Keep in mind that there are certain sections you can decide whether or not to display, but you won’t be able to customize the order in which the sections appear.
Edit the Hero Image and Text
Change the hero image
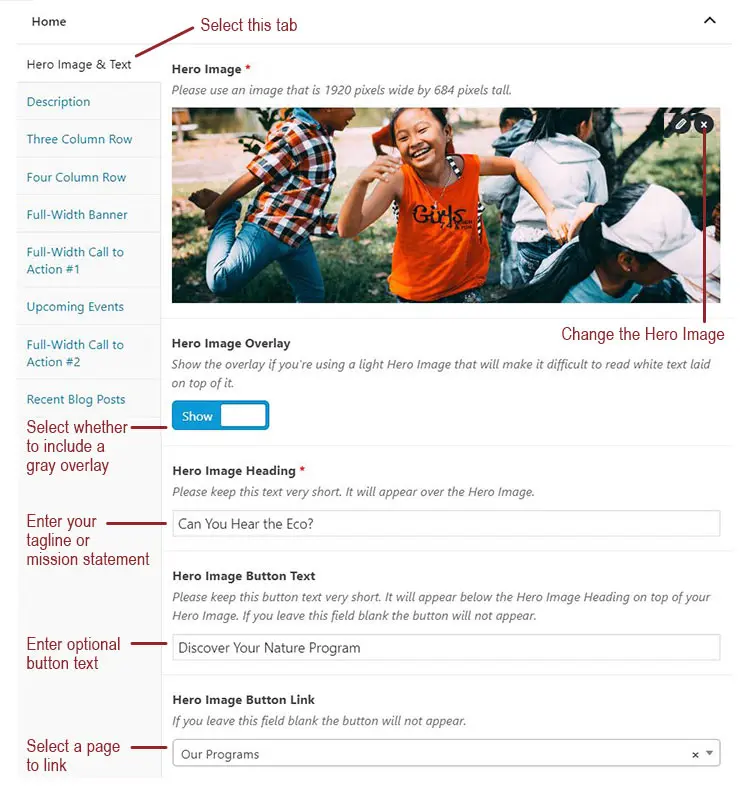
The hero image is the large image that’s front and center when your homepage loads. You can update this by first cropping an image at 1920 pixels wide x 684 pixels tall. Upload it to the section labeled “Hero Image” in the back end of your website.

- Hover over the current image in the back end and click on the “x” in the upper right-hand corner to remove the existing image.
- Click the new button that has shown up in the former image’s place called “Add Image.”
- Drag the new desired homepage hero image into the upload box.
- Don’t forget to add an Image Title and Alt Title.
Add a heading and button overlaying the hero image
If you’re planning to add a heading and/or text on top of your hero image, it’s likely that you will need to activate the Image Overlay, which is just a transparent layer of gray to make it easier to read text on busier images.
To activate or deactivate the gray overlay, click the Hero Image Overlay toggle to “Show” or “Hide” depending on your end goal.
To update the Hero Image Heading, simply highlight the existing text and enter your new heading. Additionally, you can add an optional button underneath the heading. To accomplish this, enter text in the Hero Image Button Text form field and select a page to link to in the Hero Image Button Link dropdown. If you do not enter information into those two form fields, the button will not show.
Don’t forget to click the “Update” button in the top right corner of the screen before closing out.
Edit the Description Text
Want to change the text that shows below your homepage’s hero image? The Description text can be found in the second tab in the back end of your homepage. It should give your site visitors an overview of exactly what your organization is all about.

To edit this text, use the editor field to type new content. You can use the editor to bold or italicize key parts of your text if you choose.
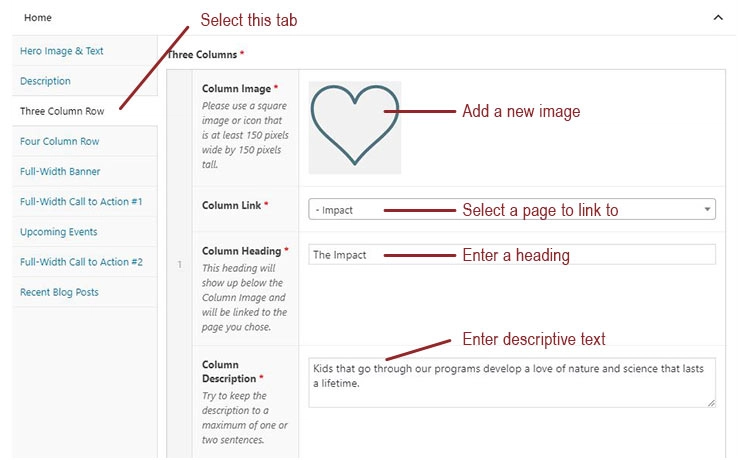
Update the Three Column Row Section
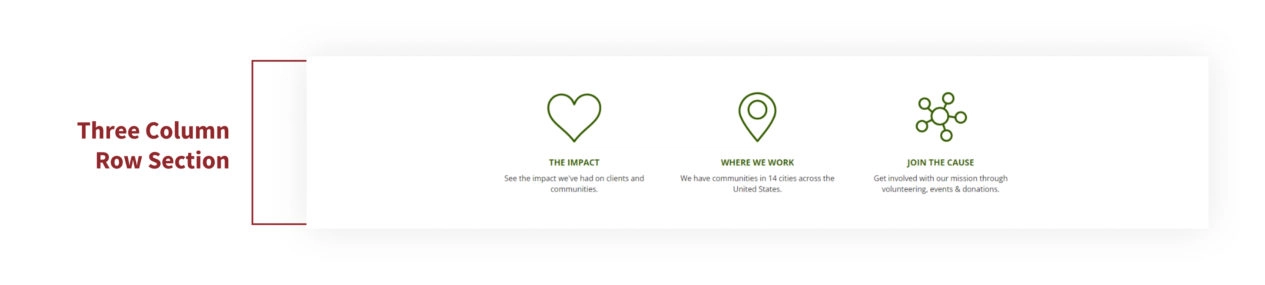
The Three Column Row section is the third tab option in the back end of your homepage. These three columns are required for the homepage, and you’ll need to provide images and text for each.
Icons or photos can both be great options for images at the top of each column, depending on how you want this section to look. You’ll also need to come up with some text and a link for each column. This is a great way to direct site visitors to information about your impact, more about your organization, or key ways to get involved.
- Crop images or create icon graphics at 150 pixels wide by 150 pixels tall. Upload the appropriately sized images to the section labeled Column Image for each of the three columns.
- In the Column Link section, choose a page of your site for each column to link to.
- A heading is required for each column. They can be edited in the field labeled Column Heading.
- Finally, you must add a Column Description that will appear below the heading for each respective column.
- Repeat these steps to update each of the three columns.
- Click the Update button to see the changes you’ve made.
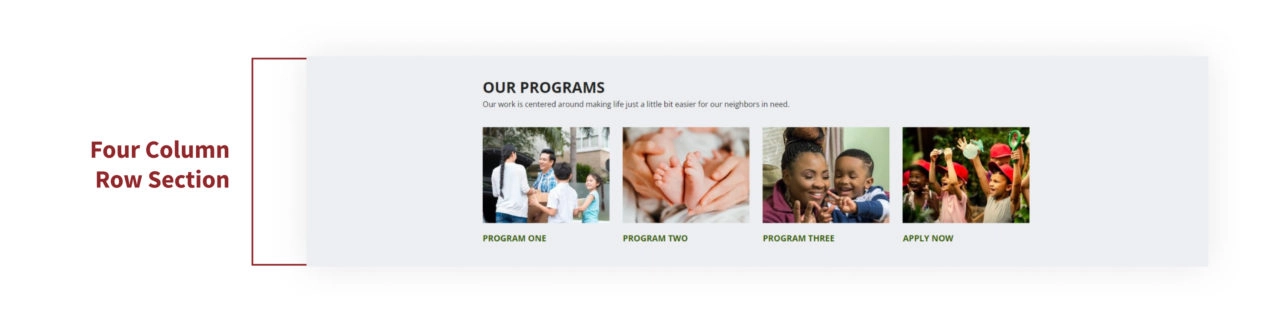
Edit Four Column Row Section
The Four Column Row section is the fourth tab down on the homepage in the back end. This section gives you the option to showcase four images and link to any page you want on the site. We recommend keeping this section focused on one topic or section of your site. It’s a great place to showcase your organization’s programs, impact stories, or four ways to get involved.
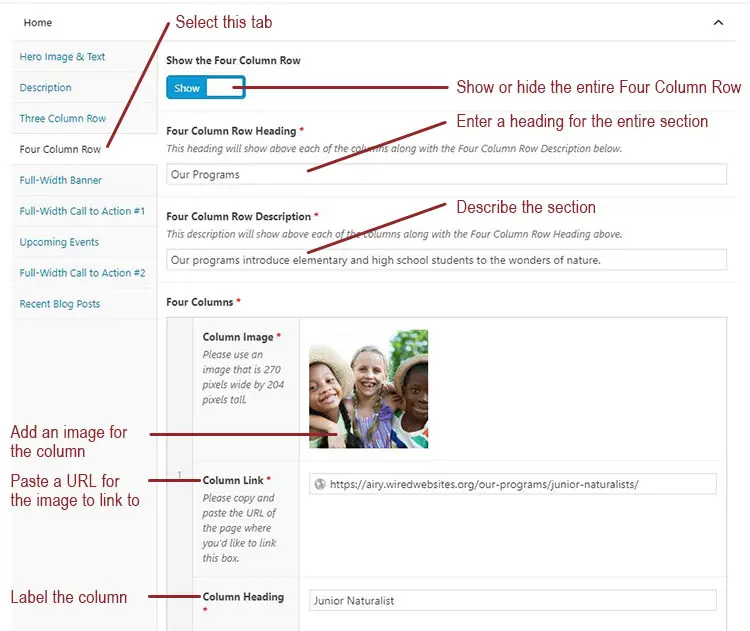
Firstly, you need to decide if you want this to display on the front end. If yes, be sure the “Show the Four Column Row” toggle is set to “Show.” If not, click the toggle to switch it to “Hide.” If you choose to hide this section, it will disappear, and the following sections will move up in its place.
- Enter a heading for the section as a whole into the Four Column Row Heading field.
- Enter a description for the section into the Four Column Row Description field.
- Crop four images to 270 pixels wide by 204 pixels tall. Upload cropped images for each of the columns to the section labeled Column Image.
- Copy and paste a link for each column in the section labeled Column Link. This ideally would be a link within your site, but can also be an external link.
- A heading is required for each column and can be edited in the field labeled Column Heading.
Edit the Full-Width Banner Section
The Full-Width Banner section is the fifth tab down in the back end of your homepage. This mandatory section allows you to feature a bold call to action prominently in a banner-style on your homepage.

To update this section, enter no more than one sentence of text into the Banner Text field. Then type in four words or less for the Banner Button Text. Finally, select the page you’d like for the call to action to link to.

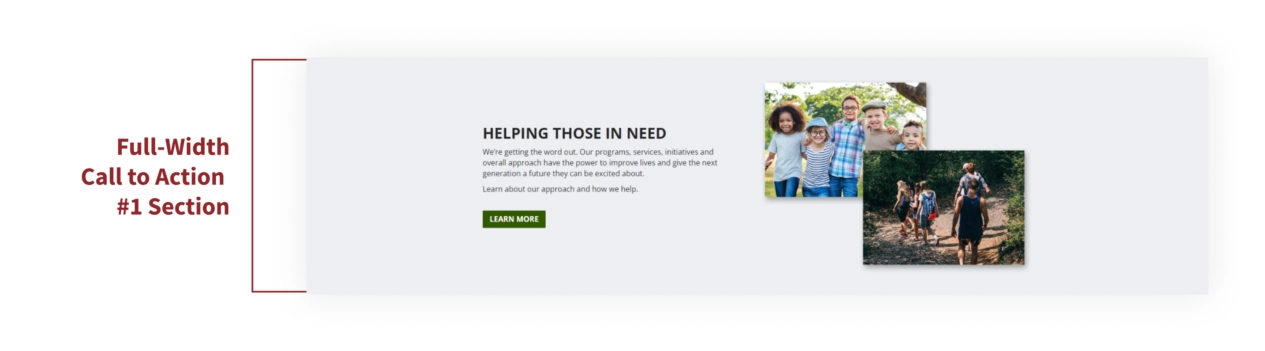
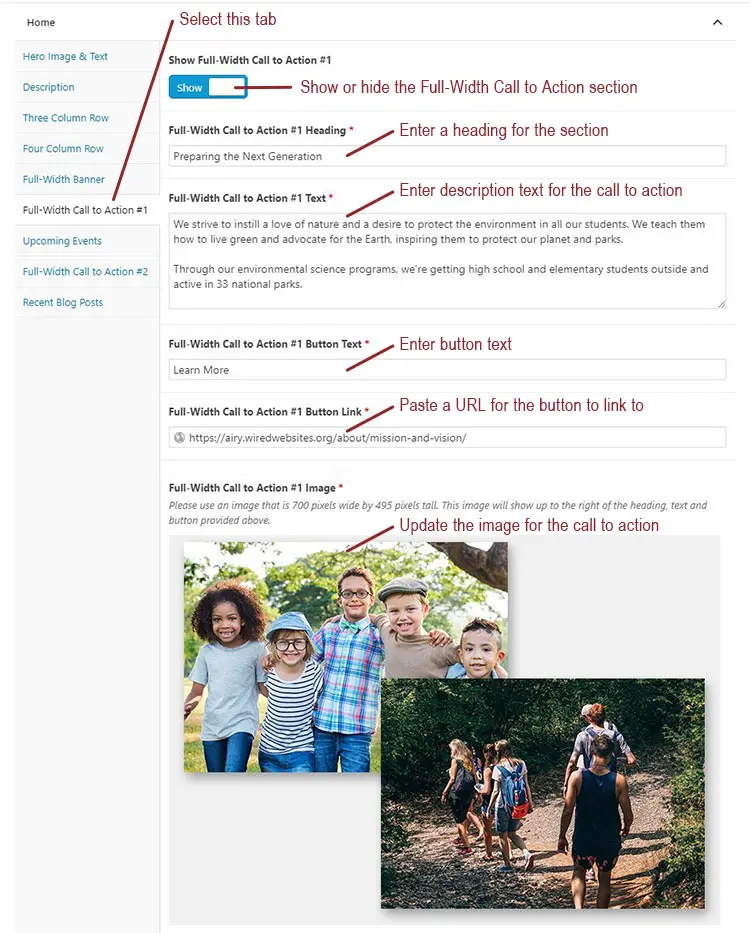
Edit the Full-Width Call to Action
There are two Full-Width Call to Action sections that you can choose to show (or hide) on your homepage. They both work and look very similar. Each section includes a spot for an image and a spot for information. Follow the instructions below to update this section.
- Click the Show/Hide toggle at the top under “Show Full-Width Call to Action #1” to activate or deactivate the section on the front end. If you decide to display this section, all of the following input fields are required.
- Input a heading into the sections called “Full-Width Call to Action #1 Heading.”
- Enter your descriptive copy into the field called “Full-Width Call to Action #1 Text” to explain your call to action or information in more detail.
- Update the text that shows in the button in the field titled “Full-Width Call to Action #1 Button Text.”
- Then paste a link into the “Full-Width Call to Action #1 Link” field.
- Finally, you’ll need to upload an image to display. We suggest uploading an image that’s 700 pixels wide by 495 pixels tall.
- Click the Update button to save your changes.
Edit the Upcoming Events Section
FEATURE AVAILABILITY
The Event System is available for Grow and Amplify plan websites. Change your plan in the Account & Billing section of your website Dashboard.
The Upcoming Events section is the seventh tab down on the homepage template in the back end. This section pulls content in automatically from a custom post type called Events. You can select whether or not to show this section on your homepage by clicking the Show/Hide toggle at the top.
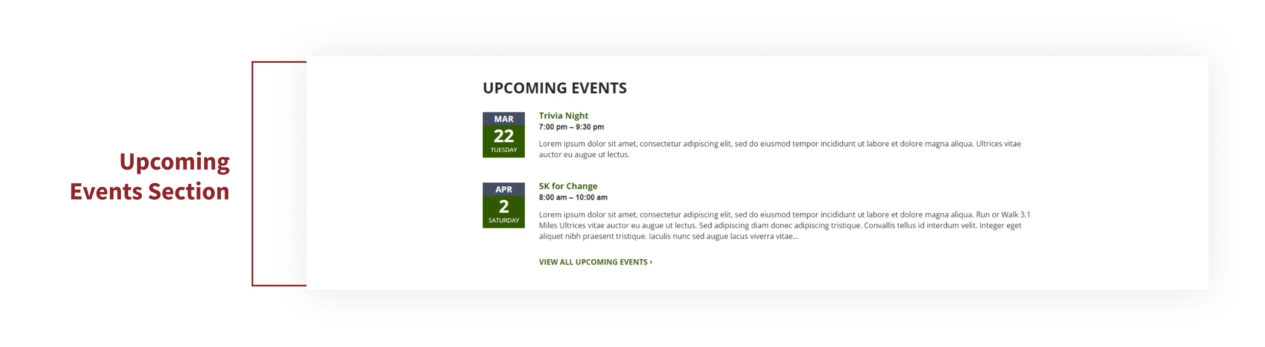
If you don’t have any content in the Events section of your website, or if you’re on the Core plan, nothing will show on the homepage for this section. Your homepage will smoothly transition to the next section you’ve opted to show.
In this homepage tab, you’ll see an input field for a heading. If you choose to use the Events section of the website, you can title this section to be more customized to your nonprofit, such as “Community Events” or “Upcoming Fundraisers.”
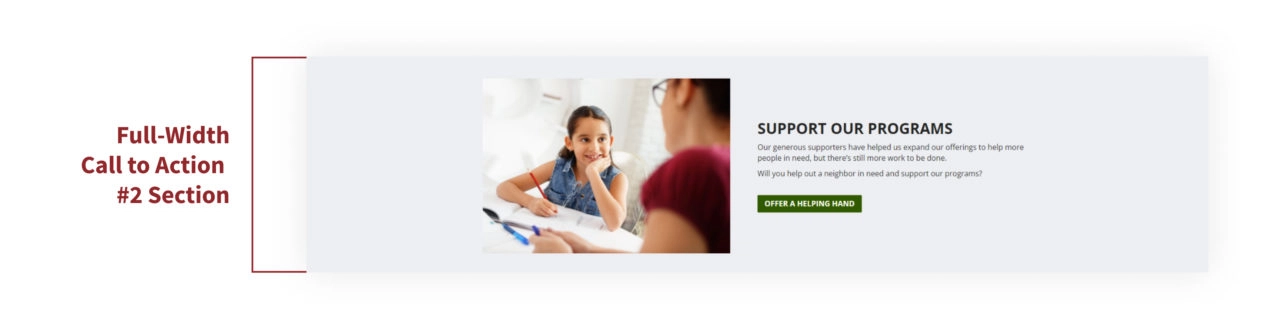
Edit the Full-Width Call to Action #2
This section works identically to Full-Width Call to Action #1, except that the image shows up on the right side of the page instead of the left. Navigate to the eighth tab on your homepage in the back end of your site, and follow the instructions above to update this section.
Update the Blog Section
The final tab of homepage options is for featuring your most recent blog posts. Similar to the Events section, your most recent blog posts are pulled onto the homepage automatically from another section of your site.
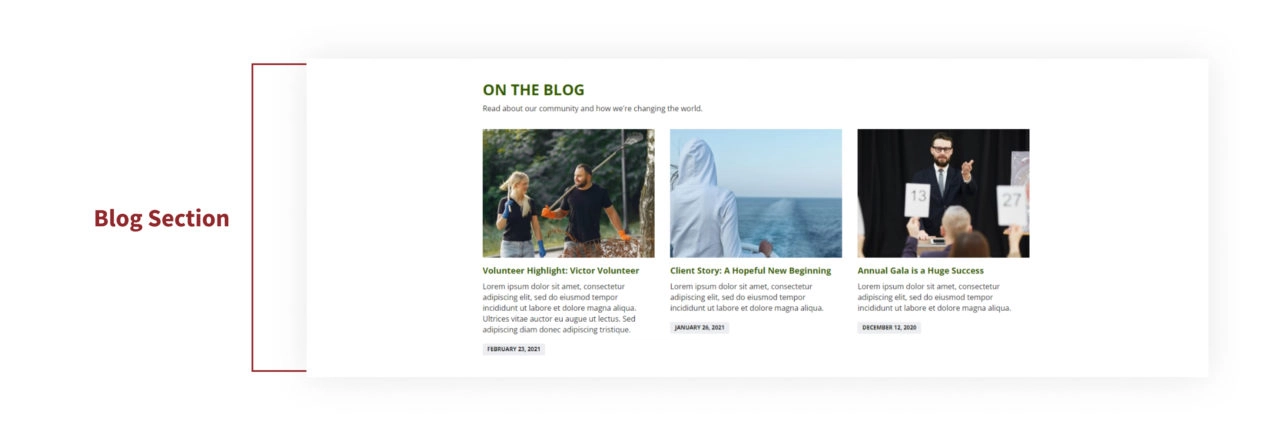
Any time you publish a new post, the newest post will automatically appear on the left side and move to the right as others are published. The three most recent posts will be the ones that show here on the homepage. If your blog is empty and you do not post any blog posts, this section will not appear on your homepage at all.
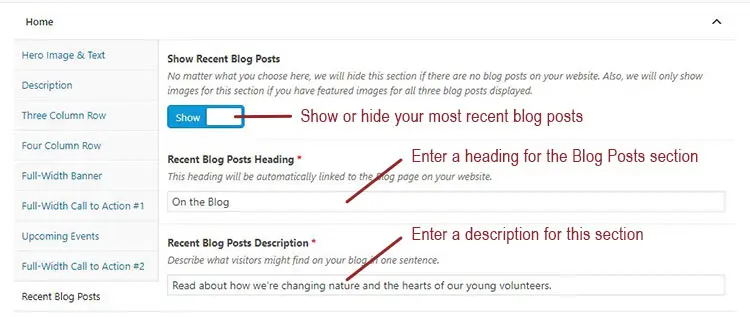
On the homepage in the back end of your site, you’ll find the Recent Blog Posts section in the 9th and final tab.
- Click the toggle button to dictate whether or not blog posts are pulled onto the homepage.
- If you have not published any blog posts, this section will automatically be turned off and will not appear on the front end of your site.
- Update the heading using the “Recent Blog Posts Heading” field. For example, you might change the Blog Heading to “Recent News.”
- Add a short description of what type of content your blog offers in the “Recent Blog Posts Description” field.
Still Have Questions?
The quickest way to get support is to reach out to us within your website’s admin dashboard. Log into your website and then fill out the Request Help form. You’ll hear back from us within one business day.