
Adding photos to your nonprofit website helps to draw visitors into your content and create an emotional connection. But there are some steps you need to take to get them ready for the web. If you don’t have Photoshop, fear not! We’ll teach you how to format photos for your nonprofit’s website without paying for an expensive program.
The Perks of Prepping Your Photos
It’s easy to get into the habit of uploading a photo directly from the photographer or a stock photography site. You might even grab a photo from your phone without thinking twice. There are several benefits, however, to resizing or cropping your photo before displaying it for the world to see.
Photos taken with a camera are often large in size, which could easily bog down the load speed of your website. According to Skilled, 47% of website users expect any given webpage to load in 2 seconds or less. It’s important to reduce an image’s file size to ensure that your site is loading as quickly as possible. Otherwise, your visitors could get frustrated and leave.
Some areas of a website also require images cropped to unique sizes—like header images at the top of a page or blog post. It’s best to crop these photos yourself so you can specify which piece of the photo is in view. Some websites will auto-crop if you upload any size image, but this can lead to odd crops that don’t tell an accurate story.
How to Format Photos Using Canva
We’ve previously recommended using Canva for social media graphics since it’s an easy-to-use platform for non-designers and offers a free account for nonprofits. Similarly, it’s a great tool for website images if you’re not sure how to format photos and export them in specific sizes.
Let’s work through an example step by step to see how you could crop a header image for a page on your site.
- Create a Canva for Nonprofits account or sign in to your existing account.
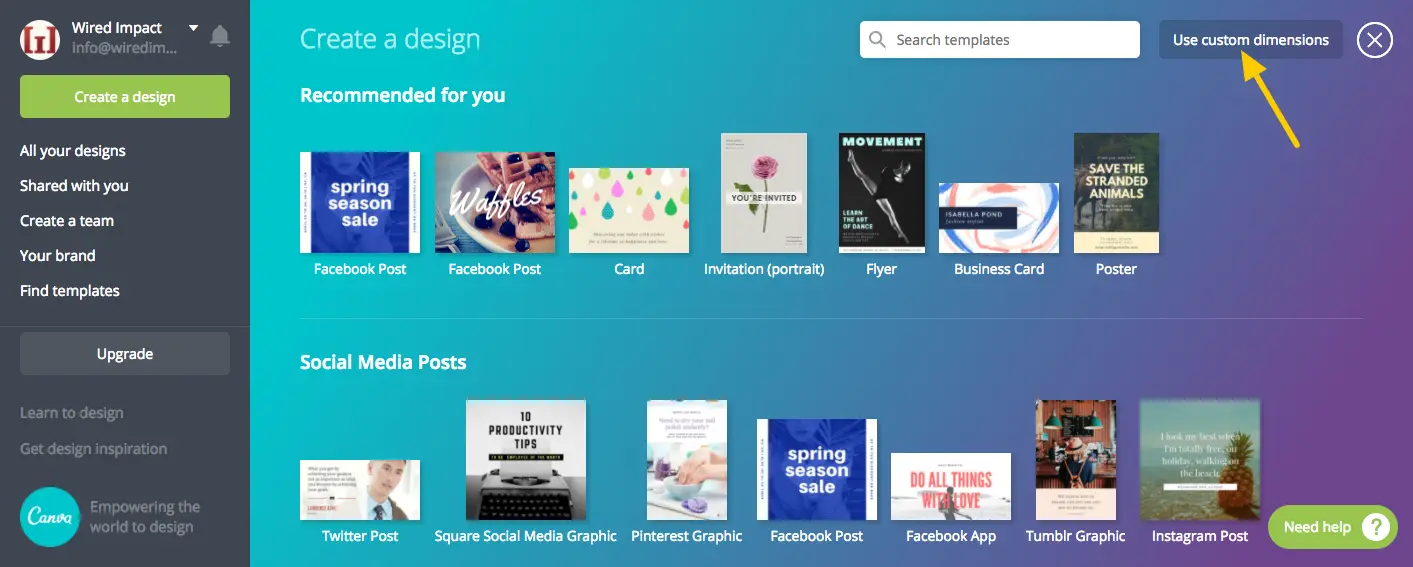
- Click “Use Custom Dimensions” button in the upper right-hand corner of the site.
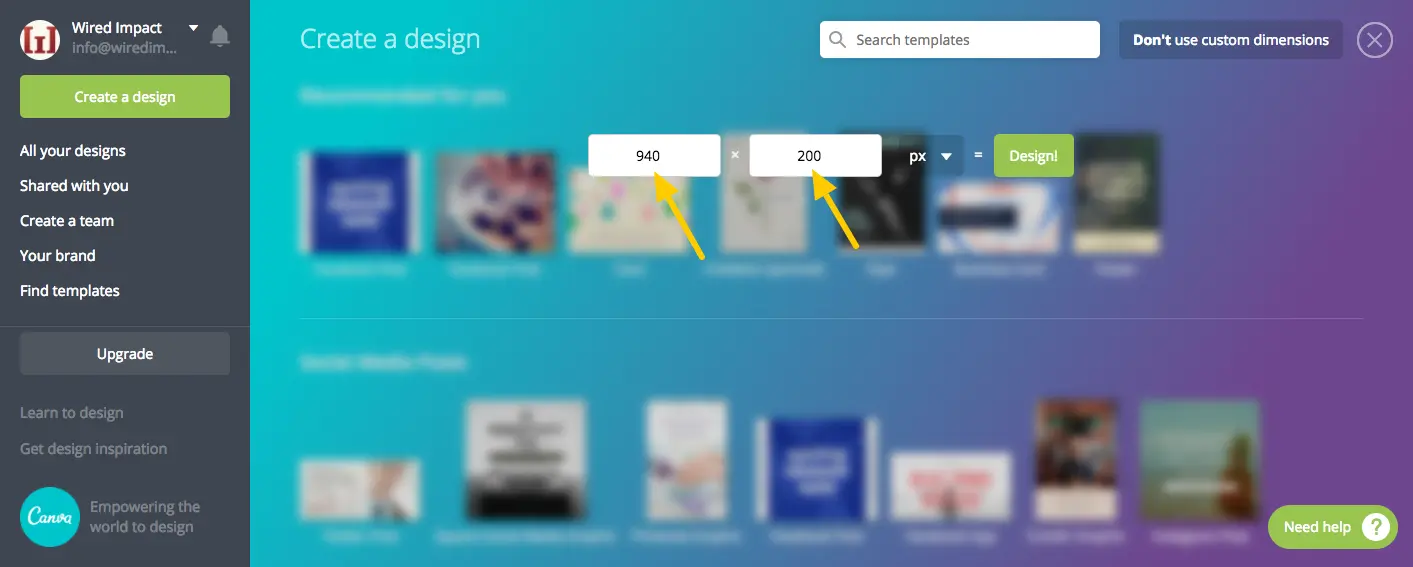
- Enter the size photo you need (in pixels) to create a blank artboard with the exact dimensions for your website.
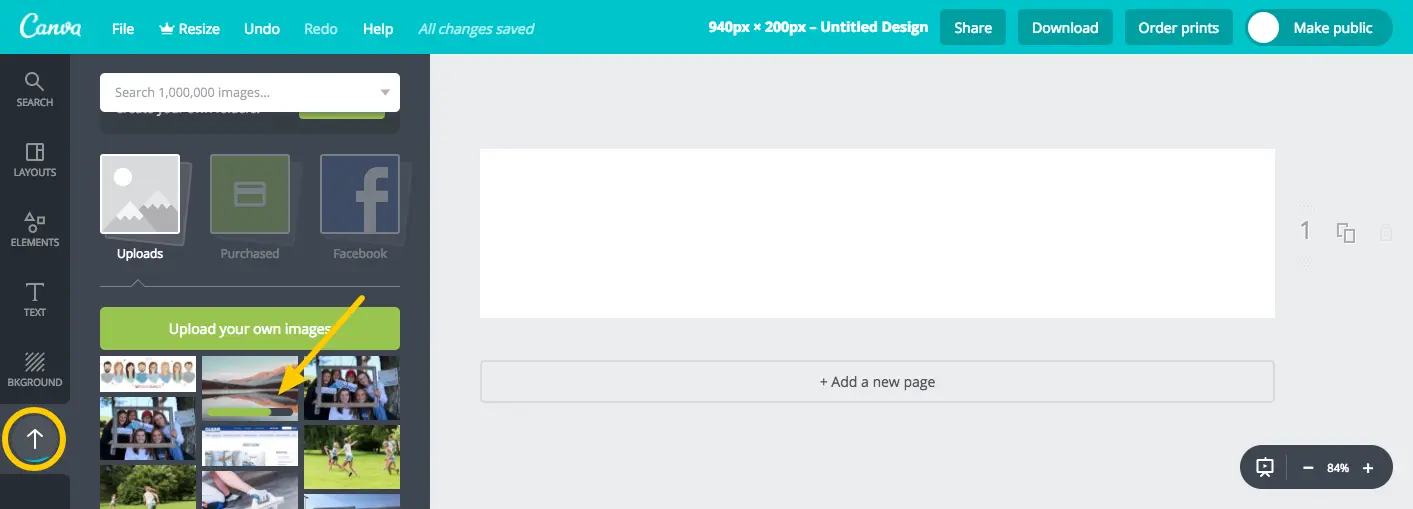
- Upload the image to Canva that you’d like to format. When it’s ready, the photo will appear as a thumbnail in your gallery of uploads in the bottom left.
- After it loads, click on the thumbnail and drag it over to your artboard.
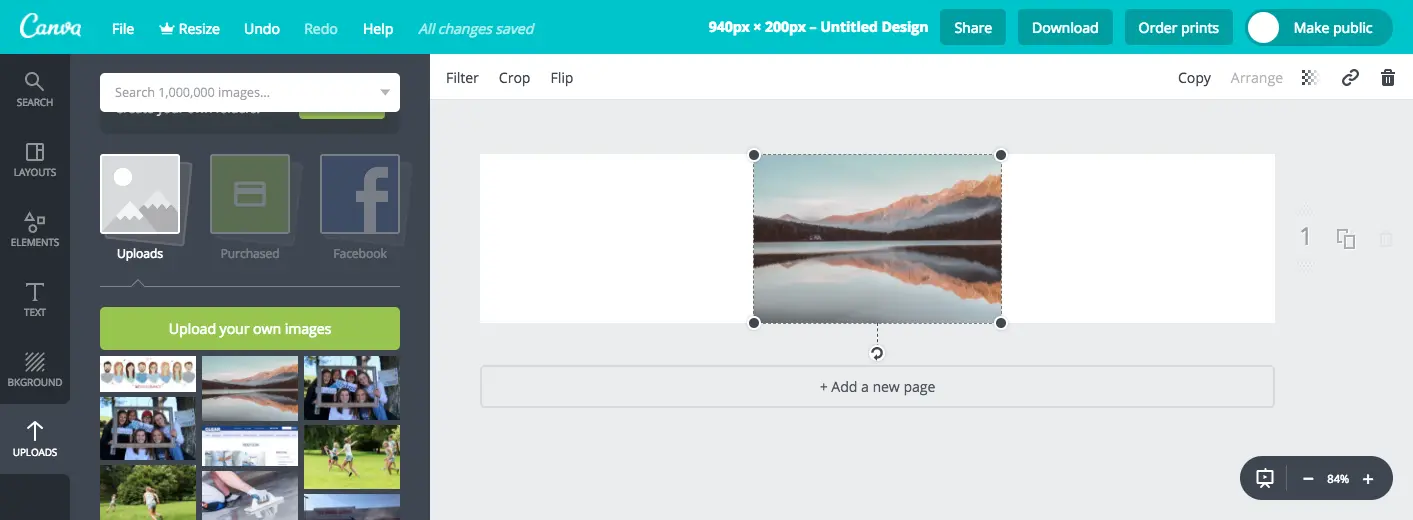
- You can resize your photo to fill the artboard until you like the crop. Reposition the photo by clicking and dragging as needed.
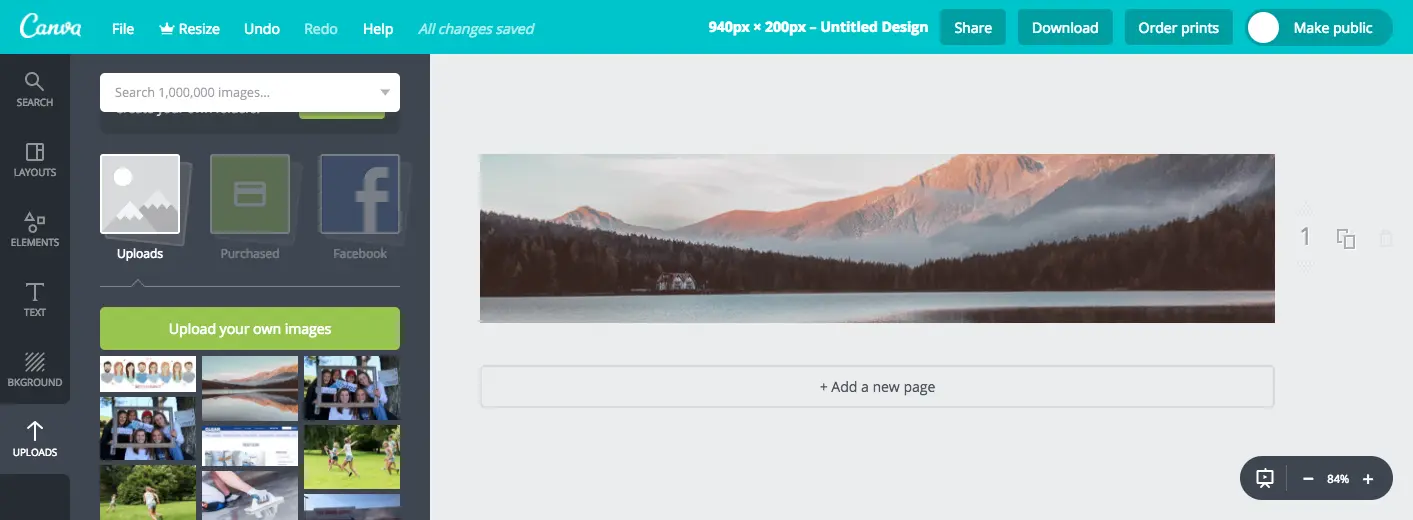
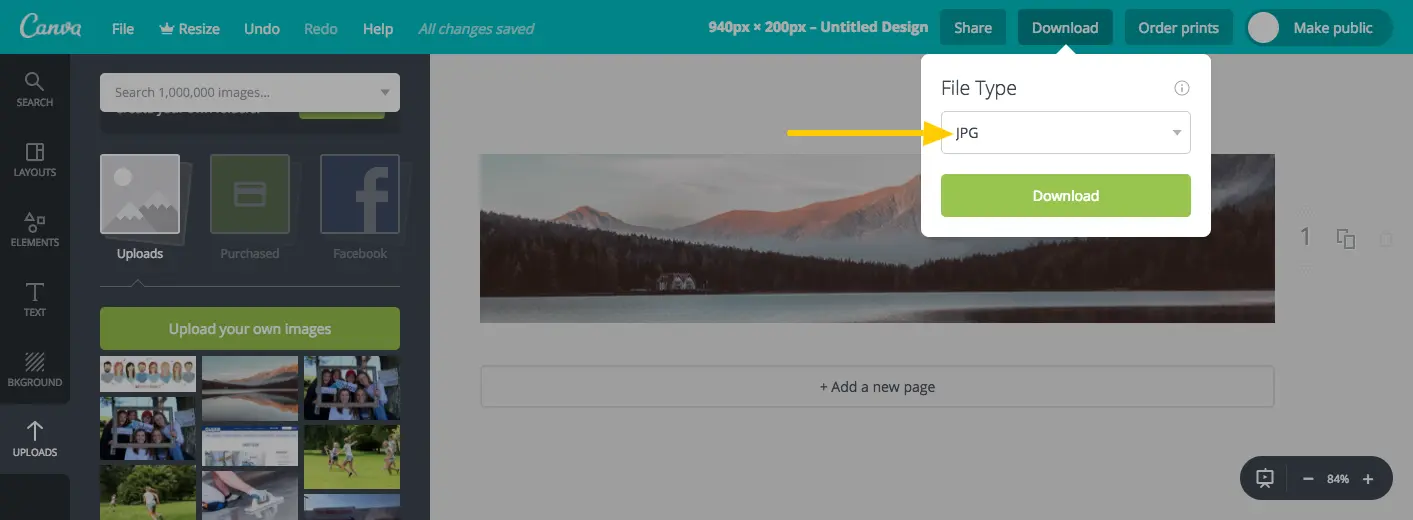
- Export the photo as a JPG file. Now you’re ready to upload it to your website!
Bonus Tip for Photo Batches
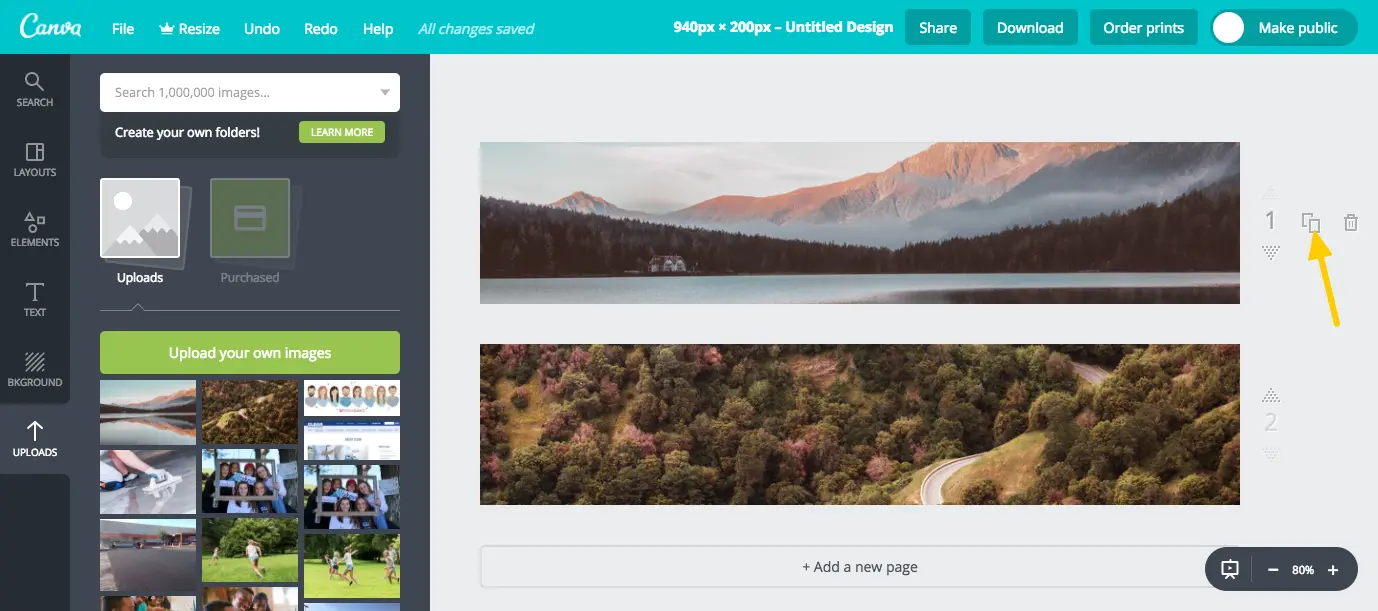
Do you need to create a bunch of images that are the same size, like header images for all of your pages? After you’ve made the first file, you can duplicate the file setup over and over without leaving the page. Click the icon shown below to add a new blank artspace with the same dimensions. Next, upload more photos and repeat the process outlined above. When you’re ready, you can save all of the images in one place without cluttering your account with repetitive files.
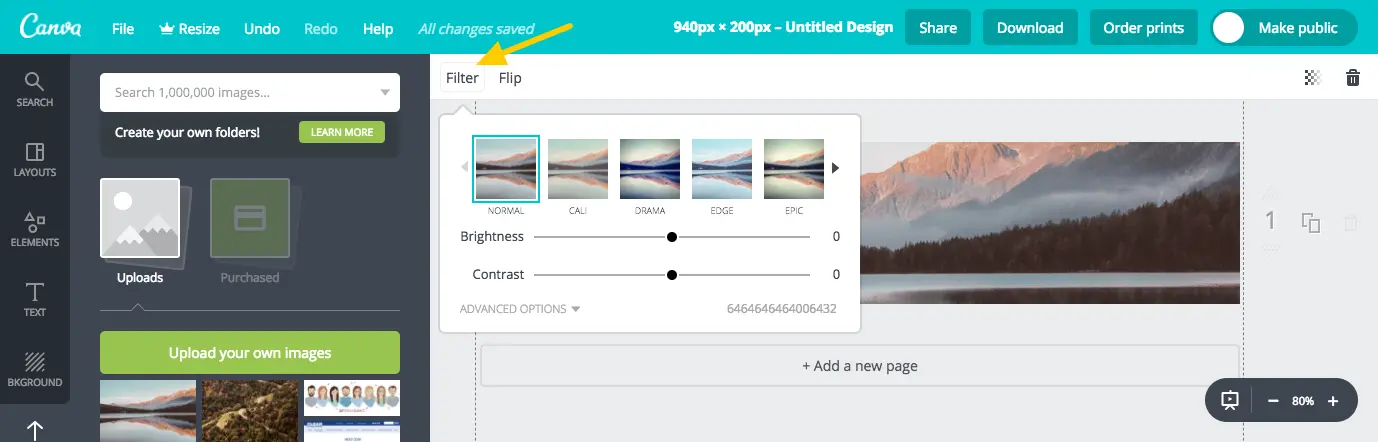
Additional Photo Editing Options
Once you’ve got your photo cropped how you’d like it, Canva offers a few additional editing options. You can select the photo within the artboard and apply photo filters, including adjusting the intensity. Advanced photo filter options allow you to make really detailed tweaks to existing filters, such as adjusting the brightness, contrast and tint of any given photo.
If a professional photographer has taken photos for your organization, we recommend that you not take any photo editing liberties. The photos are their artistic and intellectual property, and while you can display them proudly, you should not alter them without permission.
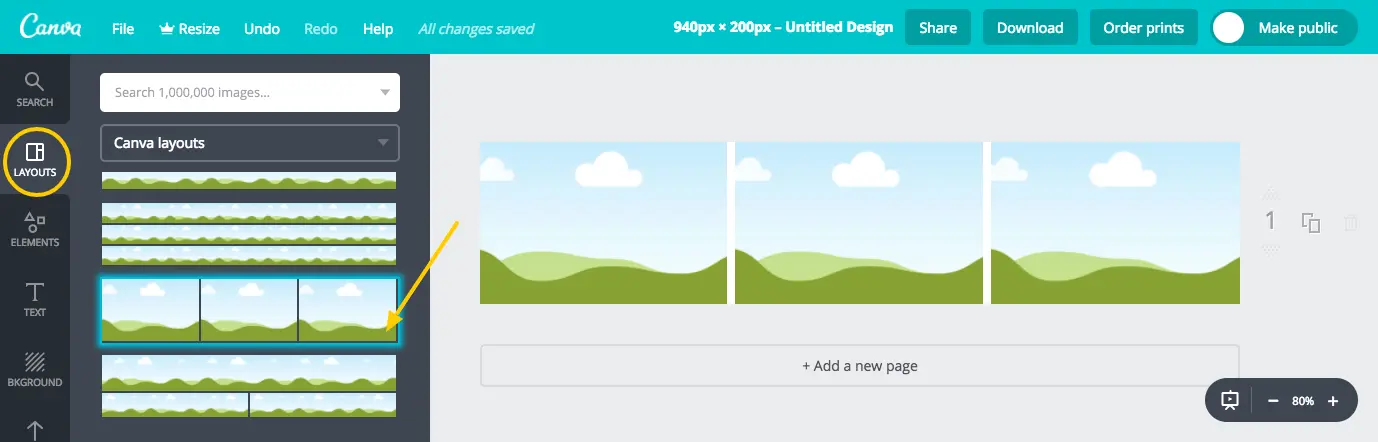
Create a Photo Collage
If you are working with small or low-resolution images, try not to stretch them to fit a larger artboard. This can distort the quality of the image leading to unclear, fuzzy images. If your original photo is too small to fill the artboard, you can create a photo collage to showcase a few different images without compromising photo quality.
- Create the appropriately sized artboard in Canva using the steps above.
- Go to the Layouts tab on the left side of the page and select the collage layout you like best.
- Upload the images you’d like to use.
- Click and drag each image you want to use into a section of the collage, and it will automatically fill the section with your photo.
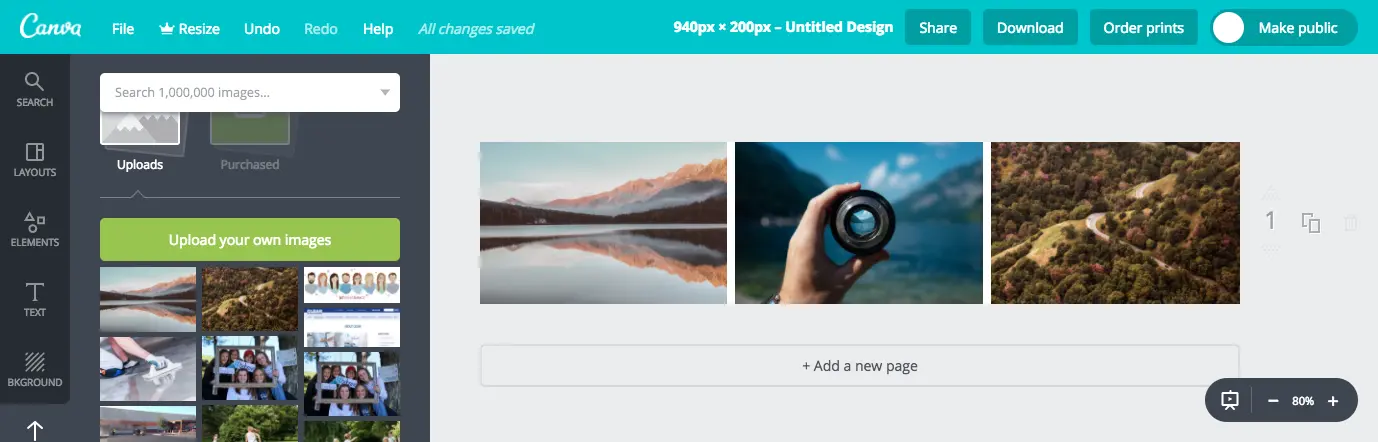
- Once you’ve arranged the photos to your liking, export the collage as a JPG file to upload to your website.
Before You Upload
Now that you’ve learned the basics of how to format photos, here are a few final uploading tips and suggestions for how to optimize images.
Image File Type
You’ll need to save your final image in one of two different file formats. If you’re cropping a photograph, save it out as a JPG. If you’re cropping something a little more graphic with mostly shapes, text or blocks of color, save it out as a PNG. Any image that requires a transparent background also needs to be saved as a PNG.
Naming Files
Don’t forget to put some effort into naming your photos. Come up with a name that uses one of your search engine-optimized keywords and/or describes the content of the photo. Do not upload your photo with a name like “IMG_123.” A photo that’s named well can increase the likelihood of someone finding your web page through search results.
File Size
Make sure your photo is sized appropriately for its use. If the location where your photo will live on your site is 600 pixels wide, there’s no reason to upload an image that is 5,000 pixels wide. While it’s great to have those nice large images for print or to allow you to crop in closely without losing image quality, a giant image will just slow your load time. Generally, each image on a web page should be less than 100KB in size.
Get Cropping!
Now that you know how to format photos using a simple tool, we hope your site will reap the rewards. Do you already crop or size your photos down before uploading them to your website? Let us know what questions you have and if you recommend any additional free software options in the comments below.
Comments