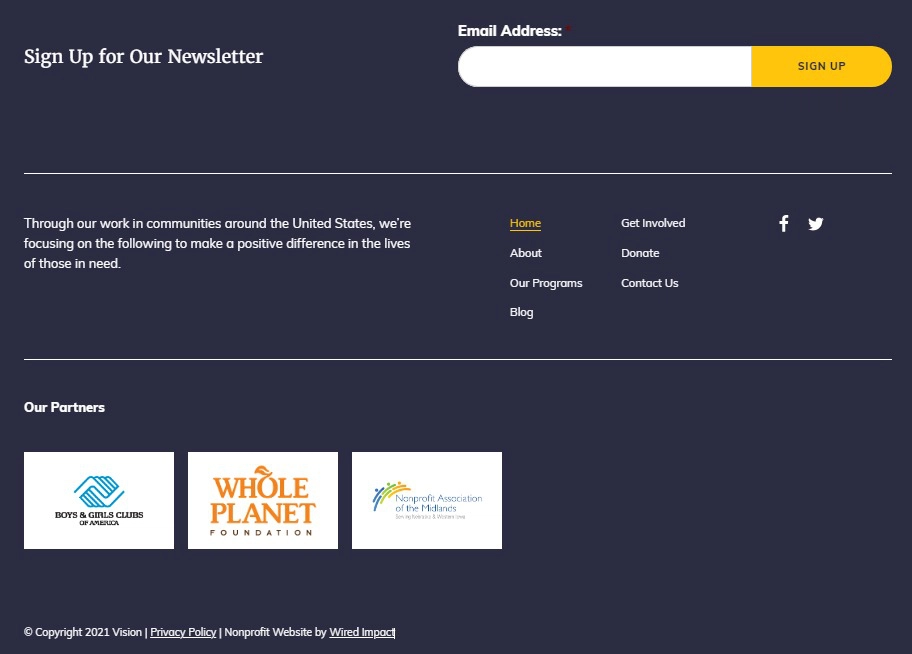
Vision has a robust footer broken up into three core sections: an optional newsletter signup, an “about” area for your mission, navigation and social media icons, and a final logos section. Unfortunately, you won’t be able to add additional sections or widgets to the Vision footer. Below is a screenshot of what the Vision footer looks like.
Not your theme? Check out how to adjust the website footer for a different theme in this support article.
Edit the Footer
- Make sure you’re logged in to the back end of your website.
- Hover over the Appearance section of the admin menu on the left, and click “Customize”.
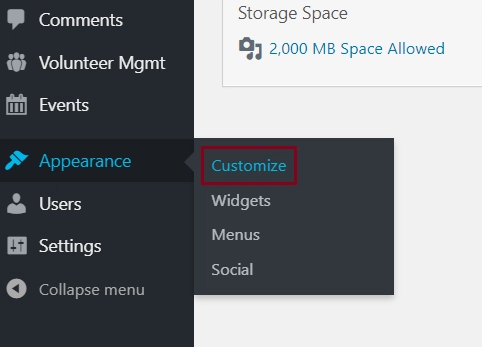
- Once you’re in the Customizer, click on the “Footer Settings” option on the left side of the page to update the footer content.
Update the content in the footer
- If you choose to show the Newsletter Sign Up Section, you can adjust the Callout Title. This is the text that appears to the left of the form. Make sure your signup form is connected to the proper form in Gravity Forms, each of which contain a number. You’ll be able to see all of your active forms, along with each corresponding form number, in the “Forms” section of your website.
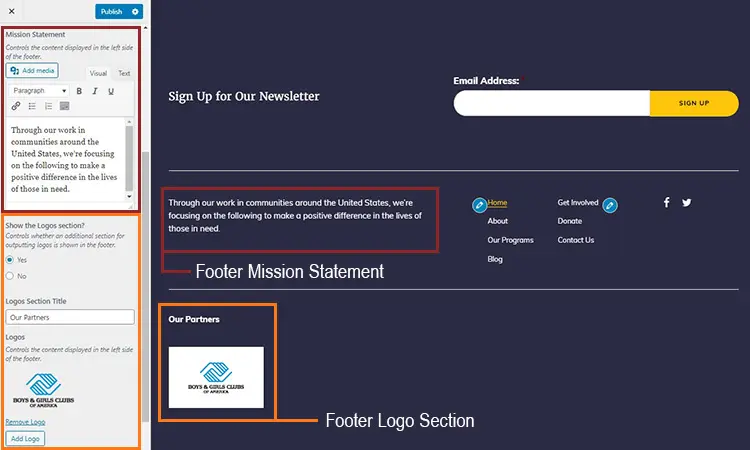
- In the Mission Statement Section, you can add in text describing your organization as well as offer contact information. As you make adjustments, you’ll be able to see the updates reflected in the website preview to the right.
- The list of pages shown in the footer is automatically pulled in from your primary navigation and secondary navigation.
- Want to change the social media information? Learn how to update the social media links in this support article.
- If you choose to show the Logos Section, you have the option to add a Logo Section Title that displays before the images. For example, you could write “Our Partners” or “Sponsored By”.
- Click the “Add Logo” button to add one or more images by uploading them to the website or selecting existing images from your library. To remove a logo, simply click the “Remove Logo” link directly below the image in the sidebar menu.
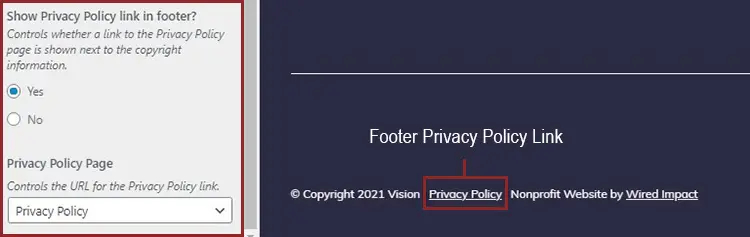
- You can choose to show the Privacy Policy link in the footer. Note: If you’re gathering people’s information in any way, we recommend you write and link to a Privacy Policy Page.
- Use the dropdown to find and select your Privacy Policy page to be sure the link that appears in the footer goes to the correct page on your site.
Once you’re happy with the footer content, be sure to click the blue “Publish” button at the top of the Customizer sidebar.
Still Have Questions?
The quickest way to get support is to reach out to us within your website’s admin dashboard. Log into your website and then fill out the Request Help form. You’ll hear back from us within one business day.