You have the option to show or hide a sidebar on the right side of each page or post on your website. The contents of your sidebar can be changed at any time. You can also adjust the settings of each widget in your sidebar on a per page or per post basis, giving you a high level of control over sidebar content throughout your website.
Customizing your sidebar allows you to prominently feature calls-to-action that drive visitors to volunteer or donate. You can add text, links and image-based content in the sidebar, too. In this article, we’ll show you where to access your sidebar settings and how to change the sidebar to fit your nonprofit’s needs. No need to worry—it’s a drag and drop process!
Helpful Terminology
The sidebar is the area on the right side of a web page that houses additional information relevant to the main content, such as navigation to other pages in the same section of the site.
A widget is a small block of content you can add to your sidebar. For example, you can add custom content with a Text widget, Image widget or Recent Posts widget without needing to deal with complicated code.
Where Do I Change the Sidebar?
To access your website’s sidebar, log into your website. From the Dashboard, look in the admin menu on the left and find the Appearance menu item. Click Widgets.
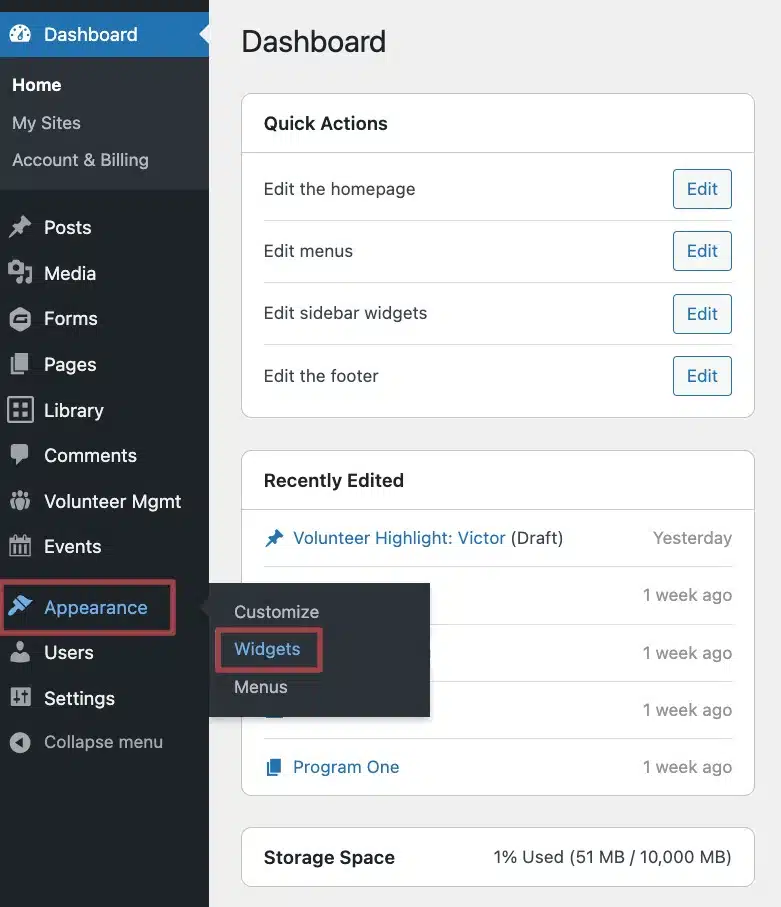
On the Widgets page, you’ll see a list of available widgets on the left and your active widgets on the right. Nonprofits using the Chroma or Airy design options will see footer and sidebar widgets on this page. If you can’t see the widgets already included in your Default sidebar, click on the word “Default” to expand the view.
About Default Sidebar Widgets
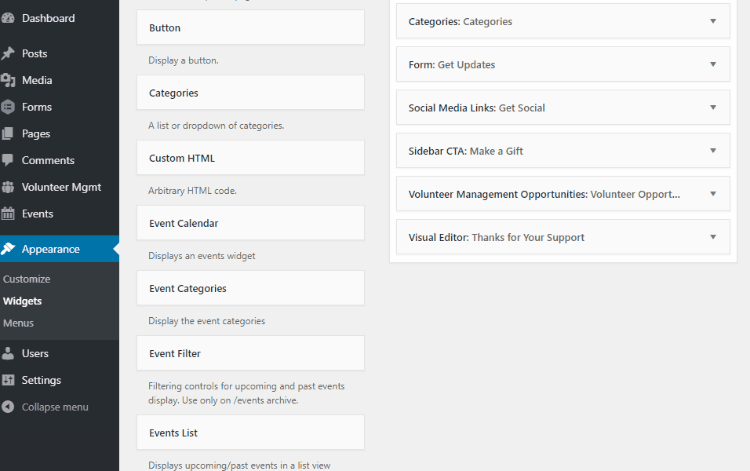
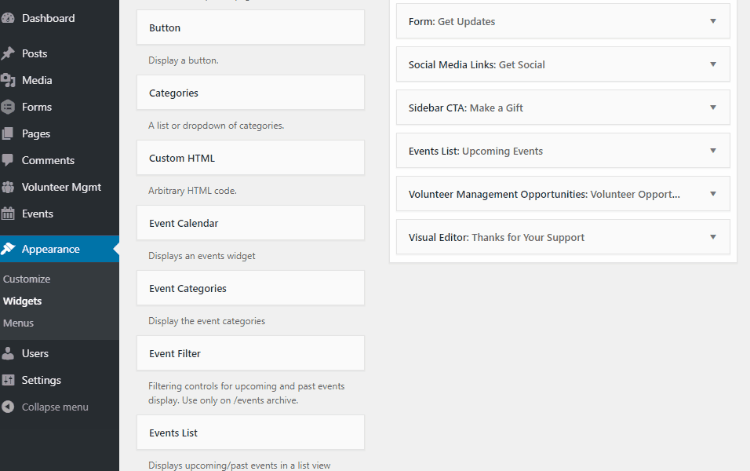
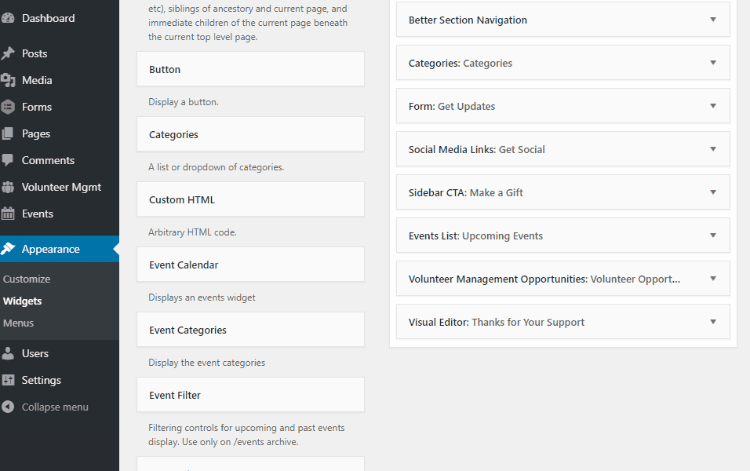
Each website may include the following widgets in your Default sidebar, depending on your design option and website plan:
- Button, which displays a brief call to action and links to a page on your site, like Events, Volunteer Opportunities or the Blog
- Better Section Navigation, which automatically lists and links to all of the pages in the related section of the website with possibility of including the parent, sibling and child pages
- Categories, which displays the categories of posts on your blog, if you’re using one
- Form, this will typically be your email sign-up form and include a title and the form description
- Social Media Links, which link to the social media accounts connected to your website
- Sidebar CTA, a text-based widget with a brief message and link or button to a page on your site, like the Donate page.
- Events List, which pulls in a list of events if you are using the built-in events system
- Volunteer Management Opportunities, which pulls in a list of volunteer opportunities if you are using the built-in volunteer management system
- Visual Editor, a text-based widget with a brief message, link and the option to include an image
Our team customizes these options for your nonprofit when we build the site to your specifications, but you have full control over your sidebar to make additional changes or updates over time.
Edit a Sidebar Widget
To change an existing widget in your sidebar, click on the widget’s name to expand and view its settings. When your edits are complete, click the blue Save button. You can collapse the widget settings by clicking Done.
Text formatting
The Visual Editor widget allows you to write and format text using simple formatting including heading styles, text alignment and weight options, as well as bulleted or numbered lists. You can also add links and media much like you would in a normal page. Remember that the sidebar is a narrow space. Try to keep your text short and concise.
Add Widget to the Sidebar
To add a new item to the sidebar, drag and drop it from the Available Widgets section into the Default sidebar. You can click and drag each widget to reorder as needed.
Alternatively, you can click on a widget in the Available Widgets section and select the Default sidebar to automatically add it to the bottom of the list in your sidebar. Click and drag the widget to reorder.
Widget options
In the list of available widgets, each one has a short description of its purpose or function. If you have questions about which widgets can best help or be adjusted to meet your needs, please reach out to our support team through the form in your website’s dashboard.
Adjust Widget Visibility
A widget can be visible or be hidden on specific pages of your choosing. For example, you don’t need a widget that promotes donations on the Donate page itself. Or, you might prefer to hide a call-to-action about volunteering on the page for a program that doesn’t accept volunteers.
To adjust visibility settings for a widget, click the widget’s name to expand it, then scroll to the bottom until you see the eye-shaped icon or the word “Visibility” in the bottom left of the widget settings. Here, you can choose to have the widget display on specific pages or, if it’s easier, select which pages it should be hidden from. Click the Save button when you’re done.
Remove Widget from the Sidebar
To delete a widget from the sidebar, click on the widget name in the sidebar to expand the settings. Click the Delete link to immediately remove it. You can always re-add any type of widget using the instructions above, but all of your previous settings and content will be lost.
If you’d rather hide a widget on the site for now rather than completely delete it, you can adjust its visibility in two different ways. The first option is to click and drag the widget to the Inactive Widgets section in the bottom left of the Widgets page.
The second option is to adjust the visibility settings of the widget itself. Choose “Show on checked pages” under the Hide/Show drop-down menu. Make sure that there are no checked boxes in the list in order to hide the widget across your entire site.
Still Have Questions?
The quickest way to get support is to reach out to us within your website’s admin dashboard. Log into your website and then fill out the Request Help form. You’ll hear back from us within one business day.