There may be instances where you need to share relevant files along with your support request. If you experience a bug or issue with your website, a screenshot can be helpful for us to see what you’re seeing and troubleshoot the problem. Other times, you may have a broader question and want to share a file or resource to help us understand your goals.
When that happens, the best way to provide additional files is to attach them directly to your request. In this article, we’ll go over methods and best practices for taking screenshots, as well as how to attach files to your support request.
Jump Ahead To
How to Grab Screenshots
Keyboard Shortcuts
One of the easiest ways to take a screenshot is to use a keyboard shortcut. These shortcuts vary depending on the operating system you are using.
Windows
On a Windows PC, you can use the following keyboard shortcuts to take a screenshot:
- To capture the entire screen: Press the Windows logo key + Print Screen key (also known as the “PrtScn” key). The screenshot will be saved to the “Screenshots” folder within your Pictures folder.
- Another option is to just press the Print Screen key. The screenshot will be copied to your clipboard. To save it, you can paste it into an image editor like Paint.
- To capture a portion of the screen: Press Windows logo key + Shift + S. You can make a rectangle to select the portion of the screen you want to capture. The screenshot will be copied to your clipboard. Windows will pop up a notification with the preview at the bottom-right corner of the screen, which you can click to save the image.
macOS
On a Mac, you can use the following keyboard shortcuts to take a screenshot:
- To capture the entire screen: Press Command key + Shift + 3
- To capture a specific area of the screen: Press Command key + Shift + 4
- The screenshot will be saved as a PNG file on your desktop.
Built-In Tools
On Windows, you can use the Snipping Tool to capture a specific area of the screen. To use it, follow these steps:
- Open the Snipping Tool by searching for it in the Start menu or by typing “snipping tool” into the search bar.
- Click the “New” button to begin a new screenshot.
- Use the cursor to select the area of the screen you want to capture.
- The screenshot will be saved to the “Screenshots” folder within your Pictures folder.
Third-Party Software
There are also many third-party software programs that can help you take screenshots on your computer. Some popular options include:
- Snagit (Windows & macOS): This software offers a variety of options for capturing screenshots, including the ability to capture scrolling windows and capture video.
- Greenshot (Windows): This open-source tool allows you to capture specific areas of the screen, annotate and highlight the screenshot, and save it in a variety of formats.
- Lightshot (Windows & macOS): This lightweight tool allows you to quickly capture and share screenshots with others.
Tips to Take Good Screenshots
- Include any error messages. If the issue you’re experiencing is accompanied by an error message, include a screenshot of it when you reach out to us.
- Make sure the screenshot is clear and easy to read. Avoid situations where the screenshot is so small or low resolution that it becomes difficult to read.
- Use annotation and highlighting tools. If you need to draw attention to a specific area of the screenshot, use annotation and highlighting tools to mark it. Most of the tools above provide features to edit the screenshot.
How to Send Files With Your Request
- Go to the “Request Help” form in the Dashboard of your website
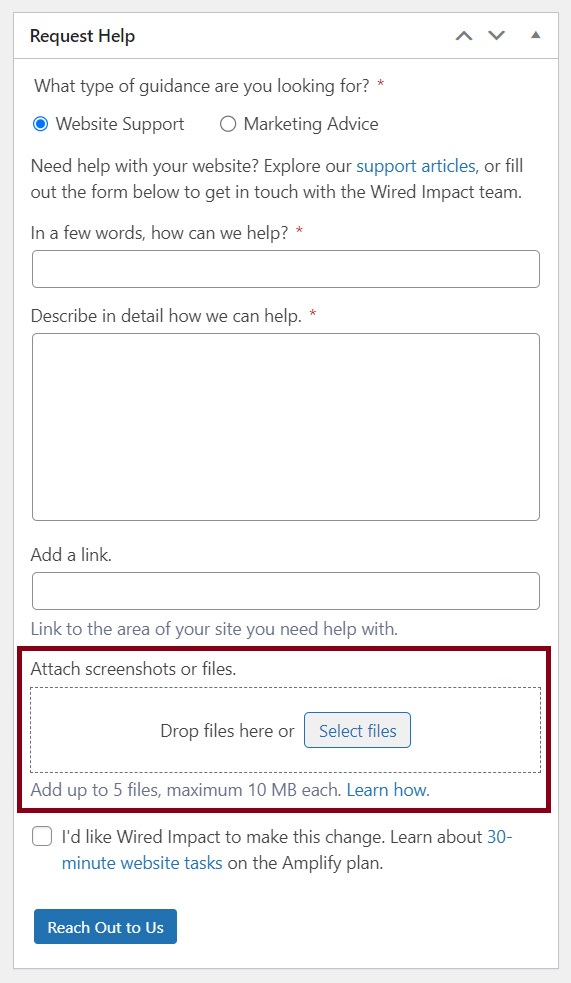
- Add all the details you can about the issue you’re experiencing
- Drag and drop the file(s) you want to share inside the dotted rectangle, or click the “Select files” button to add them
- Click on the blue “Reach Out to Us” button
Still Have Questions?
The quickest way to get support is to reach out to us within your website’s admin dashboard. Log into your website and then fill out the Request Help form. You’ll hear back from us within one business day.