Website links serve a critical role on the internet. They allow your website’s visitors to easily move from one webpage to another, simply by clicking on a link. This allows you to structure your website in a way that’s much easier to understand. Visitors can move around your website quickly and view only the content they may find helpful.
Most of the time we take links for granted. A visitor clicks a link and it takes them exactly where they want to go. But that’s not always how it works. If you’re not careful links can break entirely, sending visitors to pages with errors, which causes confusion and erodes their trust.
You can avoid situations where broken links exist by checking your website regularly. We recommend checking for broken links at least one per month, as well as before and after you launch a new website. The process outlined below shows you how to check your website using a third-party tool, so you’re not going through your website page by page.
Helpful Terminology
- A broken link takes visitors to a location where a page no longer exists. When this happens, visitors typically see a message that says something like, “Page Not Found”.
- When a visitor clicks a broken link, this causes a 404 “Page Not Found” error, which can negatively impact your search engine rankings.
Starting a Broken Link Check Using Dr. Link Check
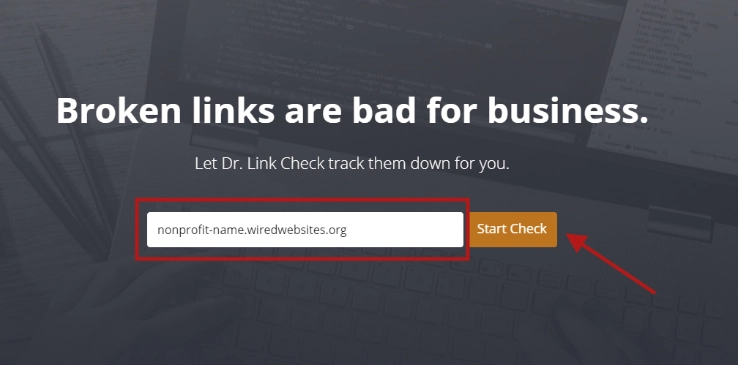
- Head over to Dr. Link Check.
- Enter your website URL (https://nonprofit-name.wiredwebsites.org) in the “Your Website URL” field and click the “Start Check” button.
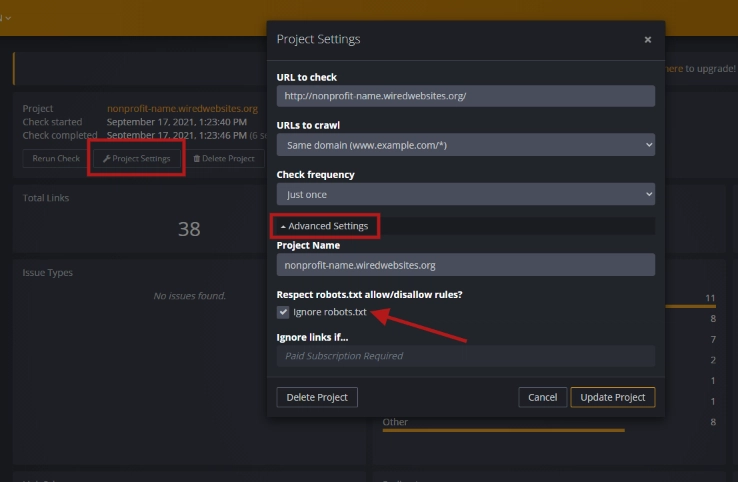
- If your site isn’t live yet, you’ll need to enable the “Ignore robots.txt” setting. In Dr. Link Check, click the “Project Settings” button, then click “Advanced Settings”, check the “Ignore robots.txt” checkbox, and click the “Update Project” button.
- After the Project Settings are updated, you’ll want to rerun the link check by clicking the “Rerun Check” button.
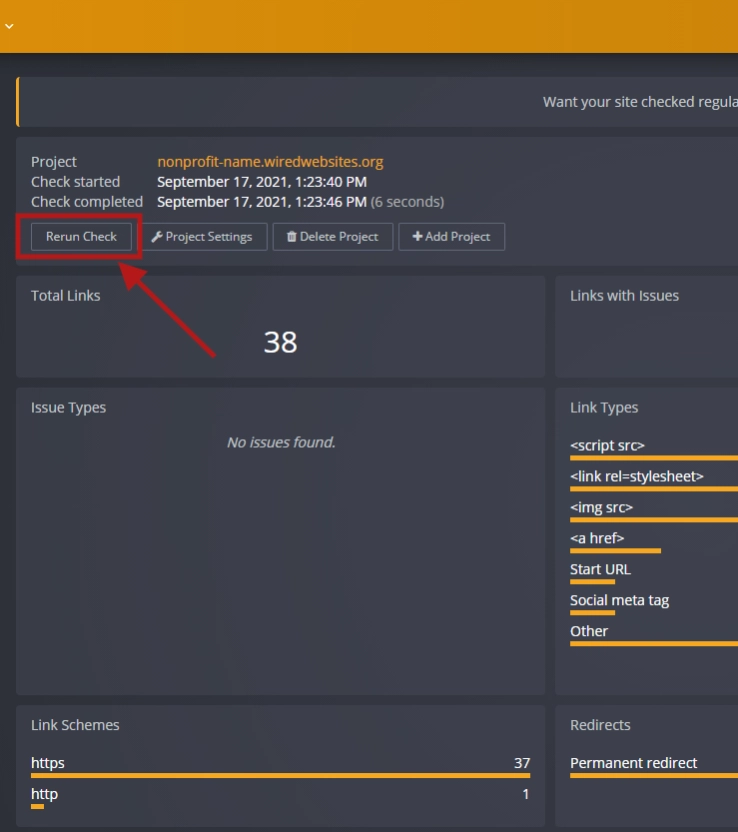
- The link check can take awhile to run. We suggest you leave it running while you work on other things.
It’s important to note that the free version of Dr. Link Check, called their Lite plan, will only check a maximum of 1,500 links on your website. If your site contains more than 1,500 links, you’ll need to upgrade to a paid plan to check all the links on your website.
Reading the Results of the Link Check
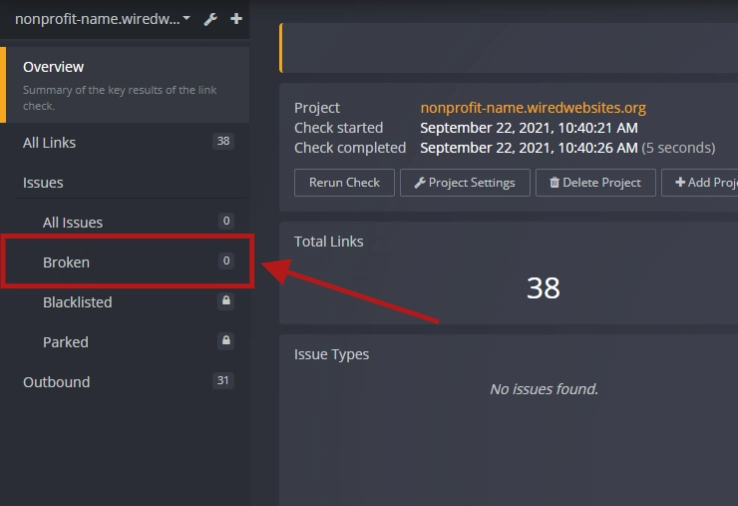
Once the link check has finished running, you can view the report to see if there are any links with issues.
- In Dr. Link Check, under the “Issues” section of the left menu click the “Broken” item. You’ll be taken to a page where you can see a list of every discovered broken link.
- The “Result” column displays the result of the link when it was checked. For broken links, this will usually show “404 Not Found”.
- The “URL” column shows:
- The URL of the link that was checked.
- The pages that the link can be found on. These are the URLs that show after “Linked from:”.
Now that you have a list of the broken links on your website, and where they’re used, you can work through fixing them.
Fixing Broken Links
There are a few different ways to fix broken links. You can update the link so it goes to a working page, you can remove the link entirely, or you can add a redirect so the URL of the broken link takes users to a working page.
Replace the Broken Link With a Working Link
- Log in to your website.
- Go to the page the broken link is on.
- To update the link so it goes to a working page, edit the page, find the broken link, then update it to use a new, working link. Whenever possible, this is the best approach to fixing a broken link.
- Make sure you fix the broken link on every page it exists on.
Remove a Broken Link
- To remove the link entirely, edit the page, find the broken link, then remove the link from the text.

- Make sure you fix the broken link on every page it exists on.
Add a Redirect for a Broken Link
- To add a redirect for the broken URL, follow the steps in our Create and Manage Redirects or Vanity URLs support article.
Fix a Broken Image Link
It’s also possible that the broken link is from an image that’s no longer displaying. If the broken link ends in jpg, png, webp or gif, follow these steps:
- Log in to your website and go to the page that the broken image is on.
- Edit the page and replace the broken image with a new one.
- Make sure you fix the broken image on every page it exists on.
Alternatively, if you no longer want to display an image where the broken image was added, simply remove the Image block.
After you’ve worked through fixing all of the broken links, we’d recommend running the check again to make sure everything is fixed.
Ensuring No Links Point to Your Existing Live Website
If you’re building a website to replace your existing one, you need to avoid linking your new website to your existing one. Otherwise, on launch day, those links will break when the pages on your old website are no longer available to the public.
If you used Dr. Link Check as outlined in the Starting a Broken Link Check Using Dr. Link Check step, finding these links is easy:
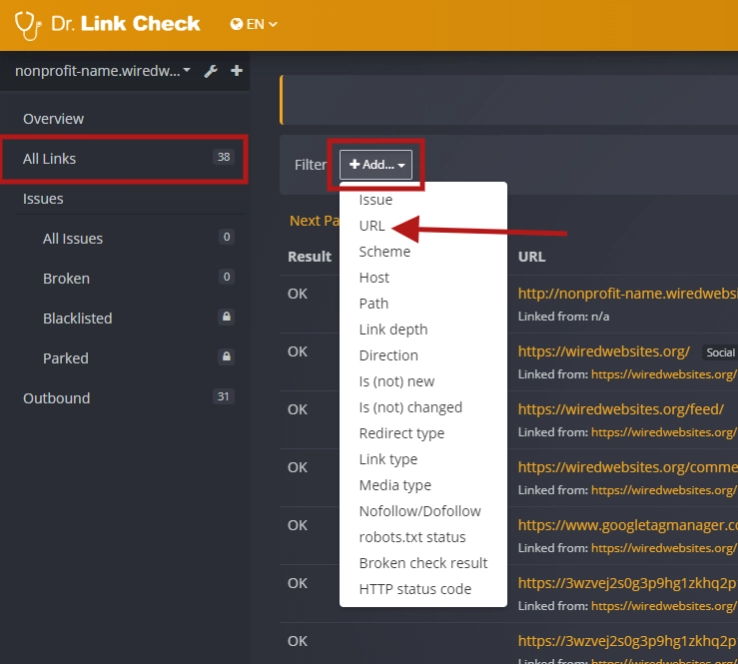
- After your report finishes running, click the “All Links” item in the left menu.
- Click the “+Add” button to add a filter.
- Select “URL” from the dropdown menu.
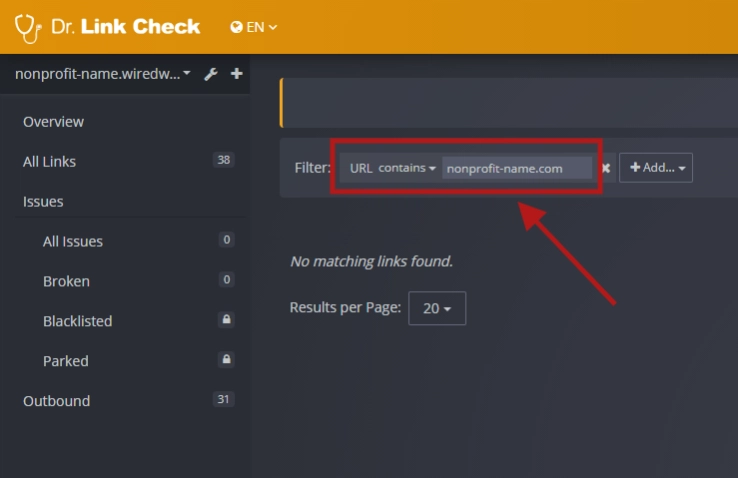
- Ensure the filter says “URL contains” and paste in the URL for your current, live website and hit Enter.
- When pasting in the URL for your current, live website, only include the domain. For example, “nonprofit.org” instead of “https://www.nonprofit.org”.
- NOTE:The URL you enter should not contain “wiredwebsites.org”.
If you found any links that are pointing to your existing live website, you’ll want to be sure to adjust those links by either replacing them or removing them entirely.
Still Have Questions?
The quickest way to get support is to reach out to us within your website’s admin dashboard. Log into your website and then fill out the Request Help form. You’ll hear back from us within one business day.