Are you using Salesforce to compile data on your donors, volunteers or others in your community? Use the steps below to connect your form with Salesforce so you don’t have to manually add information each time a visitor submits your form. Instead, when a visitor completes the form their submission information will be added to Salesforce automatically.
FEATURE AVAILABILITY
The Form Builder is available for Grow and Amplify plan websites. Change your plan in the Account & Billing section of your website Dashboard.
Helpful Terminology
- A feed on a form refers to that form’s connection with a third-party provider. For example, you would set up a feed to add a new donor to your Salesforce account automatically. Feeds are often processed each time a visitor submits your form.
- A field can relate to either your website form, or to the way data is stored in Salesforce. Your website form includes fields where visitors can enter data, such as entering their first and last name. A Salesforce field is used to store data about your community. When setting up a form feed, we need to outline how the data entered in your website’s form fields should be used to populate the fields within Salesforce.
- An opt-in condition is used to determine the criteria in which a form’s feed is processed. For example, on your donation form you may allow submitters to make a one-time or monthly donation. For the submitted data to be entered into Salesforce differently based on the donation frequency, you might need two feeds with opt-in conditions that determine which one is processed.
- A Salesforce object refers to the specific type of data you want to store. Salesforce offers certain objects by default like the “Contact” object, but custom objects like “Recurring Donations” can also exist.
Set Up a Salesforce Feed
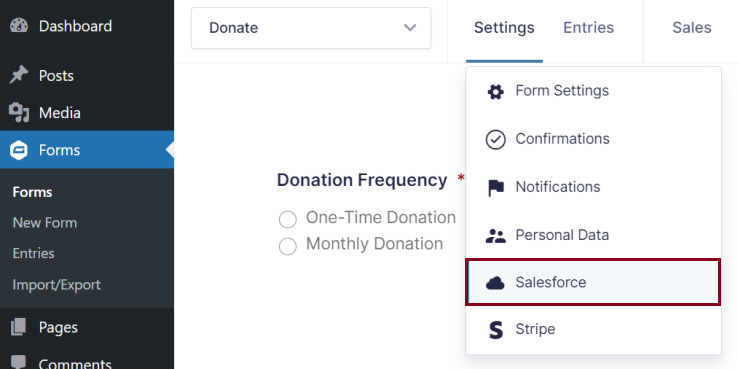
- While editing your form, hover over the Settings menu and click Salesforce in the dropdown.
- Click the Add New button to create a new feed.
- Enter a Feed Name for the feed. You can set this name to something generic such as “Salesforce Feed”, or if you end up having multiple feeds that only run under specific circumstances, we’d recommend naming it something more descriptive. For example, you might have one feed that runs only when one-time donations are made and another when monthly recurring donations are made. In that case, you may want to name the feeds “One-Time Donation” and “Monthly Donation” to make things more clear. The feed names are only used to help you understand the purpose of each feed.
- Choose the Salesforce Account where you want to pass submitted form information. In most cases you’ll only have one connected Salesforce account, so you can simply choose that one.
- Select the Salesforce Object within your account that you want to create or update when this feed is triggered. This can be any object that exists in Salesforce, but some common ones would be “Account”, “Contact”, “Opportunity” and “Recurring Donation”.
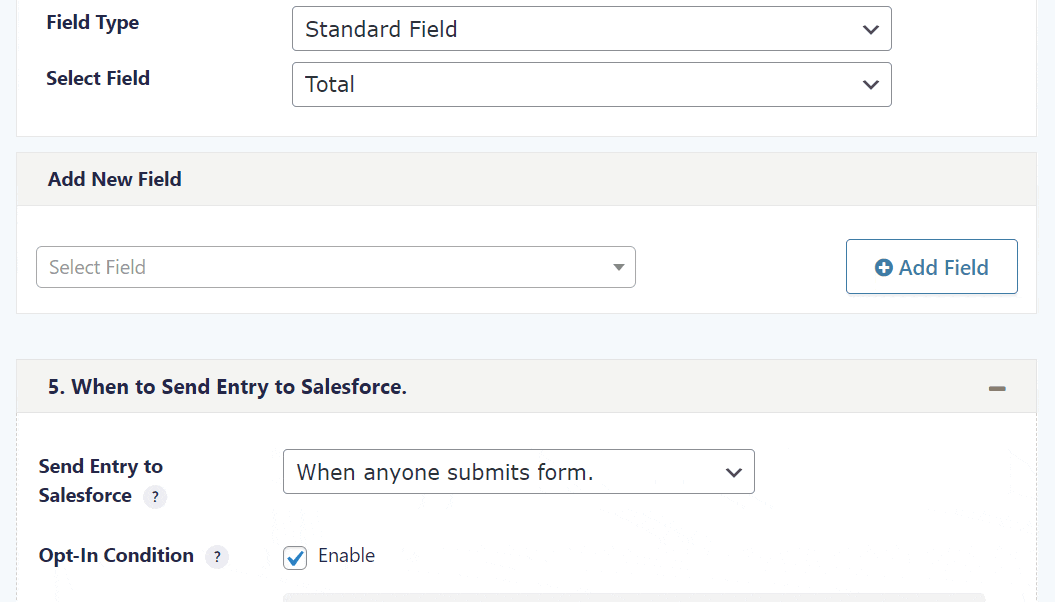
- After you choose the correct object, you’ll see the required Salesforce fields appear. For any additional fields you want to populate in Salesforce, use the Add New Field dropdown to include other fields as well. Select the field you want to include from the dropdown, then click the Add Field button. And don’t worry, you can always use the trash can icon to remove a Salesforce field if you decide you don’t want to include it later. If you notice a Salesforce field missing that you’d like to add, click the Refresh Fields button within the Salesforce Object field above. This refresh process is usually necessary when you’ve made changes to the fields that exist inside your Salesforce account. Your website stores the Salesforce fields for improved speed, so once you’ve made updates, the list of fields stored needs to be refreshed.
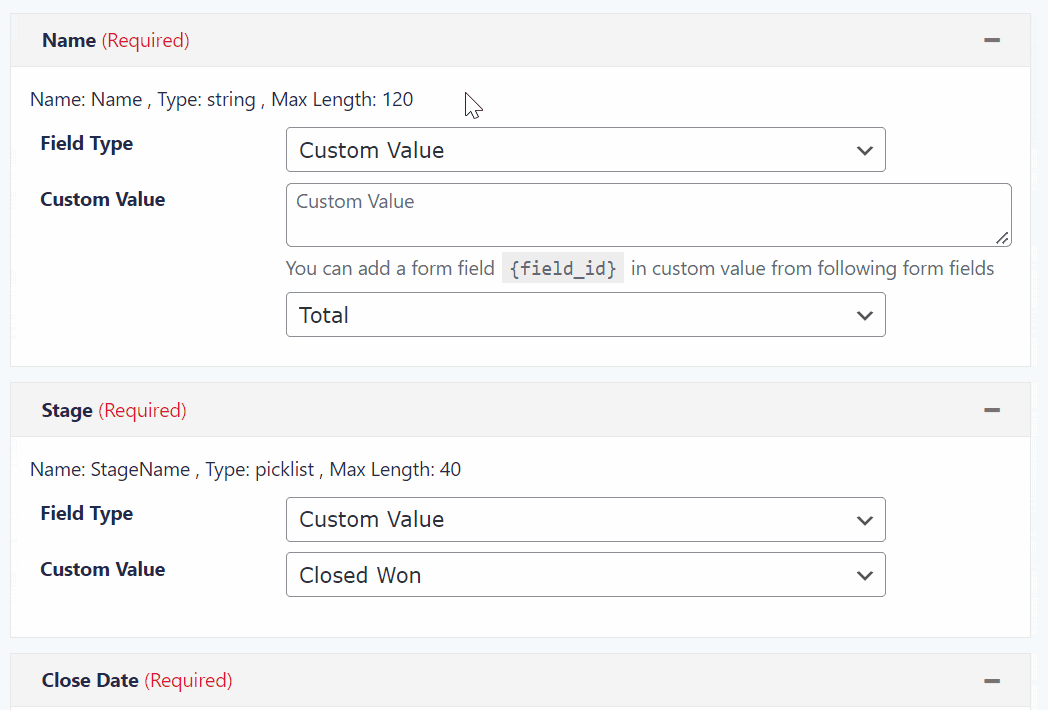
- Once you have all the necessary Salesforce fields, you need to map the fields from your website’s form to the corresponding ones in Salesforce. For each field start by choosing the Field Type:
- The Standard Field option typically signifies you’d like to pass the information to Salesforce exactly as it’s submitted on the form. For example, if you have a “Last Name” field on your form, you would pass whatever is entered there directly into the Salesforce “Last Name” field.
- The Standard Field option is also how you choose to populate a Salesforce field with an object created in another feed. For example, you may want to associate the Salesforce contact object created for a new donor with the opportunity object generated to store the donation itself. To do this, scroll to the bottom of the dropdown and within the “ID from other Feeds” section, choose the object you’d like. If you don’t see the object you want, go back to the list of every Salesforce feed and drag the feeds so the object you need is created prior to the feed you’re working on. The feeds will run from top to bottom in the list.
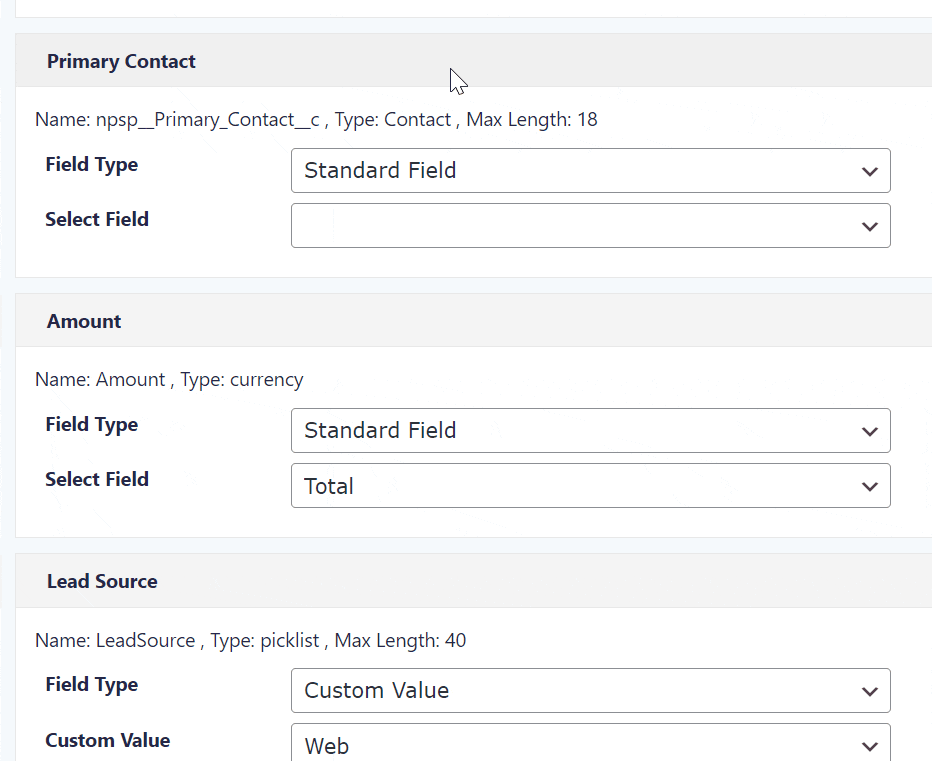
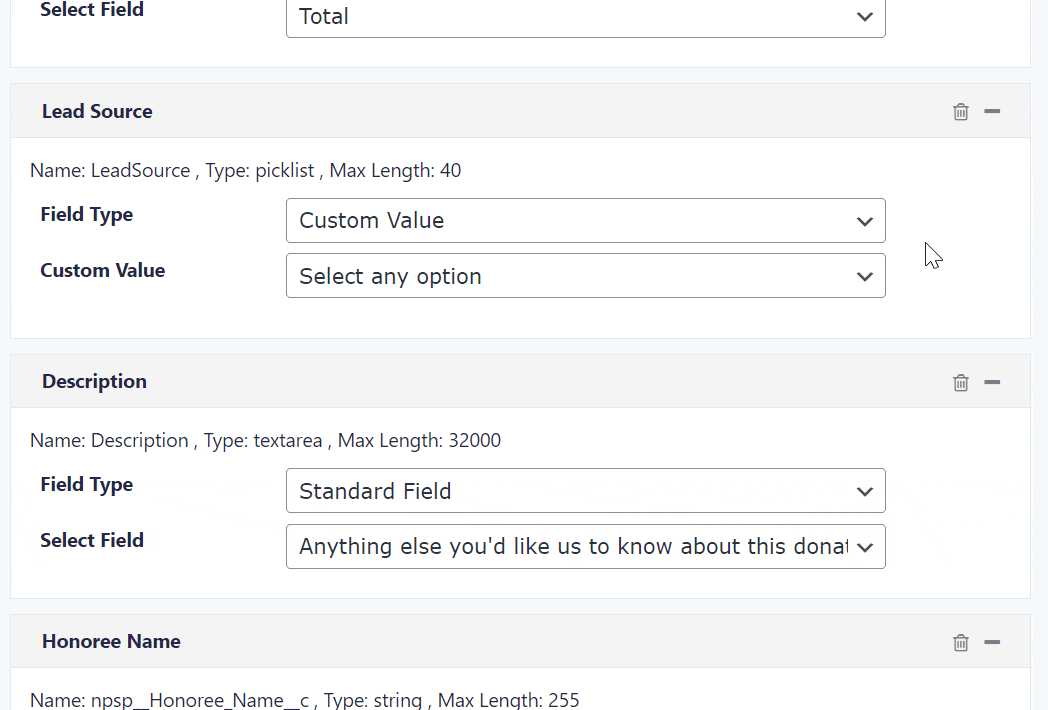
- By selecting Custom Value you’ll be prompted in one of two ways. The first is to choose from a fixed list of options that already exist in Salesforce. For example, let’s say you have a Salesforce field called “Source” that has the options “Event”, “Phone”, “Web”, etc. By selecting Custom Value, you can choose the “Web” option without having a corresponding field on your website’s form. Since that Salesforce field value should always be “Web”, there’s no need to include that field on your website’s form.
- The other potential way you’ll enter a Custom Value is by combining the data entered from multiple form fields into one. To do this, choose the field you want to use from the new dropdown and the field ID will be added to the text box automatically. You can also edit the text box directly to include something more custom. A good example here would be setting the name of a new Salesforce opportunity object. If we want each new opportunity to be named something like “First_Name Last_Name – $XX.XX” the text box may show something like “{7.3} {7.6} – ${13}” where the numbers refer to the form field IDs.
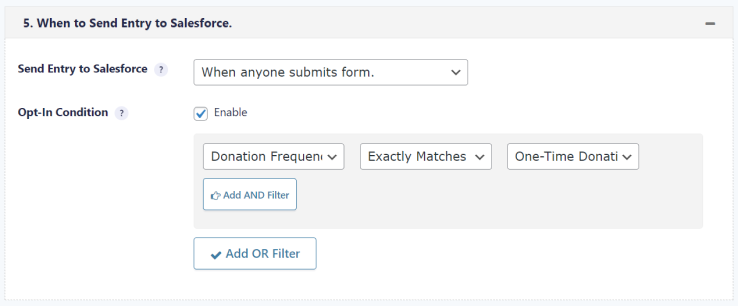
- For Send Entry to Salesforce you almost always want to select “When anyone submits form.” from the drop-down.
- If you’d like the feed to execute only under certain circumstances, check the box to enable an Opt-In Condition. These settings can also be modified to match fairly complex situations using the Add AND Filter and Add OR Filter buttons. The opt-in condition shown below causes the feed to execute only when the visitor chooses to make a one-time donation.
- The Select Primary key and Second Primary Key fields can be used to find and update an existing Salesforce record. For example, if you choose “Email” then the system will attempt to match the form’s submitted email address with an email that already exists in your Salesforce account. If it finds a match, it will update that record instead of creating a new one. Note that if you choose a primary key and a second primary key, the system will look for an existing record that matches either field, not both.
- Finally, you can enable and set up the Add Note, Assign Owner, Assign Account and Add as Campaign Member settings. These are normally left alone, but can be customized based on your needs.
- Review your settings and click the Save Feed button to save your feed.
- If you need to add another feed to the same form, start over and follow these steps again until all the necessary feeds are created. For example, you may want separate feeds to create contact, opportunity and recurring donation objects.
- Most importantly, please test your form including each feed to ensure they send information into Salesforce as expected.
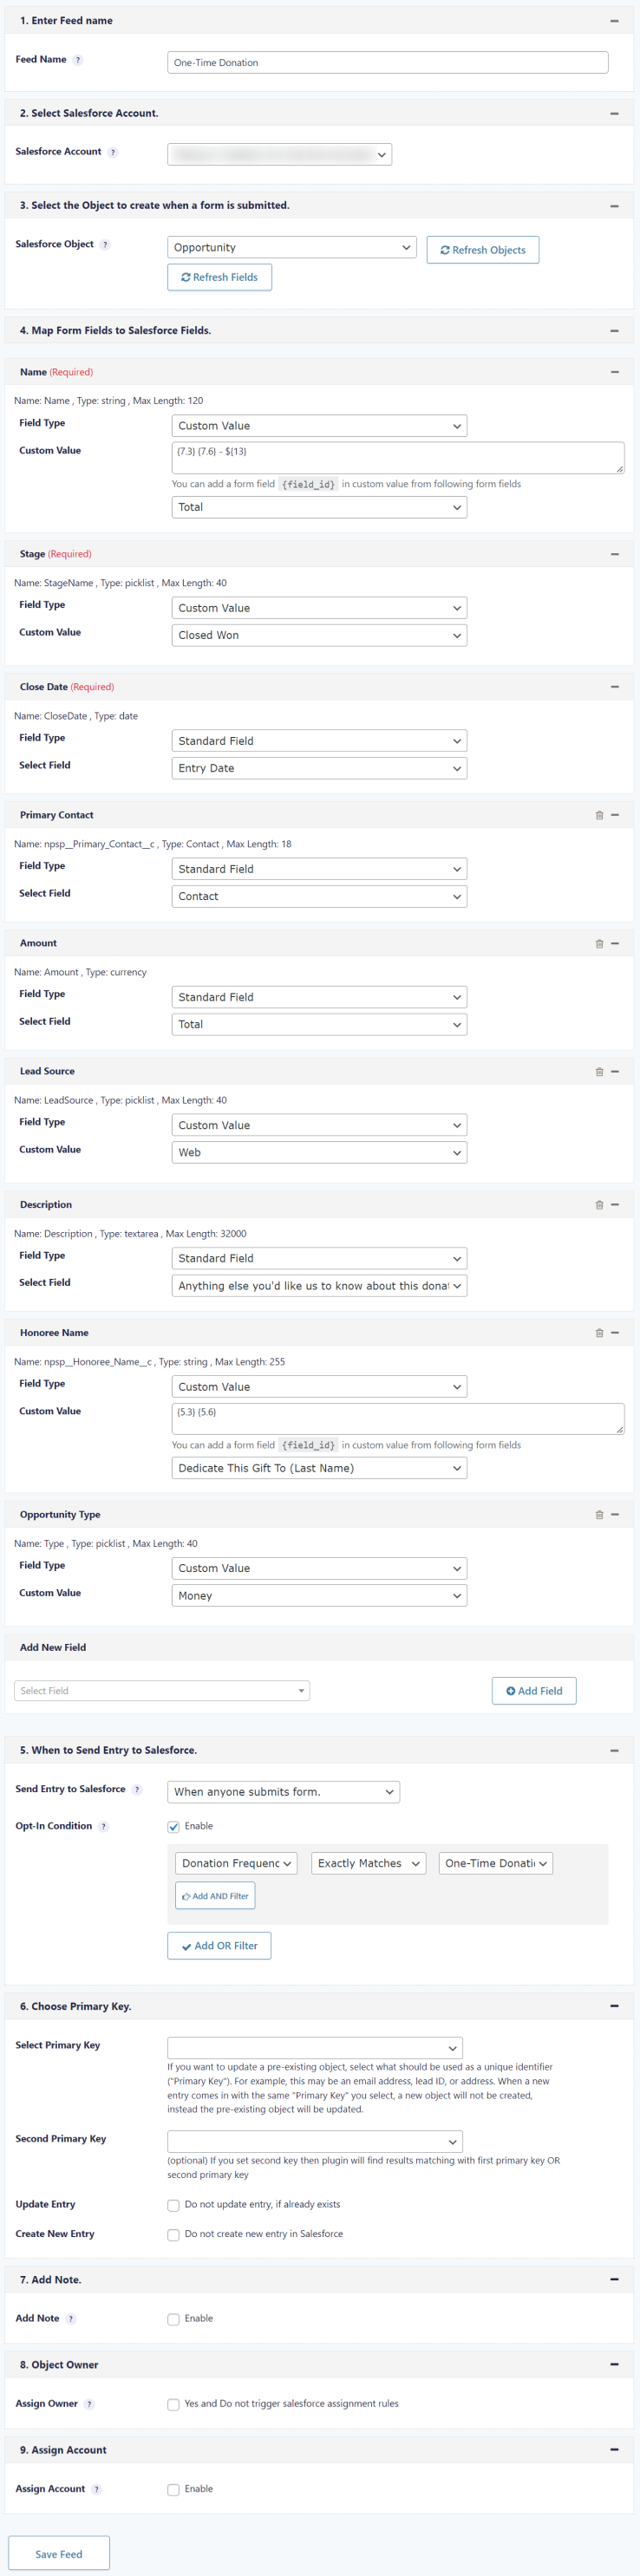
A Complete Salesforce Feed Example
For reference, we’ve included a screenshot below of a completed Salesforce feed. This feed creates a new Salesforce opportunity object for all one-time donations.
Still Have Questions?
The quickest way to get support is to reach out to us within your website’s admin dashboard. Log into your website and then fill out the Request Help form. You’ll hear back from us within one business day.