When you create a new page, make sure your visitors can find it by adding it to the primary and sidebar navigation.
In many cases, a new page will fit within an existing section of pages on your site. In this article, we’ll walk through how to manage pages within your navigation so your website stays organized and users can find what they need.
For more details on the role of your navigation and helpful best practices, see our guide on easy ways to improve your nonprofit website structure.
Helpful Terminology
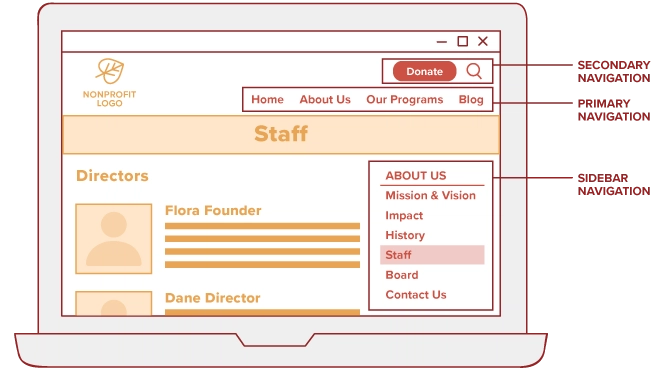
- The primary navigation is the main menu that helps visitors make their way around your website. Also called your main navigation, it’s made up of the pages that show along the top (or “header”) of your site.
- A parent page is usually a core page that represents a broader topic, with subpages nested underneath to provide more detailed information and help break your content into logical buckets.
- A subpage, sometimes referred to as a child page, is nested underneath a parent page in your website structure.
- The sidebar is an area of a page used to display information that’s not part of the main content. The sidebar is usually a column on the right side of the page.
Tips & Best Practices
- A page should only appear in one place in your navigation. Listing your page in multiple sections, like About Us and Our Programs, is confusing to visitors.
- Be sure to add links to your new page from other pages. This helps visitors naturally find the new page (and search engines like it, too). Learn about creating helpful links.
Setting a Parent Page
Parent pages keep your website structure organized by grouping related content together.
When you publish a new page, your website will automatically suggest a parent page based on the content of the page you’ve built.

- Review the parent page suggestion in the pre-publish sidebar.
- To change this suggestion, click the “Choose a parent page” field. This will open a list of existing, published pages on your website.
- Scroll or search to select a different page from the list if needed.
- If no parent page should be assigned, click the X to remove any parent page assignment.
Updating the Sidebar Navigation
Visibility of pages in your sidebar navigation is determined by parent page assignments. Ensuring your page has a parent allows visitors to see it listed in the sidebar navigation of every page within that section of your website.
New pages will appear at the bottom of the list in your sidebar navigation by default. You can manually adjust the order in which pages are shown at any time.
- Visit the “Pages” section of your website admin.
- Look for your new page. It will be listed in the same group as the parent page you set or approved when publishing.
- Drag and drop the page to order it the way you’d like among the other subpages.
This update to the order will be automatically saved. Now when you view the page, you’ll see it listed in the sidebar navigation in the order you set.
You can also create sidebar calls to action (CTAs) below the navigation on each page, which help users engage with related website content or take certain actions.
Show More Pages in the List
If your website has a lot of pages, you may need to adjust the number of pages visible onscreen before you can reorder them.
- Within the “Pages” section of your website admin, select the “Screen Options” tab in the upper right corner.
- Under Pagination, increase the number of items per page.
- Hit “Apply” to save this view. This will reload your list and make it easy to see a fuller list of pages.
Manage Pages in Your Primary Navigation
For a page to appear in your website’s main menu, it needs to be added to the primary navigation. This is what allows the page to be seen along the top of your site or in the drop-down menu.
You have the option to add new pages to your menu upon publishing. After your parent page has been set, just take the following steps:
- Look for the “Menu placement” setting below the parent page suggestion.
- Enable the “Show this page in your site’s primary menu” option. This will automatically place the page at the end of the list of subpages in this section of your menu.
- Select the “Live Preview” option if you’d like to see the page in your menu before publishing.
- Click the blue “Publish” button to save and publish your changes.
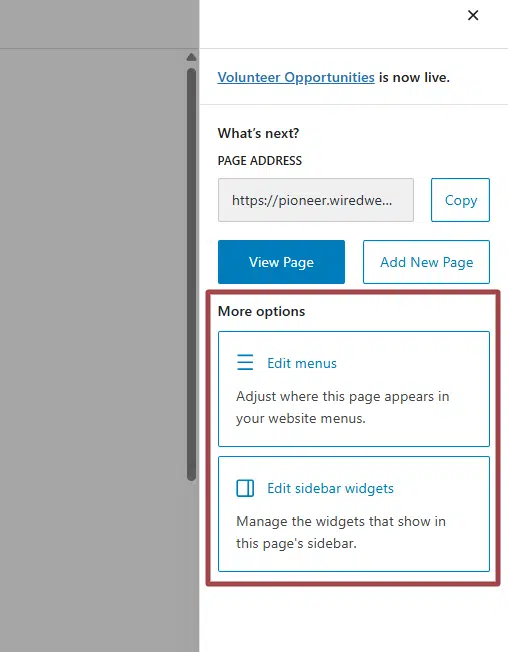
You’ll see a post-publish window with a variety of next steps once your page is live. From here, you can make further changes to your primary navigation or control the widgets that display in the sidebar of your new page.
Add, Reorder & Remove Pages in Your Menus
While the post-publish screen provides direct shortcuts, you can manage your menu at any time by taking the following steps.
- Make sure you’re logged into the back end of your website.
- In the admin menu on the left side of your screen, hover over “Appearance” and click “Customize”.
- Select “Menus” and choose the specific menu you’d like to adjust. This will show you a list of items in your chosen menu.
- Click the “Add Items” button at the end of the list to add a page to your menu. Select a page (or other post type) to add by clicking on it.
- Reorder pages by dragging and dropping into the desired placement.
- To remove an item from your menu, click the page to open additional details, then click the red “Remove” link.
- Adjust exactly how a page name appears in the menu — e.g. using shorter words, abbreviations or ampersands — by updating the page’s Navigation Label. This does not change the page name, only how it appears in the menu.
Once you’re finished making changes to the menu, be sure to click the blue “Publish” button to implement your edits on the live site.
Still Have Questions?
The quickest way to get support is to reach out to us within your website’s admin dashboard. Log into your website and then fill out the Request Help form. You’ll hear back from us within one business day.