Adding a Google Map to a page on your website can help people visualize the location of your nonprofit’s office, program or event in a way that’s interactive. There’s no limit to the number of maps you can use, and even better, there’s no cost!
We’ll show you how to create a simple Google Map of a single location and the process of embedding it within a page on your site. For more advanced needs, you can also learn how to create and add a map with multiple locations.
FEATURE AVAILABILITY
The ability to embed third-party code is only available for Grow and Amplify plan websites. Change your plan in the Account & Billing section of your website Dashboard.
Create a Google Map of a Single Location
The first step is to generate a map of the location, which doesn’t happen on your website. Visit the main Google Maps page and search for the address you’d like to show.
- Click the blue “Share” icon.
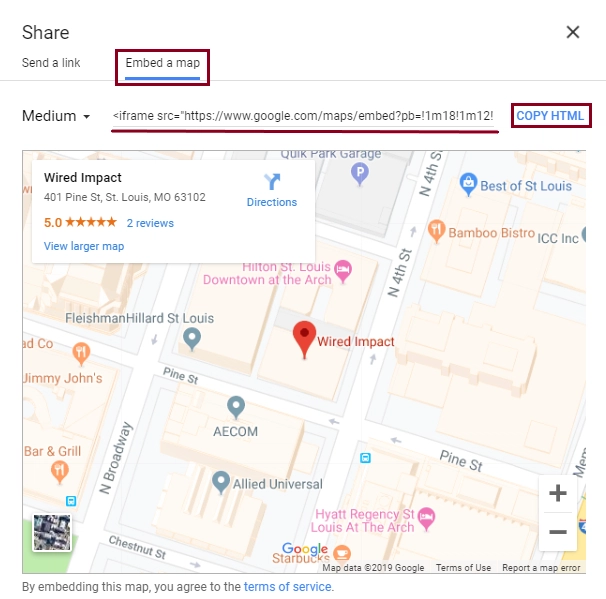
- A popup will appear. Click the “Embed a map” option at the top of the window. This will display some code that starts with <iframe scr= …>
- You can also choose a size for your map at this point, though the default Medium size works well in most cases.
- Click the “Copy HTML” link on the right side of the popup.
Add your map to a page
Once you’ve copied the HTML code for the Google map, you’ll paste this code into the page where you’d like the map to show up. Make sure you’re logged into your site and open up the editing view of the page first.
If you’re using the Full Width (no sidebar) page template, the map will automatically span the full width of the page unless you place it within a column.
- In the location where you want to add the map, add the Custom HTML block.
- Paste the code into the new block.
- Click Preview at the top of the block to see if the map displays properly.
Be sure to take it for a test run by moving the map around and making sure the location is correct for people who need directions.
If everything looks good, save your work or go ahead and publish or update the page with your new map.
Create a Google Map with Multiple Locations
If you have more than one location that you’d like to include in your Google map, the steps are slightly more advanced. Visit the Google My Maps page, sign in with your Google account, and click the “Get Started” button.
- In the top left, click the red “Create a New Map” button.
- Where it says “Untitled map” in the top left, click to customize the title and description.
- Now you can add places to your map, change what the base map looks like, and adjust the layers and icons.
- When your map is complete, click the three dots icon to the right of your map’s title and select “Embed on my site.” Copy the HTML code that appears and click OK.
Add your map to a page
Once you’ve copied the code for your map, you’ll embed it in a page on your website using the same steps outlined above.
For additional tips and instructions on editing a map with multiple locations, please visit Google’s My Maps support page.
Still Have Questions?
The quickest way to get support is to reach out to us within your website’s admin dashboard. Log into your website and then fill out the Request Help form. You’ll hear back from us within one business day.