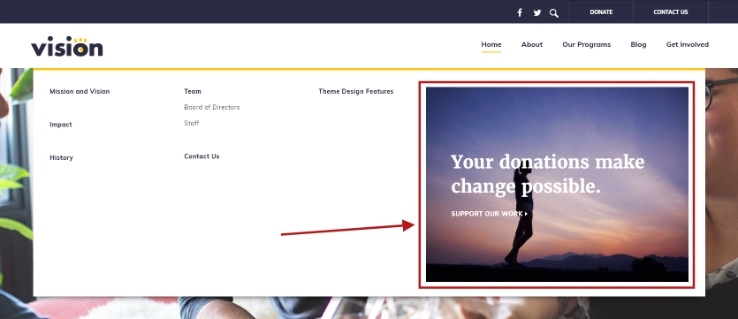
If your website uses our Vision theme, you can add a unique call to action (CTA) within your website’s primary navigation dropdown. The CTA serves as a great way to drive visitors to an important section or page on your site. For example, the CTA can link visitors to your Donate or Get Involved pages. You can see an example of how the CTA looks in the screenshot below.
Helpful Terminology
- The primary navigation is made up of the pages that show along the top (or “header”) of your website. It can also be called your main navigation.
- The primary navigation dropdown is the list of subpages that show below a parent page in the primary navigation, when that parent page is hovered over.
- A parent page is usually a core page that’s featured in your primary navigation. Your more descriptive and specific pages will usually be placed under a parent page to break your content into logical buckets.
- A subpage, sometimes referred to as a child page, is nested underneath a parent page in your website structure.
Access the Primary Navigation CTA Options
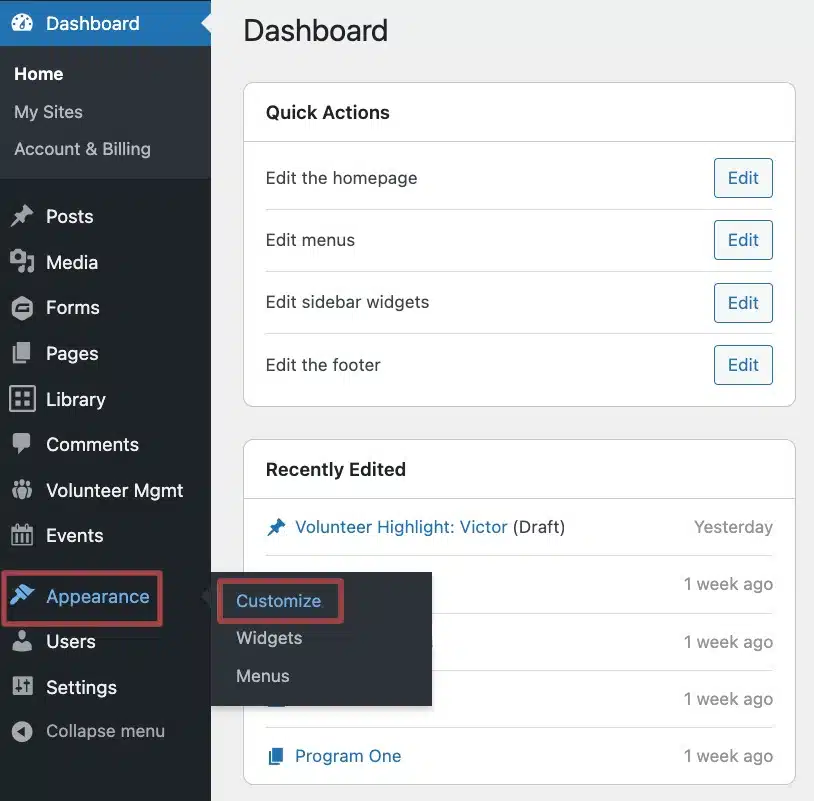
After logging into the back end of your website, hover over “Appearance” in the admin menu on the left side of your screen and click “Customize”.
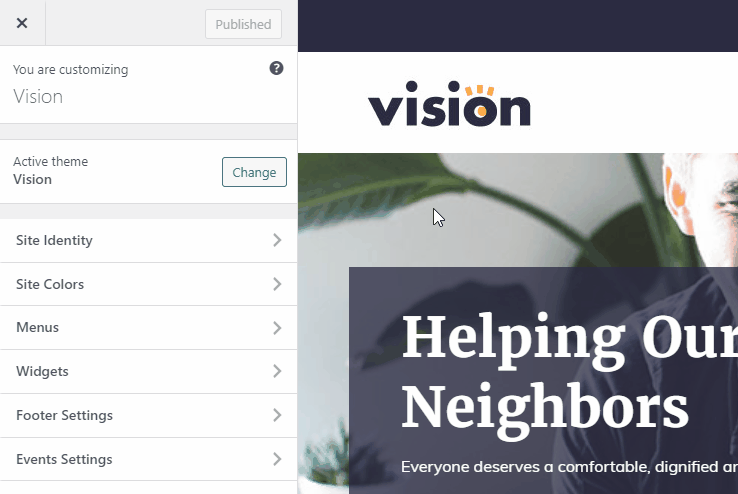
You’ll be taken to your website’s Customizer view. You should see a menu of settings on the left and a preview of your website on the right.
On the left, choose “Menus” and then “Menu Options”. The first setting should say “Show an image within the primary navigation dropdown?”.
Show or Hide the Primary Navigation CTA
- To show the CTA, set the “Show an image within the primary navigation dropdown?” option to “Yes”.
- To hide the CTA, set the “Show an image within the primary navigation dropdown?” option to “No”.
You can show or hide the CTA at any time, making it ideal for websites that only require the CTA to display occasionally.
Change the Primary Navigation CTA’s Content
The CTA’s content is highly customizable. When the CTA is set to show you can modify it using the following options:
- The Image option allows you to choose which image to show within the primary navigation dropdown. Make sure to use an image that’s 594 pixels wide by 441 pixels tall.
- The Image Text option lets you provide text to overlay on top of the image. You can think of this option as a CTA heading. Keep this text to one short sentence.
- The Image Text Color option allows you to control whether the image text color is light or dark. Choose light for darker images, and vice versa. This option will only have an effect when Image Text is provided.
- The Add a link to the image? option lets you control whether a text link will be overlayed on top of the image, beneath any Image Text you added above.
- Use the Link Text option to provide the text to use for the overlaid link. This option will only have an effect if you’ve chosen to add a link to the image.
- The Link URL option allows you to set which page on your website or externally to send visitors when they click the Link Text. This option will only have an effect if you’ve chosen to add a link to the image.
As you adjust these options you’ll be able to see the changes reflected in the preview on the right. Just hover over any of the primary navigation’s parent pages that have subpages, and your changes will appear.
To save and publish your changes on the live website, click the blue “Publish” button at the top of the page. To leave without saving your changes, click the “X” in the top left.
Still Have Questions?
The quickest way to get support is to reach out to us within your website’s admin dashboard. Log into your website and then fill out the Request Help form. You’ll hear back from us within one business day.