Adding a tab to your content can be a great way to add a visual element to your page. Not only do tabs allow you to organize your content in an interesting way, but they also allow visitors to switch back and forth from different information without leaving the page.
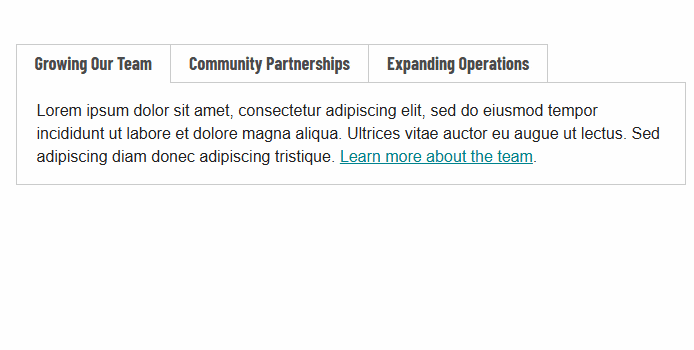
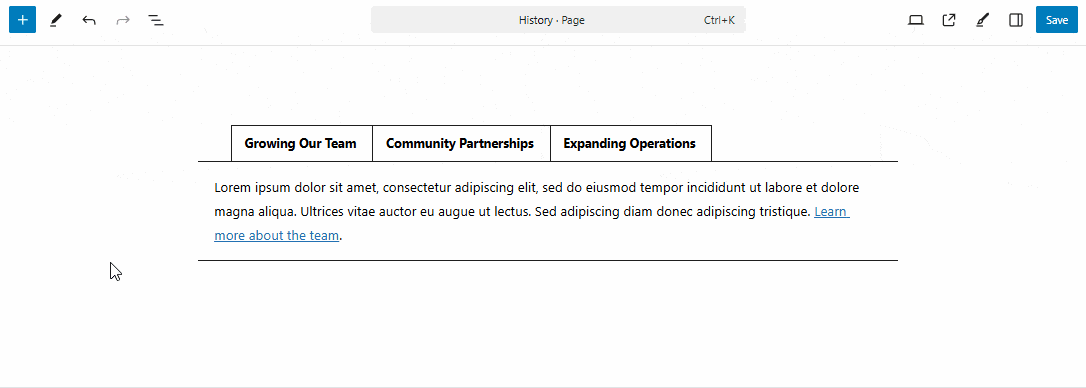
Additionally, tabs can be a good option to use if you have a lot of content and want to shorten the appearance of the page to make it easier for site visitors to scan. Check out tabs in action on the History page of our Pioneer demo site.
How to Add Tabs to Your Content
Having a large block of content on a page without any design elements can be overwhelming to users visiting your site. While adding images is a great way to diversify your pages, another great option is adding design elements such as tabs. You can do this in a few short steps!
- Make sure you’re signed in to the back end of your website and head over to the place you’d like to add a tab block.
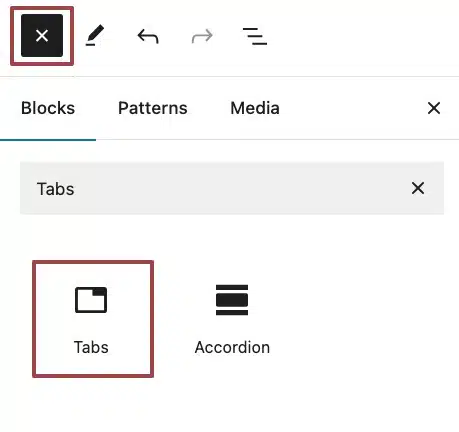
- Once there, click the + sign in the upper left-hand corner and search for “Tabs.”
- Once you’ve added the Tabs block, you’ll want to decide what the tab name should be. We recommend keeping your tab names as short as possible (aim for 3 words or less) since you only have so much horizontal real estate.
- Next, you can work on building out the content of the tab.

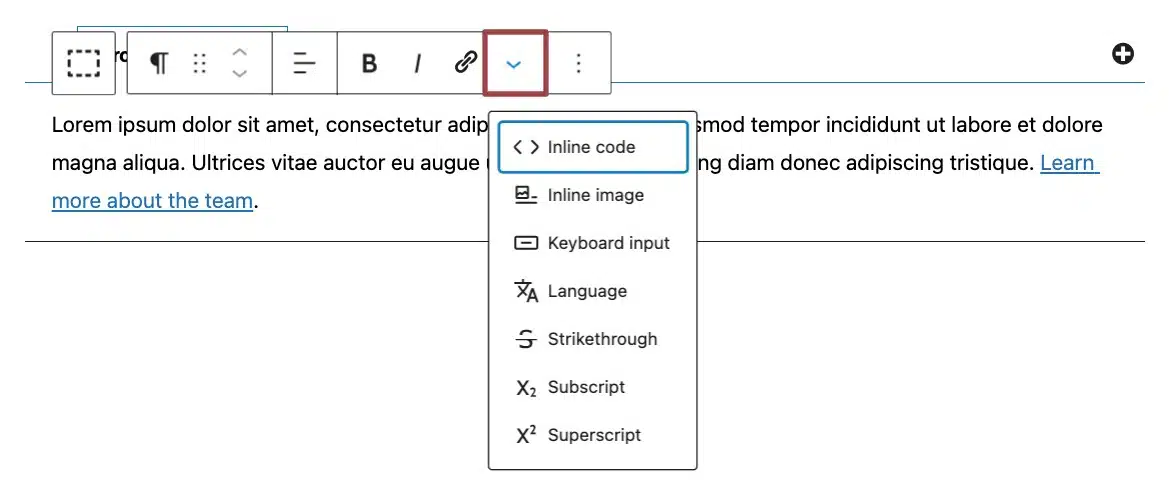
- For the content section of the tab, a bar will pop up at the top of the block that offers different styling tools. The options include formatting your text in the following ways:
- Align
- Bold
- Italics
- Link
- Strikethrough
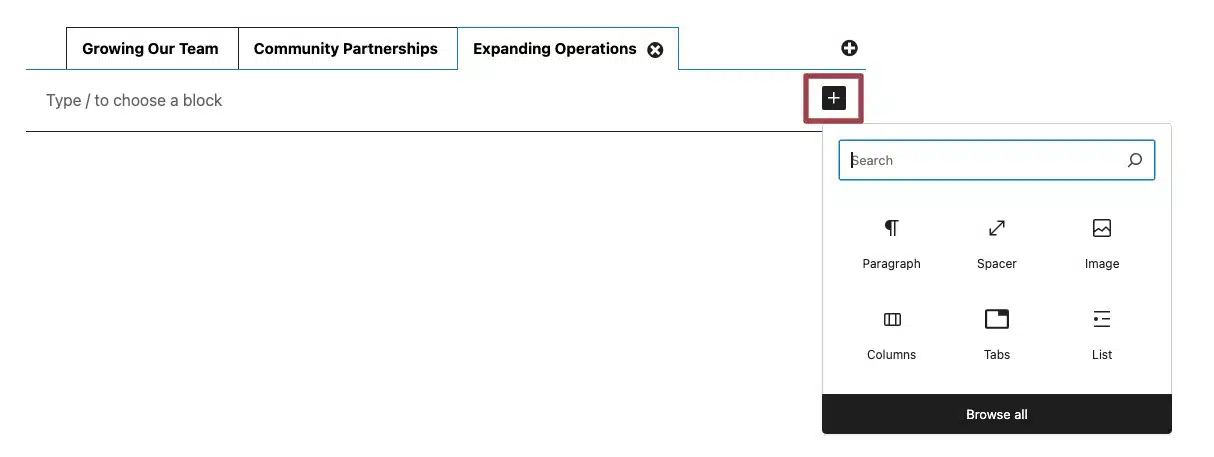
- If you’d like to add a little dimension within your tab, you have the ability to add “inner blocks,” meaning you can have a block within the Tabs block. To add an inner block, select the Tabs block and click the + sign.
- Select the block that will become the inner block. In this example, the column block was chosen. Below is what it would look like after the content was added. Feel free to play around with different inner blocks to find the one that suits your needs the best!
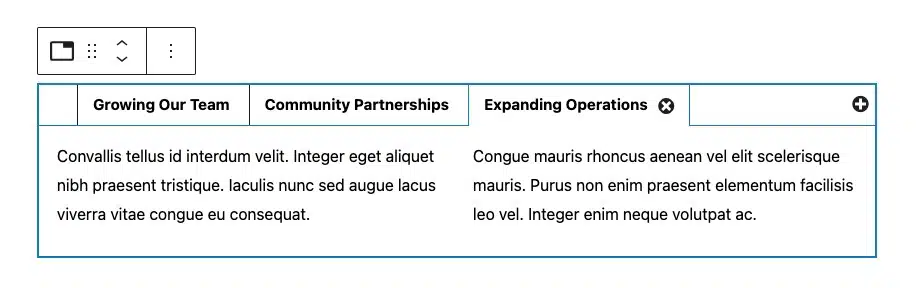
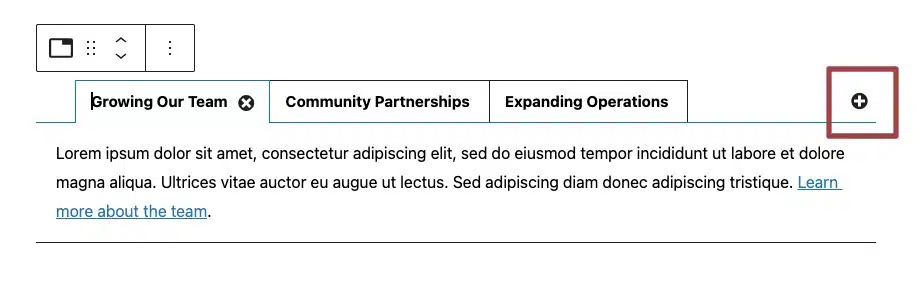
- If you’d like to add additional tabs, you can do so by clicking the “+” on the right-hand corner of the block. Note: The maximum number of tabs allowed within a block is five.
- Once the tab is ready to go, click the next tab and repeat the above steps as needed.
- If you ever want to reorder the tabs, click the Document Overview icon at the top of the page to see a list of all the blocks. From there, you can drag and drop the sections within a Tabs block into the desired order. Or, you can select the block and use the up and down arrows to move the sections.
- To remove a tab altogether, simply click the X in the name section of the tab.

- Make sure to preview your changes before pushing them live by clicking the laptop icon. We recommend choosing the “Preview in new tab” option for the most accurate view of your updated page. Once everything looks good to go, click the blue “Publish” or “Save” button, and enjoy how a simple change like adding tabs can really make your content come alive!

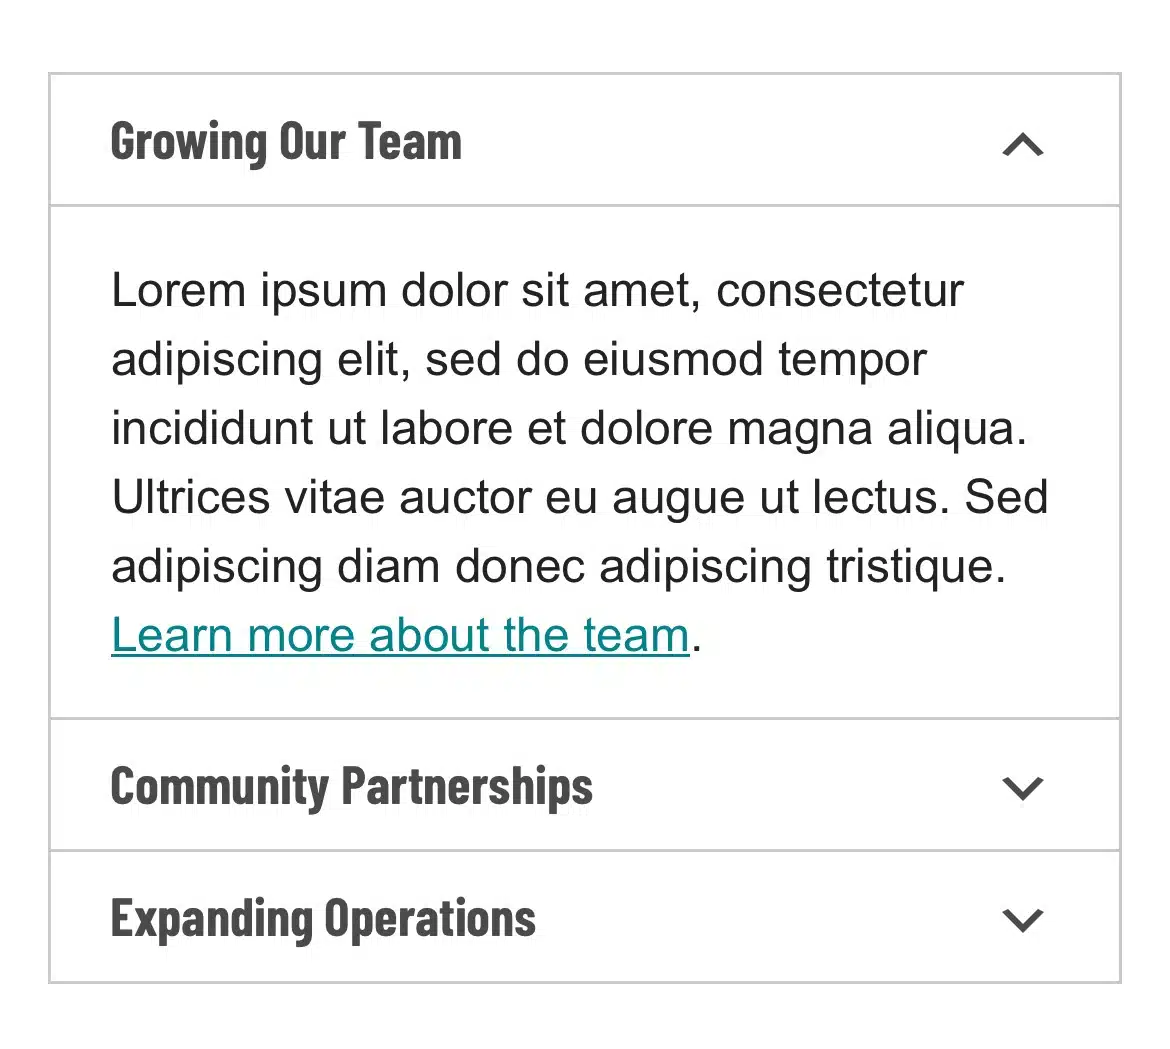
- Note: On mobile, the tabs will transition to an accordion.
Still Have Questions?
The quickest way to get support is to reach out to us within your website’s admin dashboard. Log into your website and then fill out the Request Help form. You’ll hear back from us within one business day.