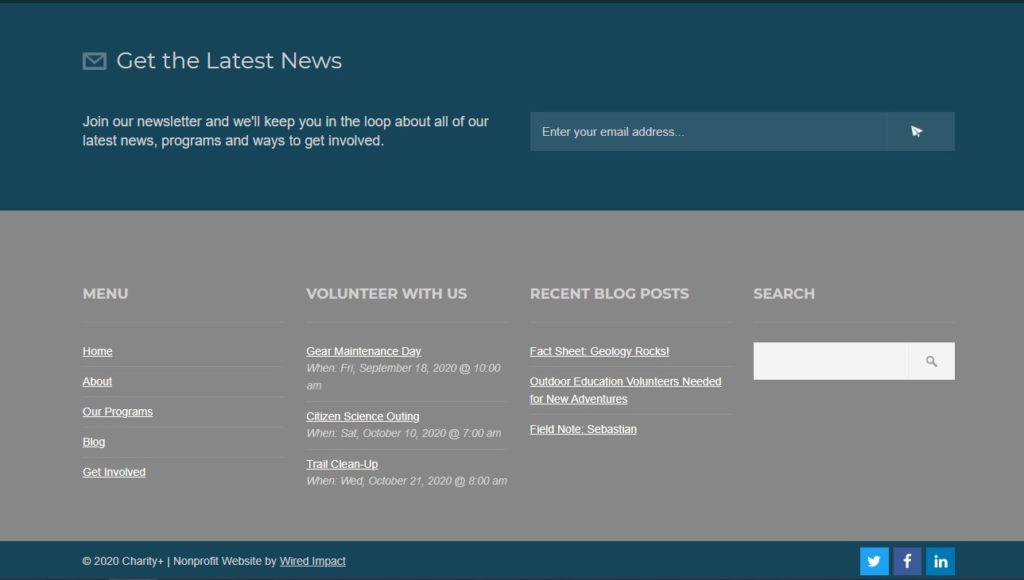
The Chroma website footer has a full-width newsletter sign up section above a four-column section of content such as navigation items, upcoming volunteer opportunities, recent blog posts and a search field. You can see a screenshot of what the footer looks like below.
Not your theme? Check out how to adjust the website footer for a different theme in this support article.
Helpful Terminology
In a WordPress website like yours, widgets are small blocks of content you can add to your footer. For example, you can add custom content to your footer with a Text widget, Image widget or Recent Posts widget without needing to deal with complicated code.
Edit the Footer
- To edit the Chroma footer, log in to the back end of your website.
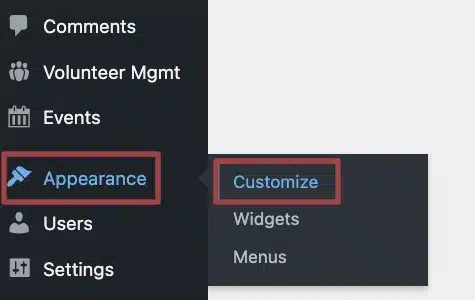
- Hover over the Appearance section of the admin menu on the left, and click “Customize”.
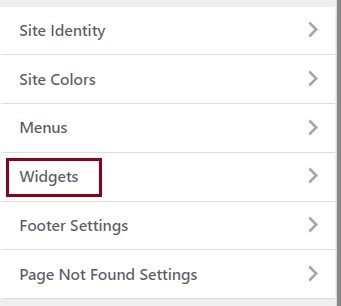
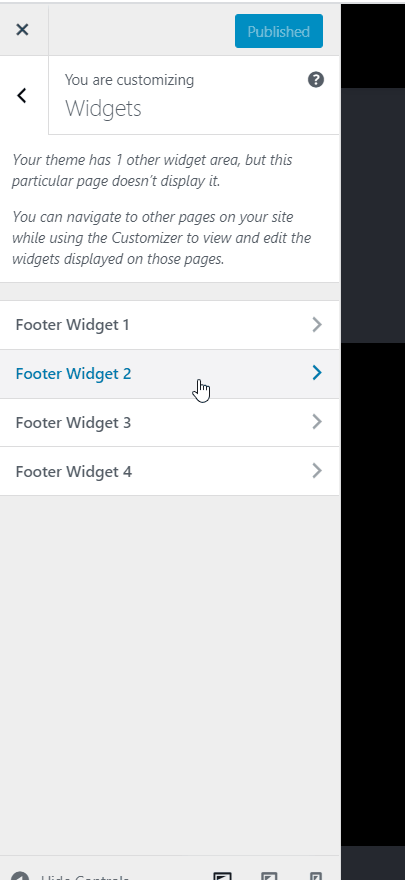
- Once you’re in the Customizer, click on the “Widgets” option from the menu and browse through the four “Footer Widgets” to find the elements you wish to change. If you scroll down to the bottom of the page, you’ll notice that each of the four columns corresponds with the Footer Widget 1, 2, 3 and 4 options in the menu.
- To adjust a column of the footer, click on the respective footer widget (1, 2, 3 or 4) within the menu to see which widgets are displaying in that column.
- From there, you can select the widget you’d like to update and adjust the content.
- You can also remove the widget altogether by clicking “Remove” at the bottom of the page.
- Be sure to click the blue “Publish” button to save your changes before exiting out.
Add a Widget
It’s important to stay mindful about what final information you include in your footer. We recommend that you include an easy way for users to get around your site (typically a reminder of the primary navigation), as well as a high priority call to action like signing up for your e-newsletter or driving supporters to volunteer.
To add a widget, follow these simple steps below:
- Once logged in, go to Appearance > Customize.
- In the menu, choose Widgets.
- From there, you’ll have the choice to add a widget to Footer Widget 1, Footer Widget 2, Footer Widget 3 or Footer Widget 4.
- Once you’ve chosen where in the footer you want to add the widget, you have the option to edit an existing widget or add a new widget. Click the Add a Widget button to see a list of the available widget options.
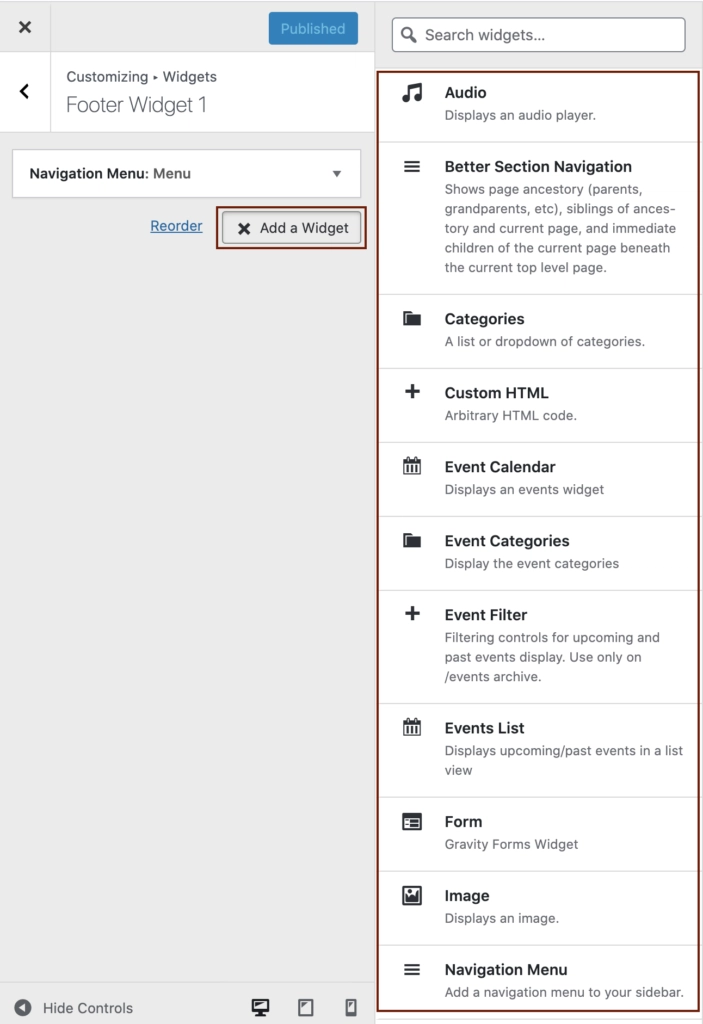
- Select the appropriate widget, which will add it to the left side under any existing widgets.
- Adjust the settings of the widget as needed.
- Click the Done button to save your updates.
- You can rearrange the widgets by dragging or dropping them into place or by clicking Reorder and using the arrows.
- When you’re finished making changes, click the blue Publish button to push your changes live.

Remember that anything you add or remove from the footer will be applied to every page on your website.
Update the Newsletter Sign Up Section
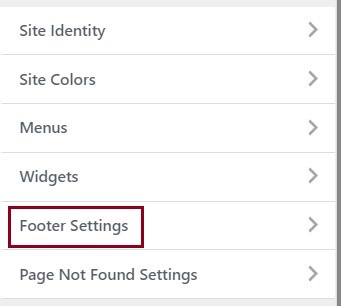
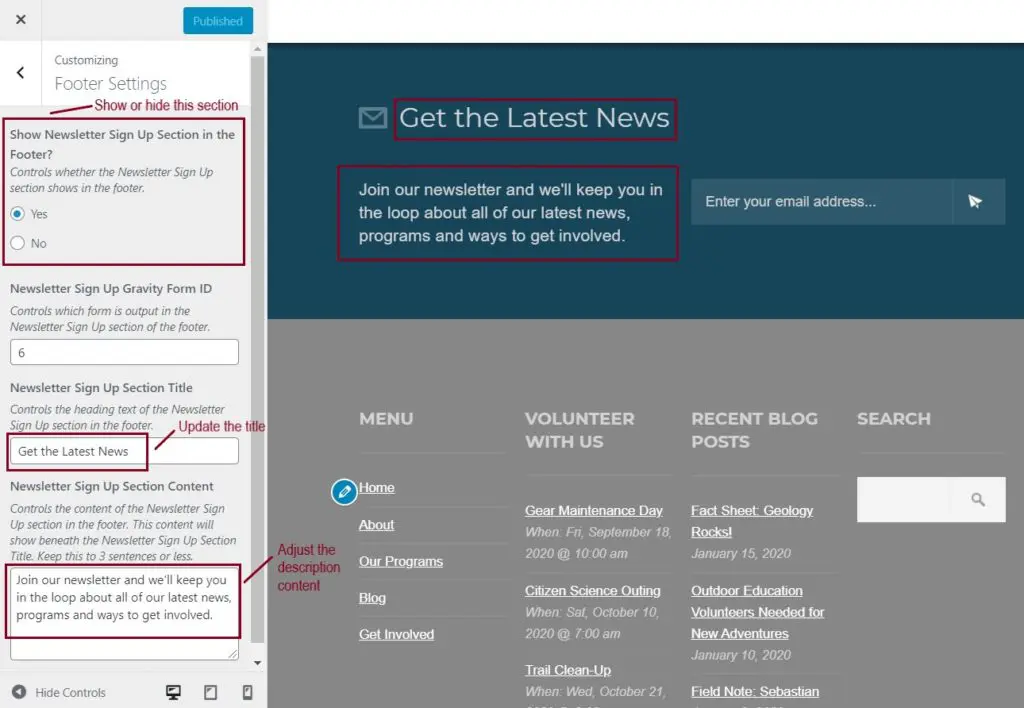
- To update the Newsletter Sign Up section, which appears at the top of the footer, select “Footer Settings” from the main Customizer menu.
- From there, you’ll see options to show the newsletter section, adjust the title of the section and adjust the description content.
Update Social Media Icons in the Chroma Footer
Learn how to update the social media links in this support article.
Still Have Questions?
The quickest way to get support is to reach out to us within your website’s admin dashboard. Log into your website and then fill out the Request Help form. You’ll hear back from us within one business day.