Clients using the Pioneer, Scholar or Vision themes can add a button or series of buttons into their website’s secondary navigation. The button(s) can be used to highlight an important section or page on your site. These are typically used to highlight your main calls to action.
Since the button(s) are located in your site’s header, they will appear on all pages of the site and can be added or removed whenever you wish. Select your website’s theme to get detailed instructions for updating your secondary navigation:
Helpful Terminology
- Your primary navigation is made up of the main parent pages along the top (or “header”) of your website.
- The links that show up in your primary navigation are called parent pages. These pages help organize your content into different groupings, such as About Us or Our Programs.
- Your secondary navigation shows up on top of your primary navigation, and typically links to key calls to action on your site.
Updating Pioneer Secondary Navigation
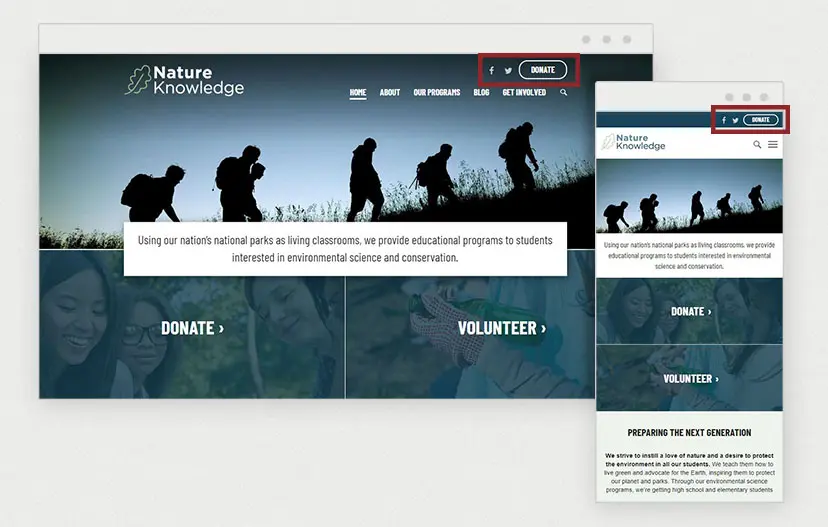
On our Pioneer theme, you have the option to highlight a button in the upper right-hand corner of the header. To the left of the button, you have the option of adding up to four social media icons. The button and social media links will also show up when the navigation is viewed on mobile devices.
What it looks like
The button will show up in both desktop and mobile views of your website. In addition to the screenshots below, see the button in action on the Pioneer demo site.
Access secondary navigation settings
After logging into your website in the admin area, hover over Appearance in the admin menu on the left side of your screen and click on Customize. You will be taken to your website’s special Customizer view.
In the left hand sidebar, choose Menus and then Secondary Menu.
- To remove the current secondary navigation link, select the page in the menu, and click the red “Remove” link.
- You can then add a new page you’d like to link to from your secondary navigation.
- Click the “Add Items” button.
- Use the search bar to find a specific page you’d like to link to, or scroll through the list.
- Select the new page for the secondary navigation button.
- You’ll see the new page show up in the Secondary Menu list.
- Click the “Publish” button to save your changes.
- To leave the Customizer, click the “X” in the top left.
You can adjust this setting at any time. You will see a preview of what your site looks like each time you click or unclick the box.
Within the menu selection process, it is possible to add more than one page into your secondary navigation menu, but only the first option will appear on your website. This is restricted to keep the header from getting overwhelmed since you also have the ability to showcase social media icons here.
Updating Scholar and Vision Secondary Navigation
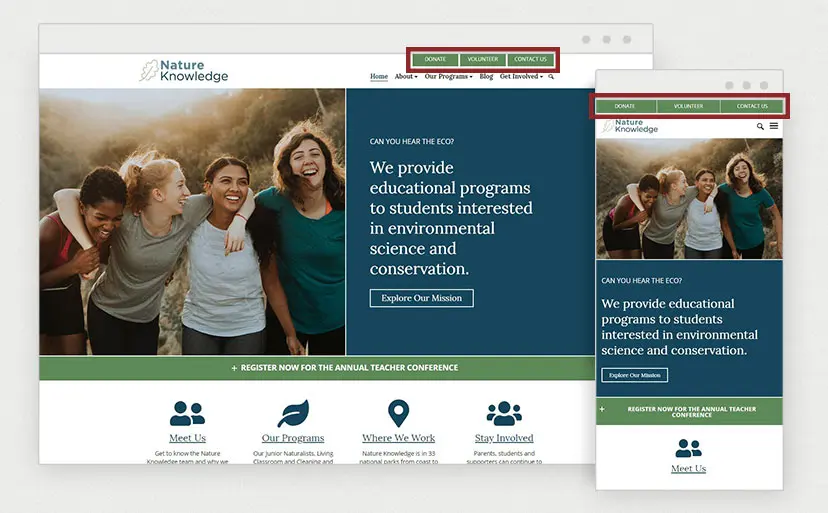
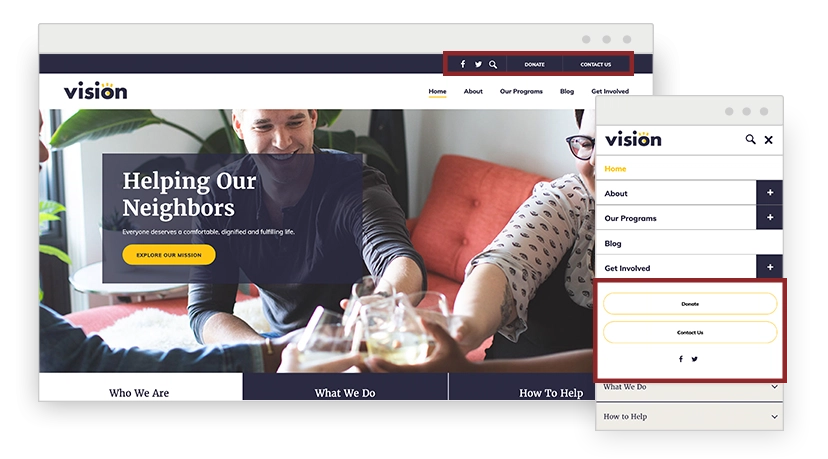
On our Scholar and Vision themes, you have the option to highlight up to three buttons in the upper right-hand corner of your website’s header. For Scholar, the buttons will also show up in your header on mobile devices. They will appear within the mobile navigation on Vision.
What it looks like
The secondary navigation buttons will appear in both desktop and mobile views of your website. In addition to the screenshots below, see the button in action on the Scholar demo site and Vision demo site.
Access secondary navigation settings
After logging into your website, hover over Appearance in the admin menu on the left side of your screen and click on Customize. You will be taken to your website’s special Customizer view.
In the left hand sidebar, choose Menus and then Secondary Menu.
- To remove the current secondary navigation links, select the page in the menu that you’d like to remove, and click the red “Remove” link.

- You can add a total of three pages to the secondary navigation.
- Click the “Add Items” button.
- Use the search bar to find a specific page you’d like to link to, or scroll through the list.
- Select the new page(s) for the secondary navigation button.
- You’ll see the new page(s) show up in the Secondary Menu list.
- To change the order in which the buttons appear, click and drag the order of the page names. You’ll see these changes reflected in the preview.
- Click the “Publish” button to save your changes.
- To leave the Customizer, click the “X” in the top left.
You can adjust this setting at any time. You will see a preview of what your site looks like each time you click or unclick the box.
Within the menu selection process, it is possible to add more than three pages into your secondary navigation menu, but only the first three options will appear on your site. This is restricted to keep the header from getting overwhelmed.
Still Have Questions?
The quickest way to get support is to reach out to us within your website’s admin dashboard. Log into your website and then fill out the Request Help form. You’ll hear back from us within one business day.