
Working toward a more accessible website means working toward improving the experience of every visitor to your nonprofit’s website. But, before diving into making changes to your nonprofit’s site, it’s helpful to test website accessibility to see what changes are necessary and have the potential to make the biggest impact. You might be surprised by what you find.
Website Accessibility
An accessible website is a website that can be used (as it’s meant to be used) by anyone, including people with disabilities. In case you need a refresher, every nonprofit should be working toward an accessible website.
Web accessibility takes a variety of disabilities into account, including hearing, visual, physical and cognitive. For example, those who have visual impairments or are unable to use a mouse or trackpad should still be able to get around and take key actions on your website through keyboard controls or a screen reader.
Common Issues
The following issues are all common sources of frustration for your website visitors with disabilities that may come up in your testing.
- Text, links or menu items are difficult for those with visual disabilities to see due to poor color contrast
- Limited access to website features using only a keyboard
- Page elements retain their look when focused, making it challenging for keyboard users to know where they are on the page
- Missing alt text for images, meaning those using a screen reader only hear the image’s name
- Text that can’t be resized to 200%
- Link anchor text that’s not helpful to understanding where the link will send visitors
- A website structure that’s not logically organized or otherwise difficult to understand
Across the global online community, the Web Content Accessibility Guidelines (WCAG) are the standard to follow for website accessibility. Those guidelines are the basis of all the tests, checks and common issues that we note throughout this post. Let’s get testing!
Testing Code on Your Website
There is no shortage of accessibility testing tools on the web. But, there are a few that we’ve found easier to use. Especially for those of us who don’t know how to code.
Chrome browser extensions
If you’re a Chrome user like me, there are browser extensions that can analyze the code for accessibility on specific pages or features on your site. While the browser extensions do require you to work through your website page by page, this approach has the added benefit of pointing out issues contextually within your content and the features of your website. It’s also a nice opportunity to fix smaller issues as you go.
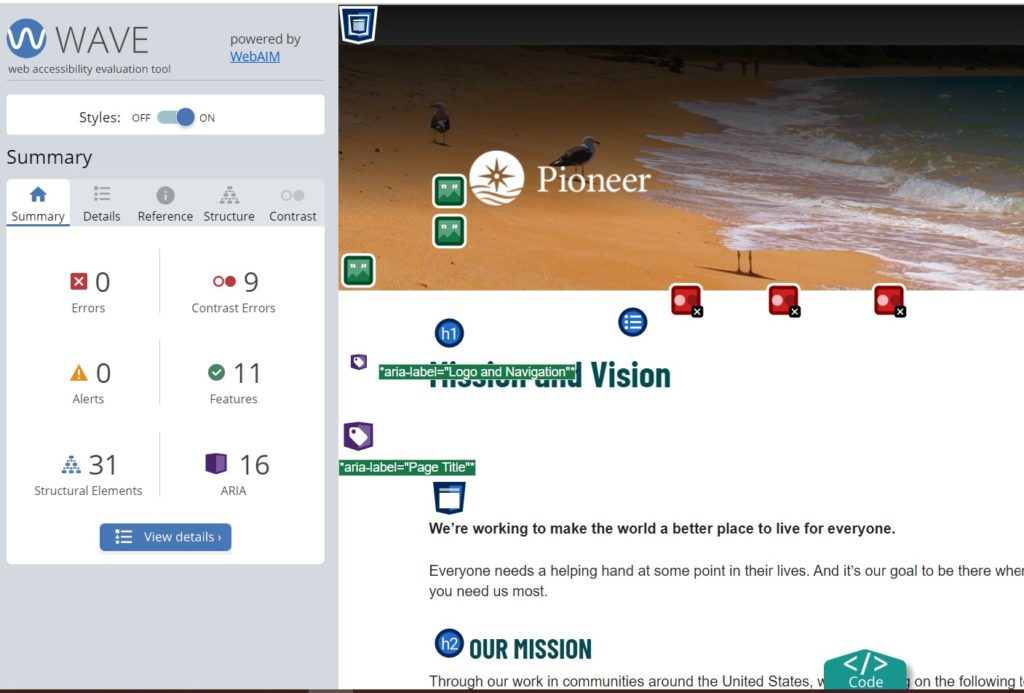
WebAIM’s WAVE accessibility test is both helpful and user-friendly. Once you add the browser extension, go to any page on your website and click on the extension. A summary of the page’s accessibility will appear, including:
- Errors
- Contrast errors
- Alerts
- Features
- Structural elements, like the navigation menu and headings
- ARIA
You can then click through to find the accessibility details for each error or alert and learn more about how to fix it.
The axe accessibility test is another option if you prefer to compare your list against another easy-to-use tool. Each test will return a list of errors and alerts for you to work through. Errors cause major issues for those with disabilities and alerts are less problematic (though still worth fixing). You’ll also find helpful links to why a certain technique is considered a best practice. For example, this article on why to include alt text for images on your website.
Chrome Accessibility Tool
Google Chrome also has a built-in accessibility testing tool that you can access and use without needing to download and enable a new browser extension. The tool provides an easy-to-understand audit, including scores (from 0-100) for how well your site adheres to best practices.
HTML Validation Tool
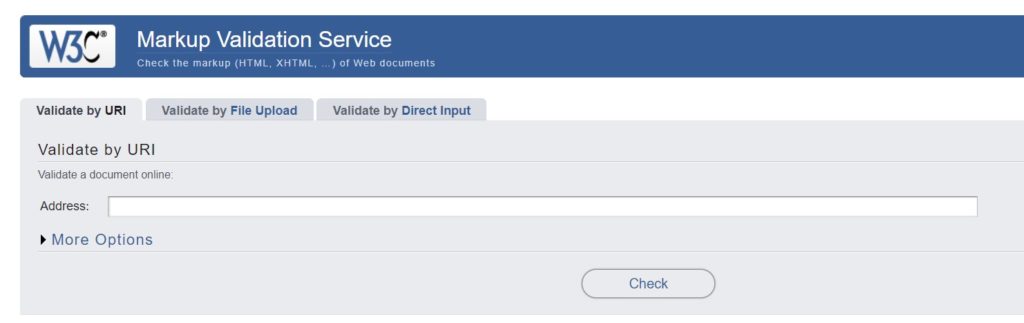
As a complement to the accessibility tools mentioned above, a Hypertext Markup Language (HTML) validator can point you to errors directly in your website’s code. Not all of the errors found with the validator will impact accessibility, but errors can cause issues with screen readers, keyboard navigation and other assistive technologies. Unfortunately, these tools focus entirely on code, so you’ll want to work with someone who’s comfortable with HTML.
We like using the World Wide Web Consortium’s HTML validation tool to test for elements that go against accessibility best practices. Drop in the URL, and it will return a list of errors and warnings for specific snippets of code on your site.
Manually Test Website Accessibility
If code is not your thing, it’s possible to do some manual accessibility testing. It never hurts to put yourself in your users’ shoes to help pinpoint problem pages and features on your website. To start, you can read up on web accessibility principles and then work your way through your website to look for issues.
- Use a keyboard to navigate your site via Tab and Shift + Tab without using a mouse at all
- Work through your website on a screen reader
Are you able to find and read key pages on your website? Can you take important actions, like making a donation, registering to volunteer or signing up for the email newsletter? Are there any features you miss out on, like images, downloads or functionality?
Usability Testing
If possible, go straight to the source with a usability test. If you are close with a supporter, staff member or friend who is open about their experiences as a person with a disability, you might enlist their help to pinpoint pages or features to start with. Just be sure that you offer fair compensation, even if they already volunteer their time.
To focus their efforts, provide them with a list of pages and actions to take on your website and ask them to provide any notes or feedback on frustrations or possible improvements you could make to the site.
Updating Your Site
And now the fun part – make sure you have a plan to actually fix the errors you find. As you test website accessibility and note issues on your nonprofit’s site, keep an organized list of items to work through over time. It helps to separate those that you can tackle on your own from those that you’ll need to work through with a web developer.
Depending on the age of your site and how much accessibility was prioritized initially, the list of improvements could be very long. To prioritize, we focus on the issues that check these boxes:
- Impact all or many of the site’s pages, such as in the header or footer
- Cause serious problems for those with disabilities
- Require a limited amount of time to fix
As you knock out issues along the way, we’d encourage you to continue testing to make sure problems are resolved and new issues haven’t been created.
Resources for Beginners
To prevent future issues, don’t forget to educate other staff members who publish or edit content on your website about accessibility. The following resources can help to provide a base level of knowledge about web accessibility and guidelines.
- Tips on creating accessible content
- Characteristics of a user-friendly website
- The basics of inclusive design
- Web Accessibility Basics for Nonprofit Leaders
- Web accessibility on WordPress websites
Have you tried to test website accessibility for your organization? What tools did you use? Any tips for other nonprofits working through the process?
What You Should Do Now
01. Come to Nonprofit Website Office Hours
We cover a new topic every few weeks. Plus get a live answer to any website-related question you're wrestling with.
02. Book a Website Call
Find a time to discuss your nonprofit's website needs. Discover what's worked for other nonprofits like you and see how easy building your new site can be.
03. Start a Free Website Trial
Try our nonprofit website platform for yourself. Instantly get access to every feature to see if it's the right fit for your needs. No credit card required.
Comments