Using buttons is a great way to highlight an important link or request. For example, you might use a button that reads “Give Today” and link it to your donation form. Or you could use a button that says “Download Our Brochure” and link to a downloadable file.
No matter the reason, you’ll create a button in the same way whenever you’re formatting content on a page or in a blog post. You can even add multiple buttons if you wish, like in this example showing multiple buttons in different columns.
Before we get started, please note that this article will not address how to add or remove the button in your site’s navigation. Learn more about the navigation button.
Adding a Button
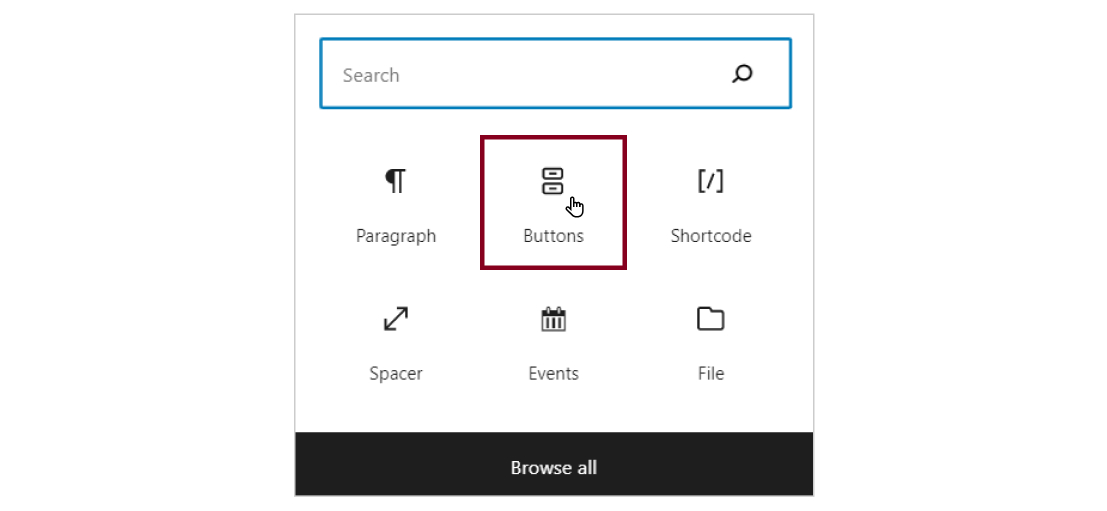
To create a button, you’ll need to add the Buttons block to your post or page wherever you want the button to show up:
- Place your cursor in the location where you’d like to add a button.
- Click the + symbol. You can use either the one in the upper left-hand corner, or the one that appears above the place you just clicked.
- Search for “Buttons”
Your Button Options
Every button you make can be customized in different ways. The one option that is pre-set is the color. It’s the same for every button and is determined by your site’s primary color. If you need help changing this color across your site, please reach out to us for support.
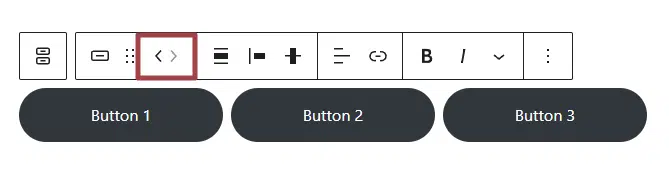
You can add more than one button within each Buttons block by clicking the + button to the right.

This allows you to create a group of buttons. You can change the order by selecting one of the buttons and using the left or right arrow icons.
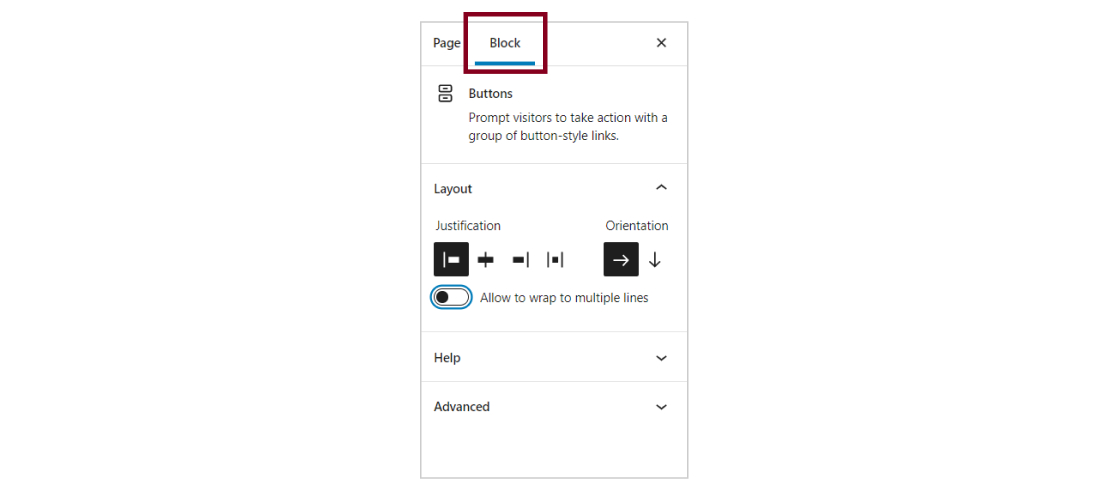
In the Buttons block settings on the right panel, you can change the justification and orientation of the buttons as needed.
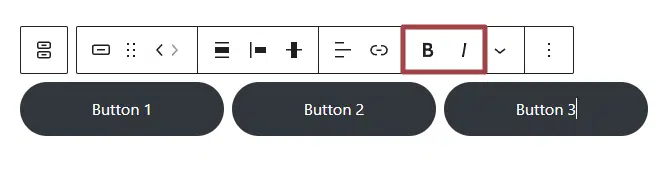
Here are the individual button attributes you can change using the toolbar above the Button block:
- Alignment. You can adjust how the buttons are aligned both horizontally and vertically.

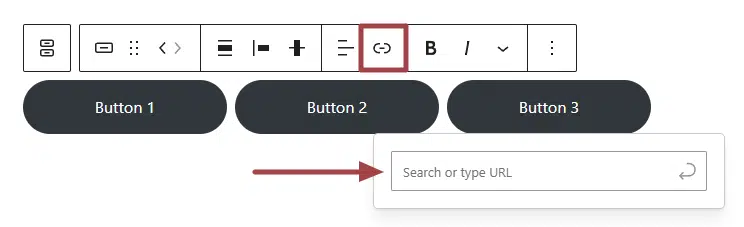
- URL. You can add the link where you want the button to direct people, like another page on your site.
- Text. You can add or modify the button’s text by clicking it. In the toolbar, you’ll find the options to tweak the style of your text, like adding bold or italics. Try to keep it short, action-oriented and specific (not “read more”).
The button will change as you adjust these options, making it easy to see what the final button will look like. Be sure to preview your page or post and save or publish your changes when you’re finished.
Still Have Questions?
The quickest way to get support is to reach out to us within your website’s admin dashboard. Log into your website and then fill out the Request Help form. You’ll hear back from us within one business day.