Have you ever landed on a web page, faced a wall of text and left to find an option that’s a bit more scannable?
Big blocks of text are hard for online readers to consume. The way you format content could mean the difference between someone taking the time to read it or jumping ship and clicking off the page.
To make sure that doesn’t happen on your nonprofit’s website, format your content before you publish a page or blog post. We’ll walk you through how to use the editing system as well as some formatting best practices to keep in mind.
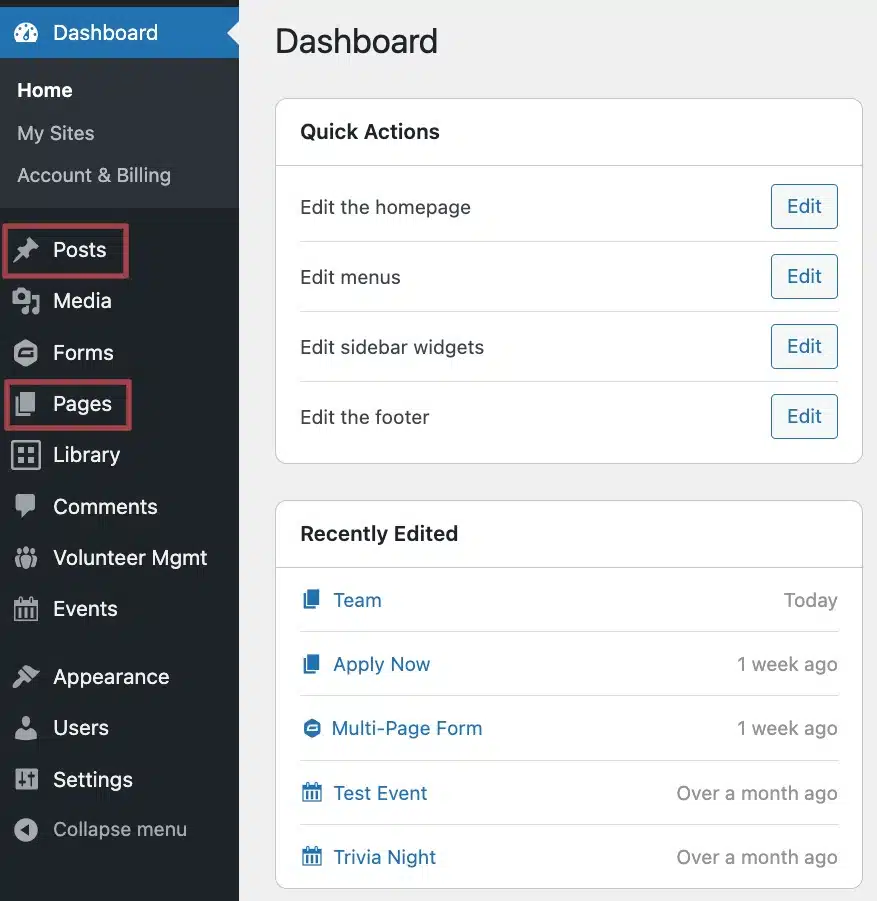
Where Do I Add Content?
The admin menu on the left in the back end of your website has both a “Pages” and a “Posts” section. Posts allow you to add and edit blog posts, and Pages house other pages on your website. Click through to a specific page in the Pages section to see the content editor for that page, and do the same within the Posts section to view the content editor for specific blog posts.
Using the Block Editor
Your website uses a block editor. Each “block” that you add to your page or post can use a different content layout. For example, you can have an image block, a heading block, a paragraph block and a list block—all on the same page and used in as many places as you like. Each time you need to use a different content layout, you’ll add a new block.
The first block on your page or post is the page title. Any blocks that appear after that will appear in the body of the page or post.
The Page Writer will automatically appear on new pages you create. The Page Writer uses artificial intelligence to help you create a draft of your page in less time. If you prefer to start from scratch, you can remove this block.
Copying content into the editor
If you have your content ready to go in a document, you can simply copy and paste that content directly into the content editor where it says “Type / to choose a block”.
However, since different types of documents, like Microsoft Word or Google Documents, can carry along their own formatting, it’s best to remove any outside styling when you add it into the content editor.
To do this, we’d recommend using the shortcut Control+Shift+V to paste in your content. When you copy over your content, new paragraphs will automatically be transitioned to new blocks. It will clear all of the other formatting, allowing you to start fresh and use consistent styling across your whole site.
Adding a new block
To add a new block, click the “plus” icon at the top of the block above where you would like to place your new block. Select the type of block you’d like. Alternatively, you can click the three vertical dots within the block toolbar and select either “Add before” or “Add after” depending on where you would like the new block.
To rearrange a block, select it and use the arrows to move it to the spot where you would like it.
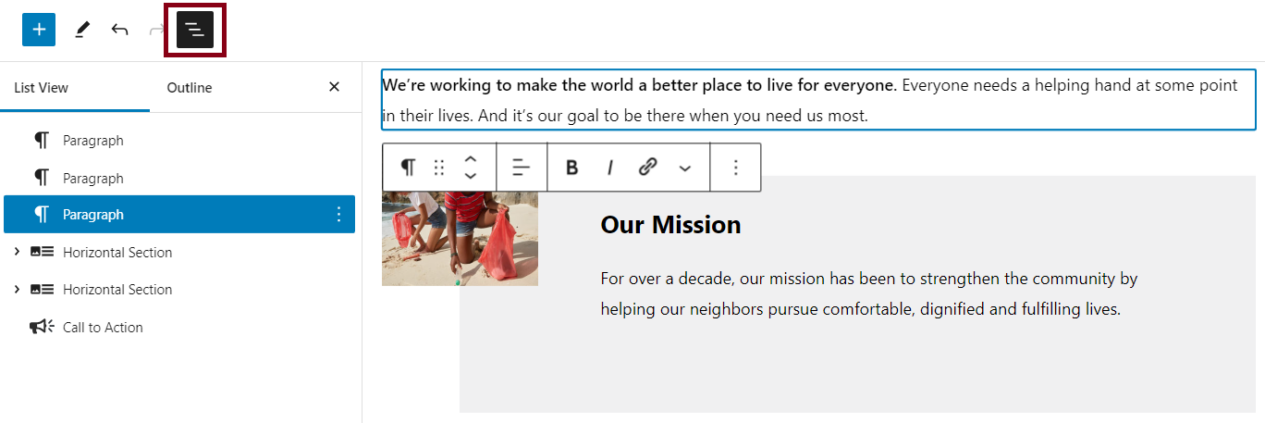
Another way to rearrange blocks is using the List View. At the top of the page, click on the “Document overview” icon to see a list of all the blocks on the page. You can reorganize items on the list by dragging and dropping them.
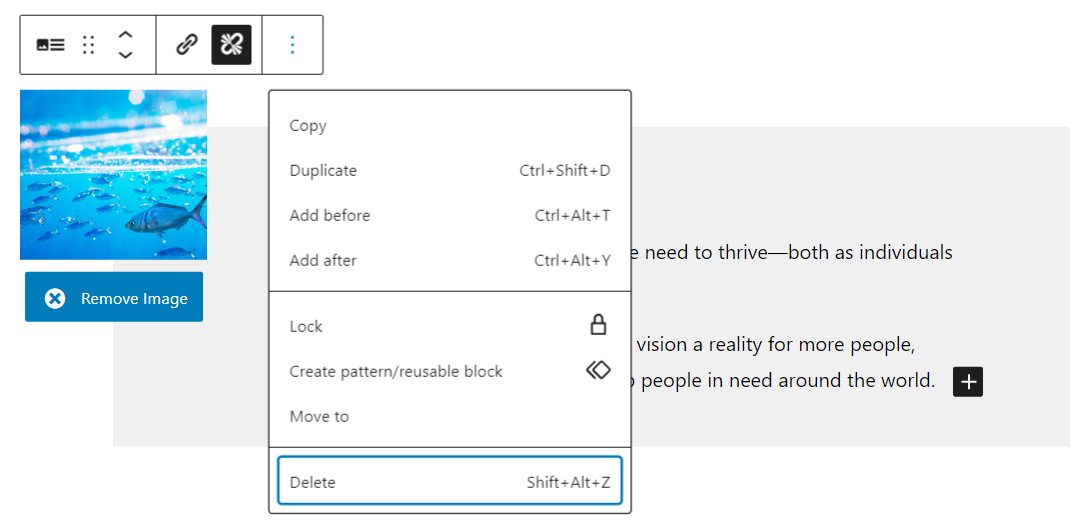
Deleting a block
To delete a block of content that you would no longer like to include in your page or post, click the three vertical dots within the block toolbar and select “Delete”.
Using block patterns
Block patterns are saved groups of pre-designed blocks you can use to achieve specific layouts and give yourself a starting point for entering and formatting content.
You can select from a variety of patterns depending on your preferences, and once you’ve added it to your page, you can customize it with your text and images to make it your own.
Types of blocks
Each new piece of content will need to use a new block. This includes things like bulleted lists, buttons and content formatted into columns. You might find the following types of blocks especially handy as you format your nonprofit’s website content.
- Paragraph – This will be your most-used block for standard paragraphs of text
- Heading – Find five levels of headings, from the largest H2 to the smallest H6
- List – Choose between a bulleted or numbered list
- Quote – Call attention to quotes or statistics with special quote styling
- Image – Add a full-width image to the page, breaking up the content
- Video – Add a full-width video to the page
- Horizontal Section – Add a media file to appear on half of the page, with a paragraph of text appearing on the other side of the page
- Table – Create a table to showcase data
- Button – Create a button with customizable text and a link
- Columns – Format content into two or more columns with this block
- Separator – Add a horizontal line across the page to separate content
- More – Use this tag within blog posts to indicate content to include the snippet on the Home page and main blog posts page
Changing block types
Rather than deleting a block when you realize it’s the wrong type of block for the content you’re creating, it’s sometimes possible to change similar block types from one type to another. For example, you can change a paragraph block into a heading, list or quote block. This change is especially useful when pasting in content from another source.
By clicking the block icon in the toolbar, you can see your options and select the block type you’d like to transition to.
Options within blocks
Many blocks offer a variety of options based on your preferences. When a block has settings options, they will appear in a settings menu on the right side of your screen when the block in question is selected.
Formatting Your Page
You can manually arrange different blocks to format your content into your desired layout. If you’re not totally happy with your design, or are looking to save time, you can use the Design Assistant to format page content into a polished, engaging layout automatically.
With one click, it can reformat your existing page content into a professional layout using design best practices tailored for nonprofits. Preview the new design and compare with your original before accepting changes.
Formatting Best Practices
The goal with any formatting best practice is to create content that’s easy for online readers to consume and that looks clean on the page. Review your content for these quick formatting upgrades.
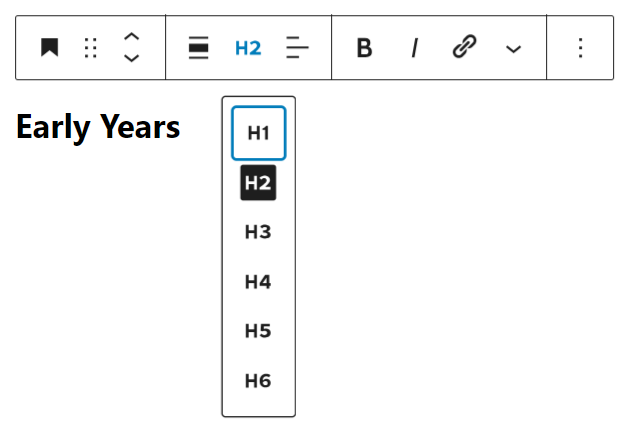
Use headings to break up content
Headings ensure your content is easy to scan. Most readers scan for lists and headings before committing to reading whole paragraphs of content. Whenever the topic on the page shifts, use a new heading.
Start with Heading 2, found in the “Heading” block, and work your way down numerically for sub-headings of similar points that you’d like to make on a certain topic. For example, on your history page, you might use H2 for “Early Years” and then H3 for “2013” and to dive further into each specific year within that section.
Use bullet points for lists of three items
To make content easier to scan, break out lists of three or more items with bullet points or with a numbered list.
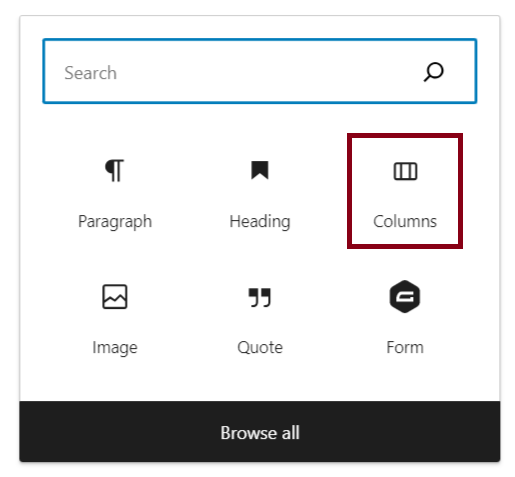
Use columns
Columns are helpful when your lists get very long or you want to list different options with icons. To add more than two columns within a block, simply adjust the block settings on the right. Learn more about using columns.
Link related content
To allow your readers to learn more about a particular topic discussed in greater detail elsewhere on your website or even on another website, use links to direct them there. This will help you avoid including the same content on multiple pages of your website.
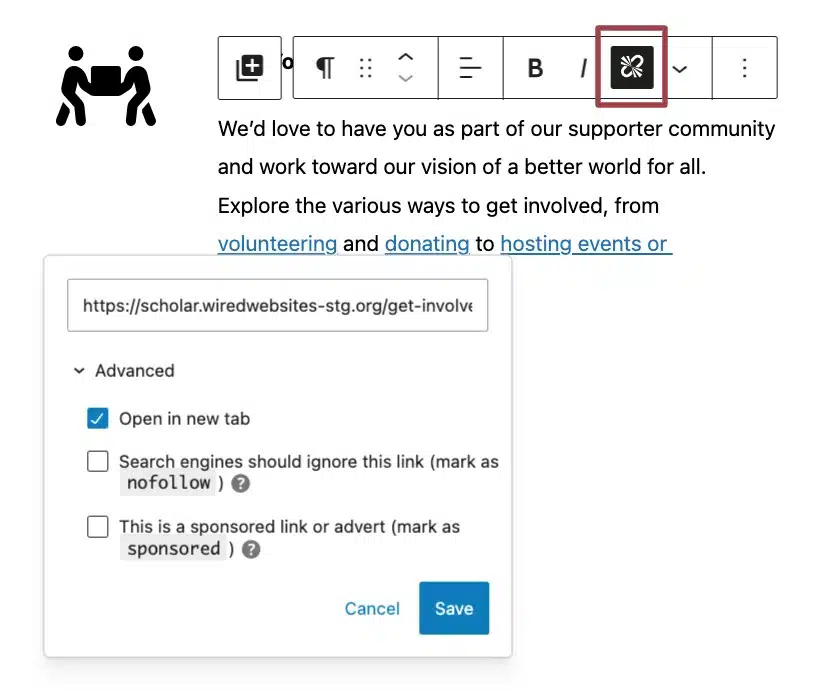
If you’re linking to a site that is not your own, be sure to select the “Open in new tab” checkbox as you’re adding the link. This way, a new tab will open for third party information, and your site visitors won’t leave your site prematurely.
Add visuals
Online readers are visual. Whenever possible, add intrigue to your content by including things like photos, videos, buttons and icons. This also helps to break up the content so visitors aren’t faced with a wall of text when they land on a new page. Each has a separate block dedicated to that function within the content editor that will prompt you to upload a file or select one from your media library.
Use quote styling
If you have quotes or important statistics in your content, give them some visual interest by adding quote styling. To do this, select the Quote block and copy in your quote or stat.
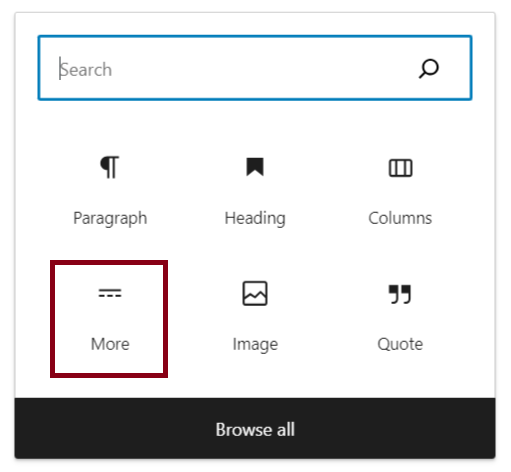
Add the More block to blog posts
To control the snippet that displays along with posts on the main landing page for the blog, add a More block after the amount of text that you’d like to display. Typically, this will be after the first paragraph block. Without this block, a specific amount of characters will pull to the landing page and the cut-off point might not make sense or might be in the middle of a sentence.
Create a Style Guide
While there are certain best practices that can be applied to any website, there are also lots of formatting choices that can fluctuate based on your organization’s preferences. To ensure your formatting is consistent across your whole site, as well as to make it easier for multiple people to enter content on your website, consider creating a simple style guide to note all of the above best practices and formatting preferences specific to your organization.
You could include things like when to use bold or italic text and the placement of buttons or images within the content. Having a standardized way to format text using the tools provided can help make sure that your site as a whole appears more cohesive.
Still Have Questions?
The quickest way to get support is to reach out to us within your website’s admin dashboard. Log into your website and then fill out the Request Help form. You’ll hear back from us within one business day.