Columns are a nice tool to keep in your back pocket when formatting your content, especially for content in list form. For example, you might use columns to list out people on your Board page or to list and link to past issues on your Newsletter page.
You’ll create columns in the same way whenever you’re formatting content on a page or in a blog post. You can even add multiple columns if you wish, like in this example showing the three calls to action in different columns.
Creating Columns
To create a column, you’ll need to add a column block to your post or page to enclose the content that you would like to appear in columns. Follow the steps below to learn how to find and update the column options, including column width and number of columns.
- Click the + symbol in the upper left-hand corner.
- Search for “Columns”.
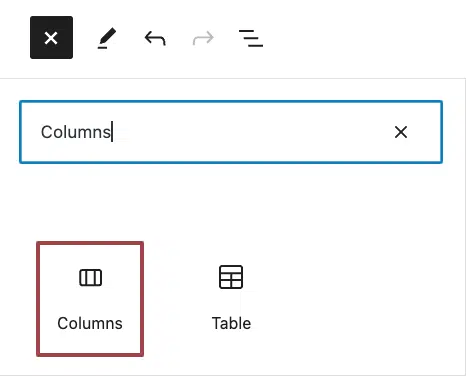
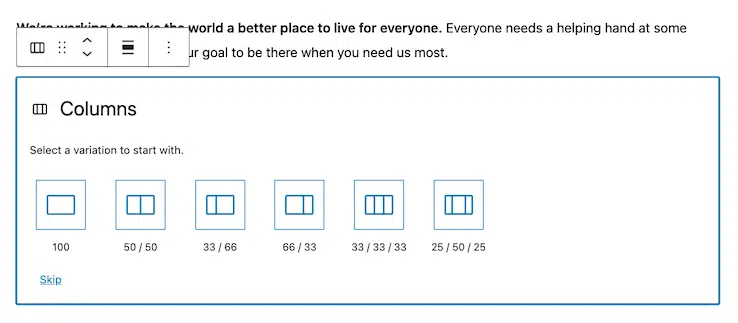
- You’ll then be able to choose from a variety of common column layouts, including two columns equally split and two columns with a one-third and two-thirds split. If you don’t see the layout that you’d like, clicking “Skip” at the bottom of the block allows you to customize it further.
- You can select up to six columns to be added in a single row by adjusting the block settings. To do this, the entire block must be selected, not just one specific column.
- Use the slider under “Columns” in the block settings to specify the number of columns.
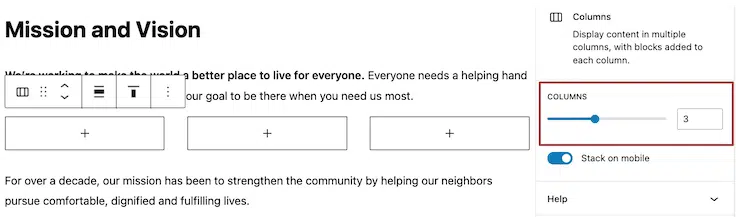
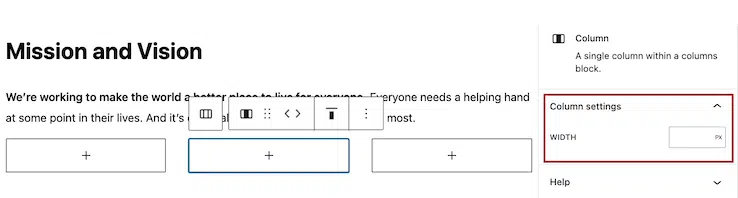
- To adjust the column widths, click on the individual column within the block and update the Percentage width within the block settings. The default settings will split all columns equally.
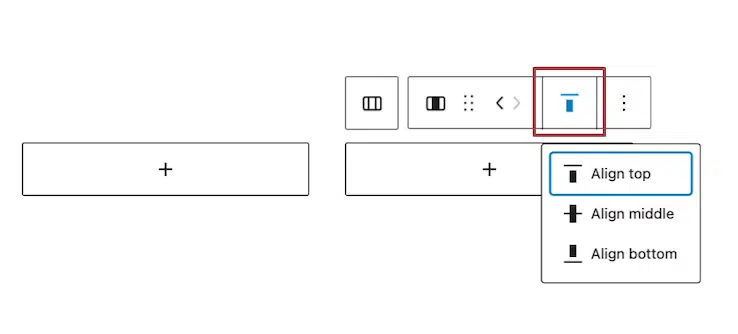
- You can also adjust the vertical alignment for the content within each column to align to the top, middle or bottom. Click the ‘change vertical alignment’ and choose your preferred vertical alignment from the drop down menu that appears. The default setting will vertically align content to the top of the column.
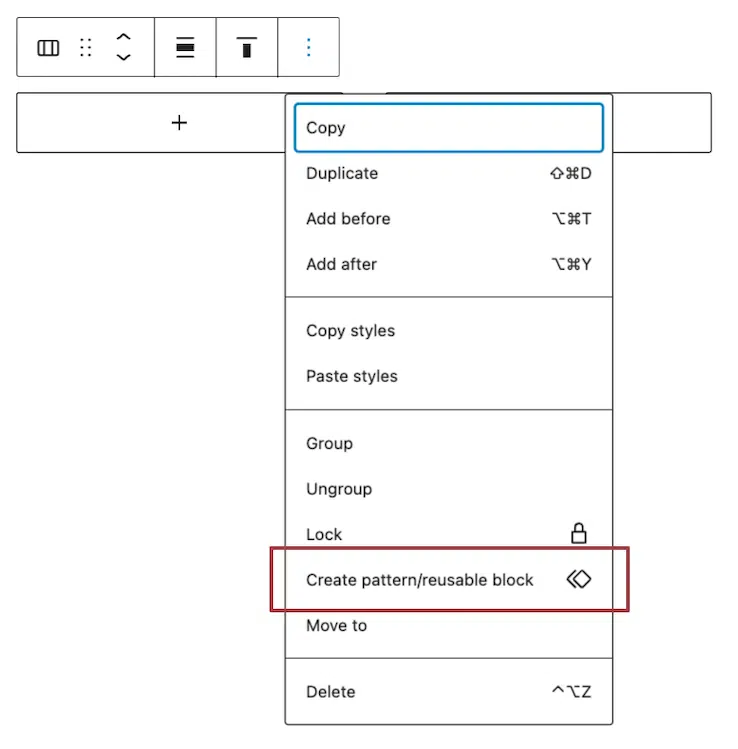
- Protip: if you want to be able to duplicate the column block you just made, click the three dots above the block and click “Create pattern/reusable block”. You’ll be able to save the block’s formatting and reuse it. You can also repeat the above process as needed.
Adding Content to Columns
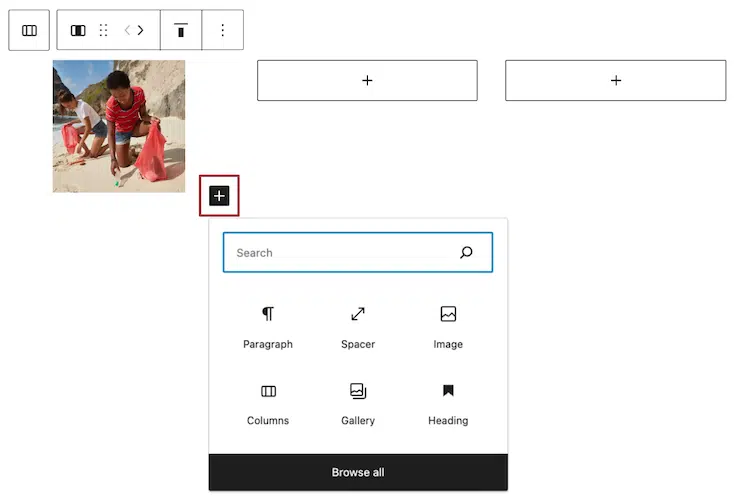
- Click the + symbol in each column to select the block you’d like.
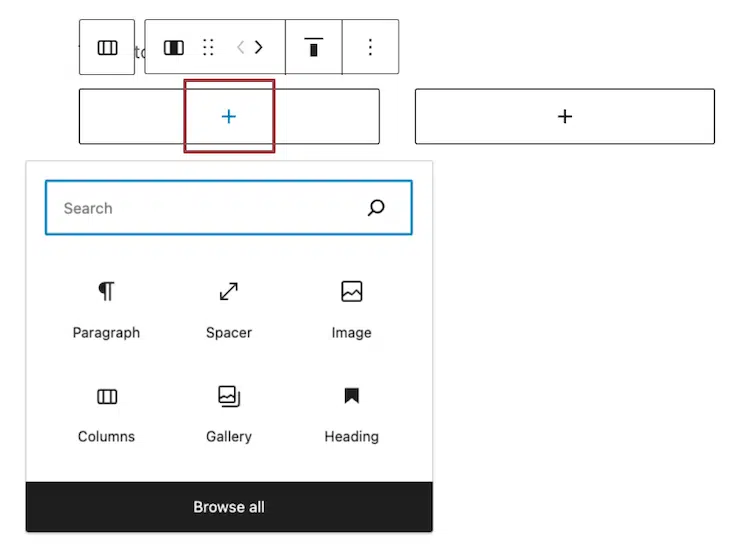
- You can add any block that you’d like to your columns, including paragraph text, headings, images and buttons.
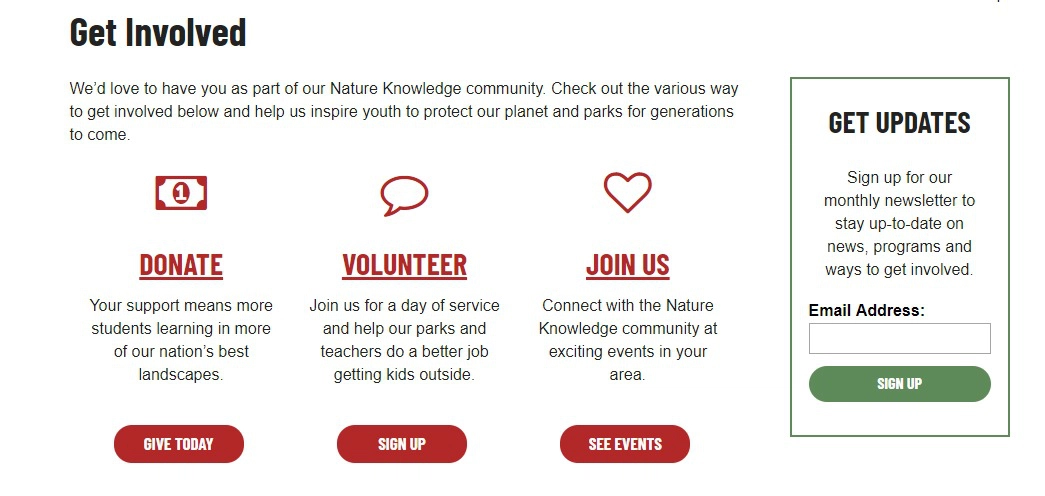
- Check out the example below to see a variety of different blocks formatted in one content block. It uses icons, headings, paragraph text and buttons.
- To include a new piece of content within the same column, you’ll click the + symbol that appears in a new row each time you fill the previous row. From there, you can select the type of block that you’d like.
- Repeat the process as needed.
- Once you’re finished adding content, preview your changes and make sure to publish if all looks good.
Removing a Column
Once in a while you might need to remove a column, which you can do in a few short steps.
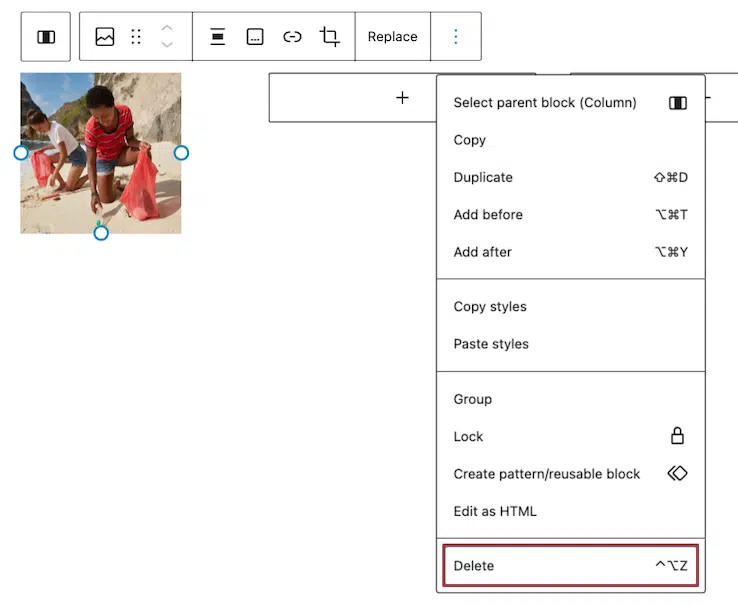
- First, select the block you want to remove.
- Once you’ve done that, click the three dots that appear on the right-hand side of the block to find more options.
- Select “Delete”.
- Repeat as necessary.
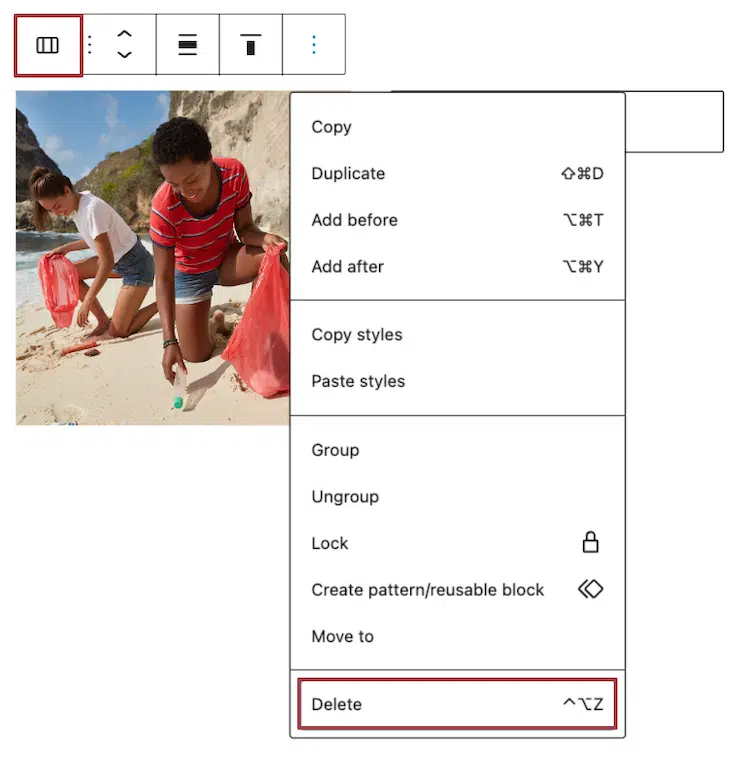
- To remove an entire column block with all of the column content, click the edge of the block to see that the whole area is selected in one box as shown below.
- You’ll now be able to click the three dot symbol and click Delete.
Still Have Questions?
The quickest way to get support is to reach out to us within your website’s admin dashboard. Log into your website and then fill out the Request Help form. You’ll hear back from us within one business day.