Want to sell swag or resources online through your nonprofit’s website? Create a paid form that collects all the information you need from a purchaser of one of your products.
FEATURE AVAILABILITY
The Form Builder is available for Grow and Amplify plan websites. Change your plan in the Account & Billing section of your website Dashboard.
To help you get on the right track with less work, use our Store form template. The base template includes a range of fields and settings that you can customize to fit your needs.
Jump Ahead To
Upload the Store Template Form to Your Website
To make things easy for you, we’ve created a simple store form template that you can use as a starting point. In order to use the template, you’ll need to:
- Save this page as a JSON file if your payment processor is Stripe
- Save this page as a JSON file if your payment processor is PayPal
- Save this page as a JSON file if your payment processor is Authorize.Net
The default file type will automatically be JSON. To save the page, you’ll right click and select “Save as” from the drop-down menu.
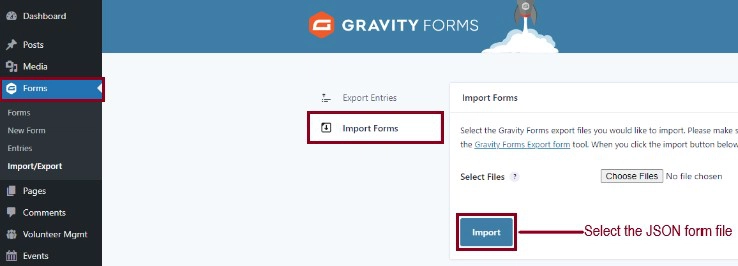
Once you’re signed in to the back end of your website, head over to the Forms section of the admin menu on the left side of your screen.
- Under Forms, go to “Import/Export”.
- Select “Import Forms” on the left.
- Choose the WI Store Template JSON file that you saved previously and click “Import”.
Edit the Store Form
Once the form is uploaded, you’ll see a notification on the top of the page confirming a successful upload. Go to Forms in the admin menu on the left and click “Edit” below the newly imported Store form to make changes.
Important note about the template
There are certain fields within the Store Form Template that are required in order for the form and payments to function correctly. You’ll want to be sure that you do not delete the following fields:
- Name
- Email Address
- Credit Card
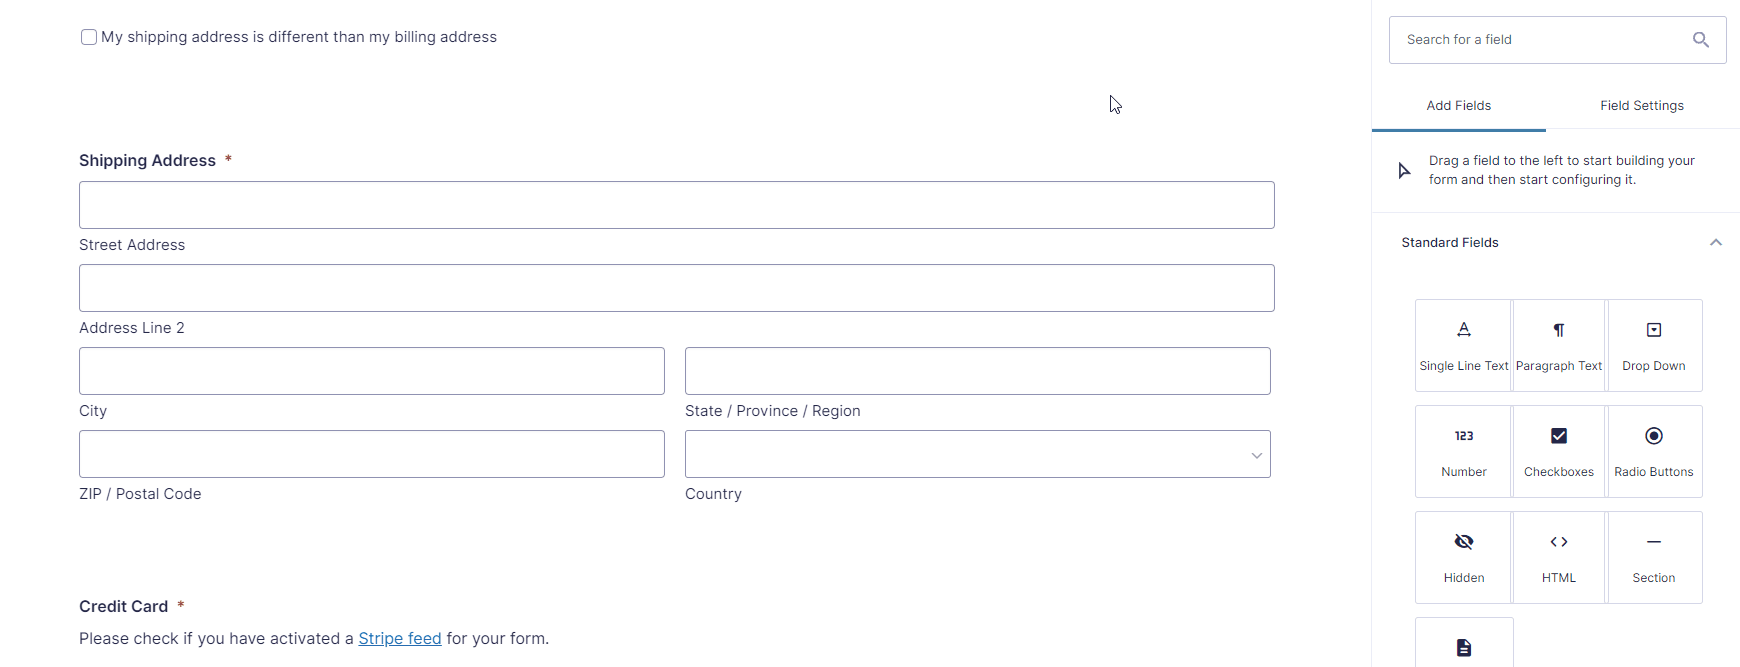
- Shipping
- Shipping Address
- Total
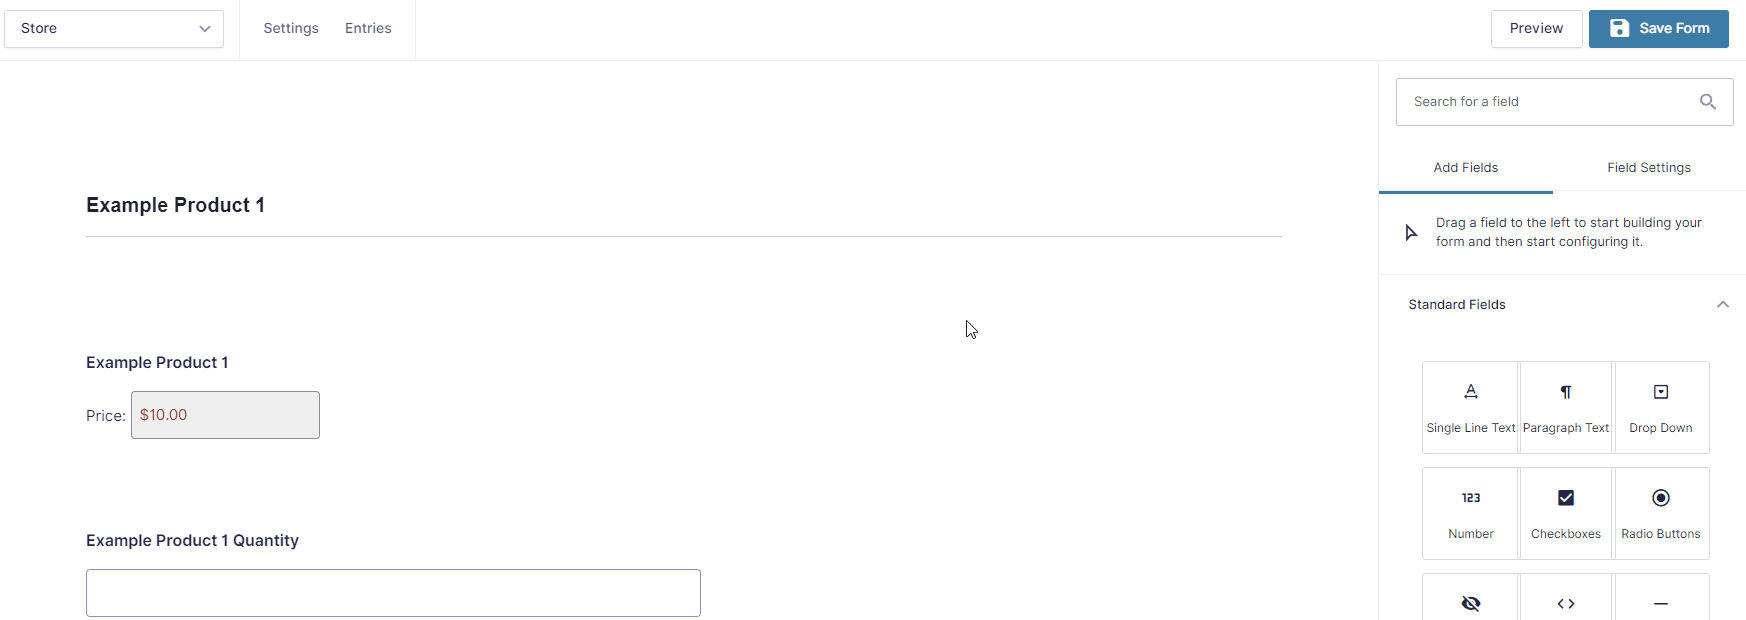
Add your products
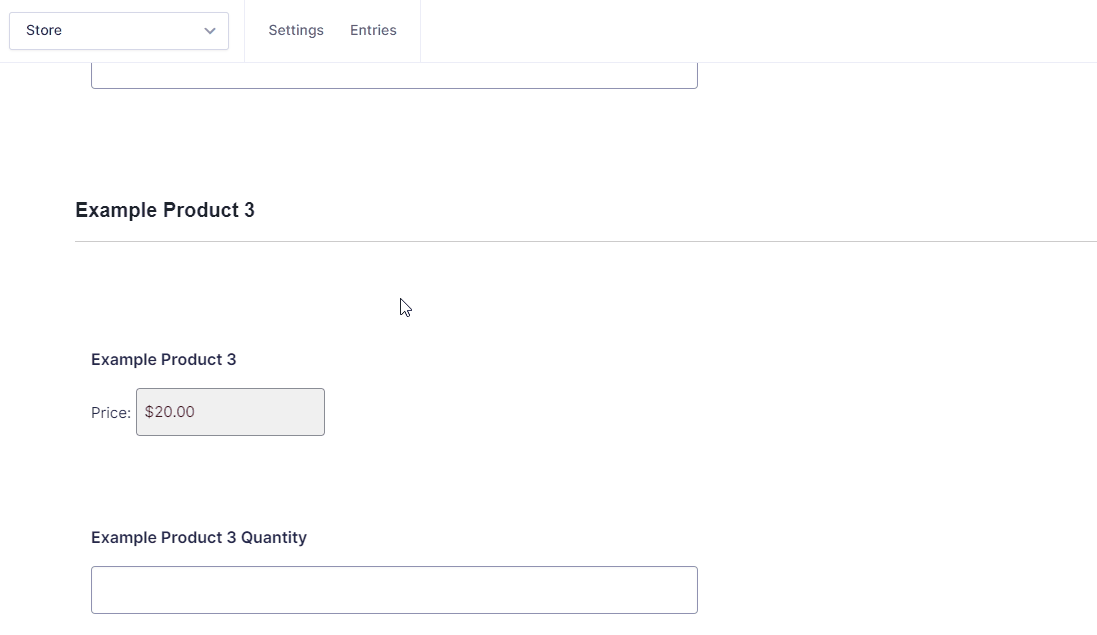
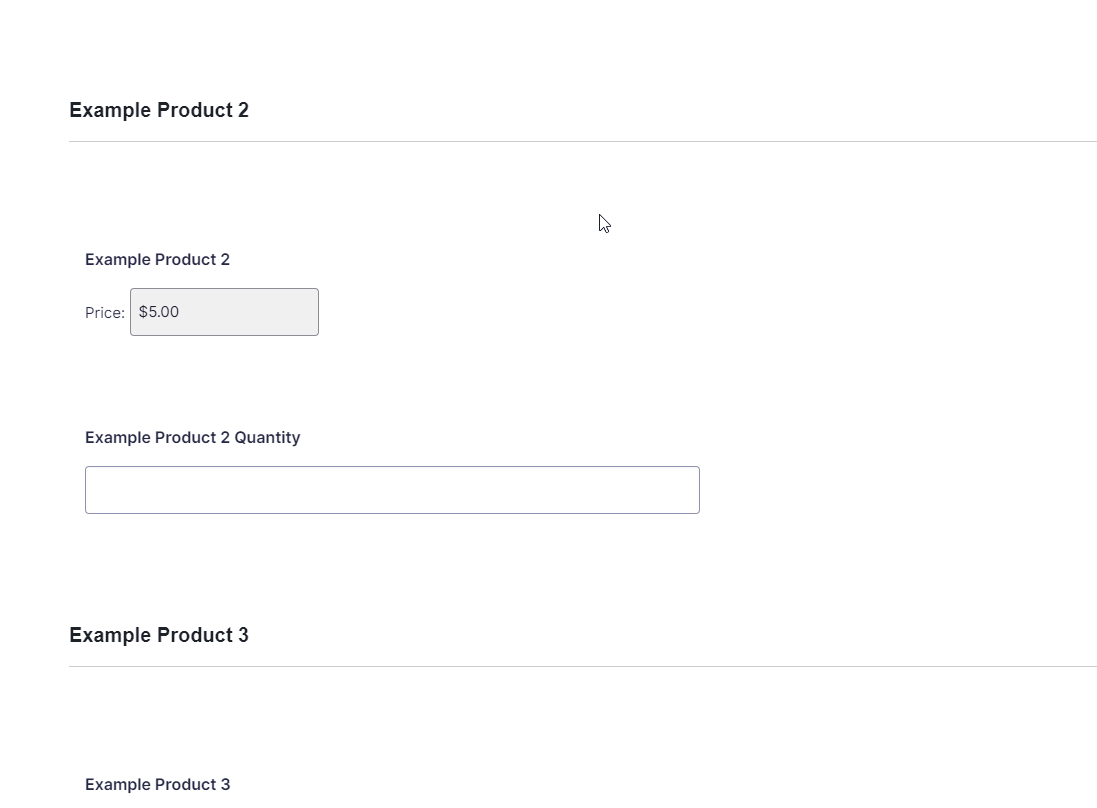
To add your products to the store, use the Example Product Fields. Each product should have:
Each field will need to be customized for the specific product.
Section field
This field serves as a heading for each product within the form. To edit the Section field, click on the field, then in the Field Settings on the right-hand side of the screen, update the Field Label to be the name of the product.
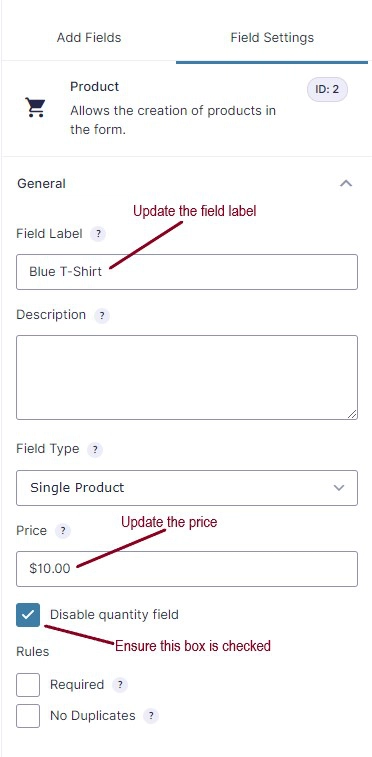
Product field
This field provides information on the product itself. To edit the Product field, click on the field then you’ll see the Field Settings on the right-hand side of the screen.
- Edit the Field Label to match the product name. This field should have the same field label as the Section field.
- Edit the Price.
- Ensure the box for “Disable quantity field” is checked.
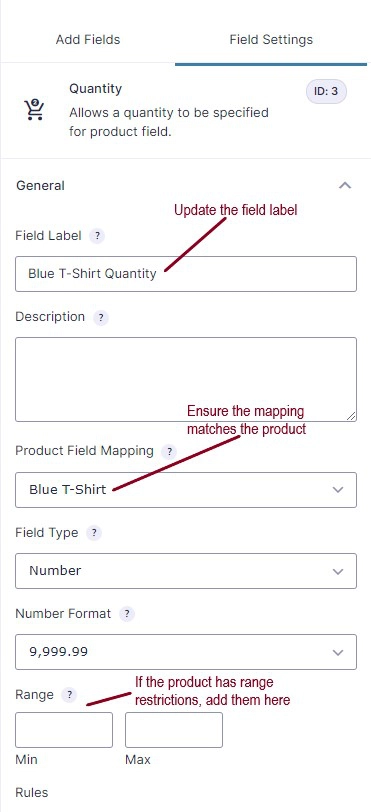
Quantity field
This field allows supporters to purchase more than one of the same products without completing the form multiple times. To edit the Quantity field, click on the field then you’ll see the Field Settings on the right-hand side of the screen.
- Update the Field Label to be the name of your product + “Quantity”.
- Ensure that the Product Field Mapping matches the correct product.
- If there is a minimum or maximum amount that one person may purchase, add those restrictions within the Range section. In most cases you can leave this blank or will only need to input a maximum amount.
Repeat this process for each product that you would like to sell.
If you have fewer than three products, you’ll need to delete the Example Product fields for all those that you have not updated. To delete a field, click the trash can icon in the top right corner and select “OK” within the pop-up that appears.
If you have more than three products to sell, duplicate product fields and make the same adjustments noted above to each of the three duplicated fields. To duplicate a field, click the icon that resembles a sheet of paper with a ‘+’ in the top right corner of each field.
You’ll want to ensure that each product has a Section, Product and Quantity field and that all fields have been updated in the ways indicated above to be specific to that product. To re-order form fields, drag and drop each field to group the fields for each product together.
Update the shipping fields
If you only ship purchases within the United States and do not ship your store products internationally, you’ll need to update the Shipping Address field accordingly.
To do so, click on the field. Within the Field Settings on the right-hand side of the screen, choose “United States” from the Address Type drop-down.
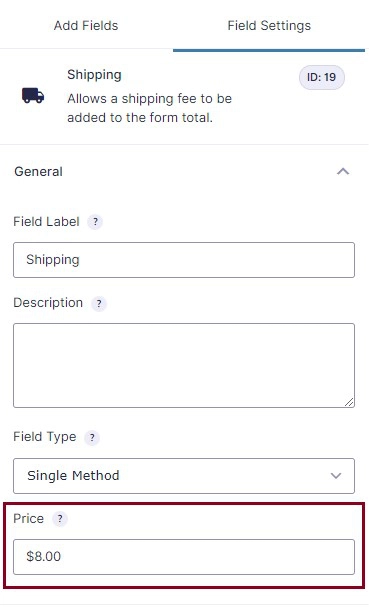
The Shipping field for the form template is set to a standard $8.00 additional shipping cost. If this cost is different for your nonprofit, you can adjust the amount within the field by clicking on the field and adjusting the Price within the Field Settings. If you’d prefer to offer multiple shipping options, you can also change the Field Type to use a dropdown or radio buttons, then modify the options accordingly.
Those updates should be sufficient for a standard nonprofit store form. To add other more complicated form fields, such as fields using conditional logic, Gravity Forms provides great documentation and tutorials on how to use the form tool.
You can also adjust the button text for the submit button. For example, instead of “Submit Your Order”, you might prefer “Make My Purchase”.
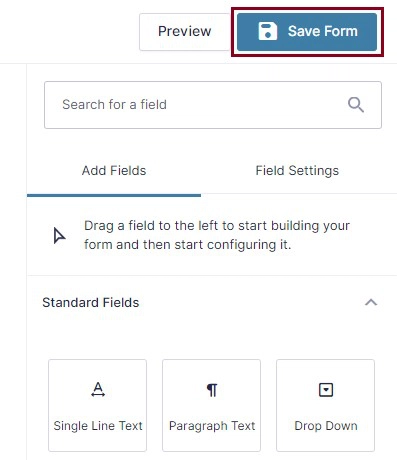
Once you are satisfied with the form fields, click the blue “Save Form” button.
Updating the Settings
Once all of your products are in place, you’ll want to update your form settings. Under Settings, you’ll find the following options: Form Settings, Confirmations, Notifications, Personal Data and Integrations (ie Mailchimp, Stripe, etc).
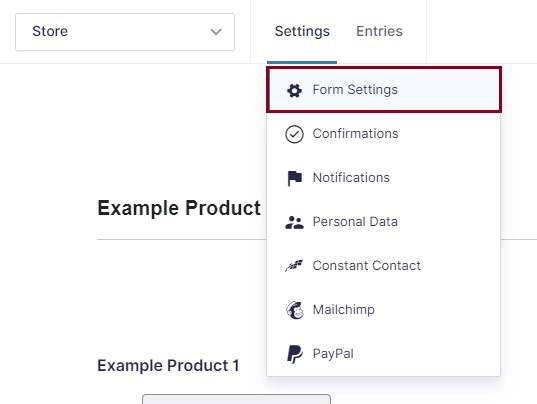
The Form Settings for your imported Store form allow for a few customizations for you to consider.
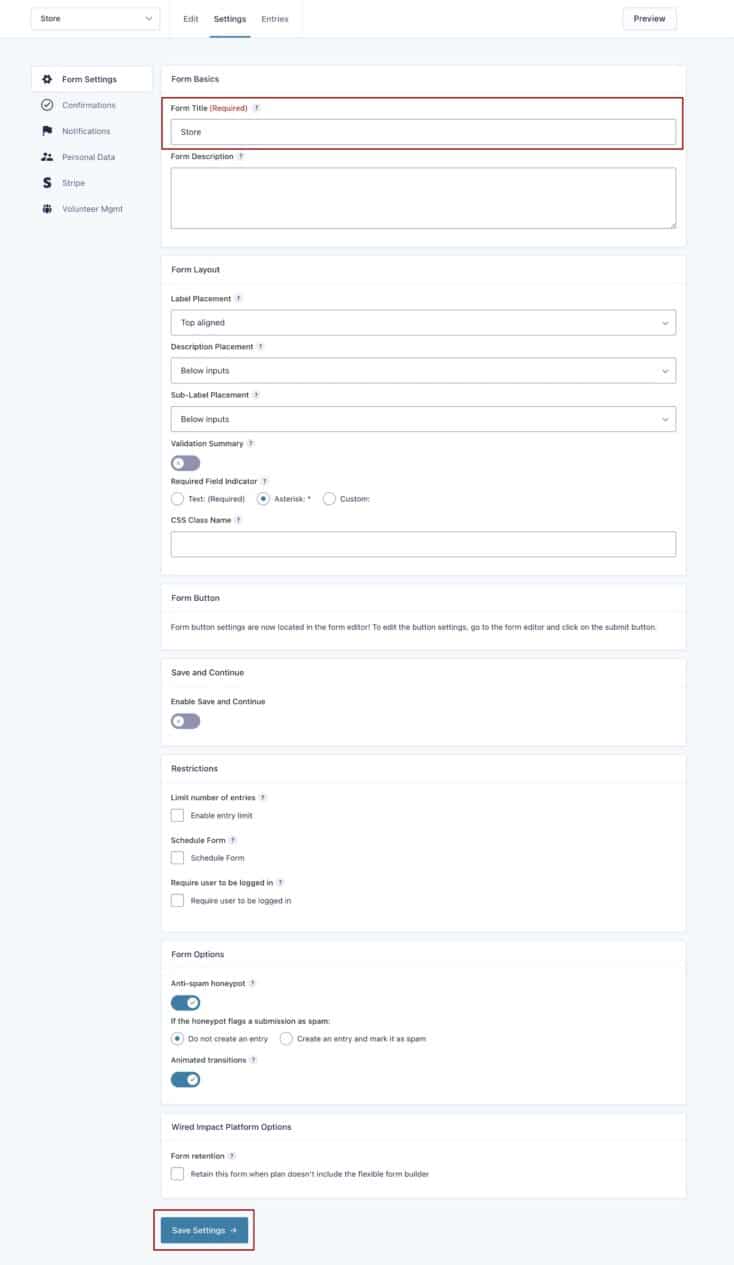
- If you would like to adjust the title of the form to be something other than “Store”, now is the time. You can choose to show the title above the form on your website, but we normally recommend you disable that option and use page content instead. Usually, it’s best to name the form something that makes it easy for you to find down the road.
- Once you’re satisfied with the Title and Button Text, click “Save Settings”.
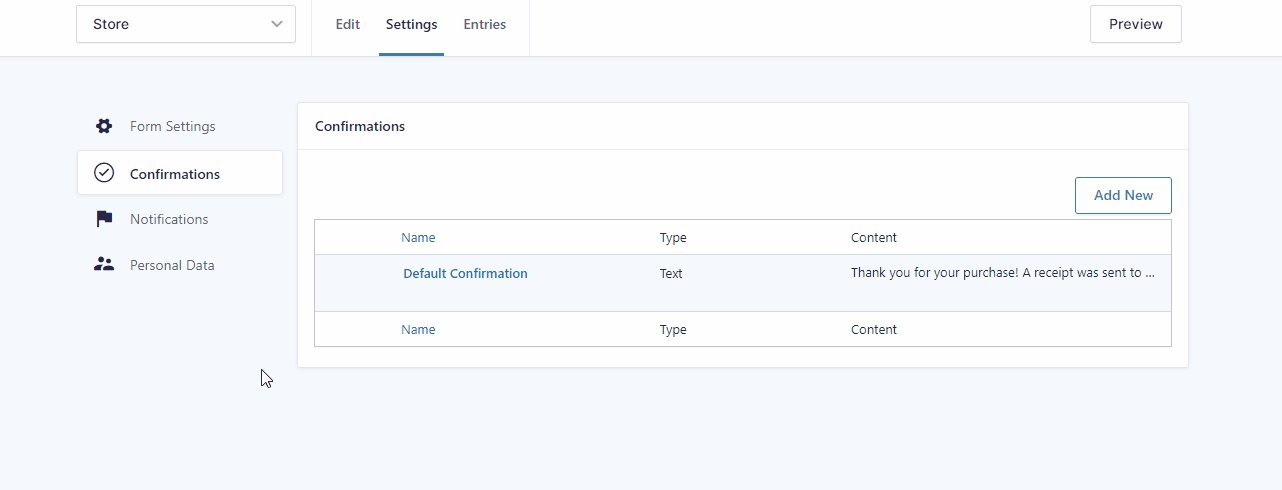
Set Confirmations
After someone submits an online form, they’ll expect confirmation that their order was processed successfully. There will be default confirmation text imported with your form that says:
“Thank you for your purchase! A receipt was sent to the email address you provided during checkout.”
While the default confirmation text works, we’d recommend using a Thank You page that the person is redirected to after completing the form.
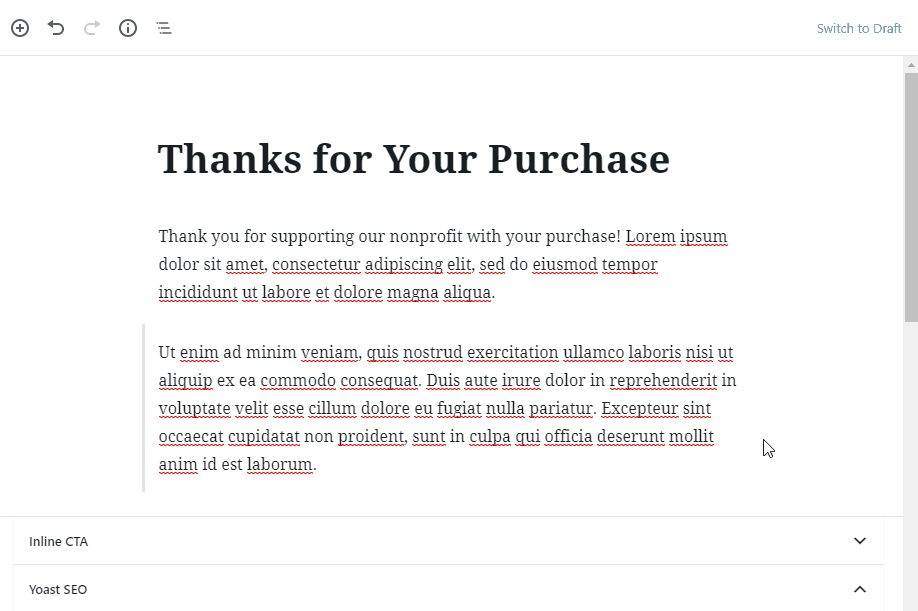
Create a Thank You page
Create a new page and name it something along the lines of “Thanks for Your Purchase”. Include content on the page that thanks your supporters and runs through any next steps, such as when they can expect their order to ship and that they will be emailed a receipt. You might also highlight other content and calls to action on your site that they may be interested in, such as your About Us, Donate or Volunteer Opportunities pages.
You’ll want to set this page to be “no index”. This means that the page will be blocked from search engine results and ensures that only visitors who complete the form will land on this page.
- Within the content editor for your Thank You page, scroll down to the section titled Yoast SEO.
- Click the Advanced tab at the very bottom of the page.
- Under “Allow search engines to show this Page in search results?”, select “No”.
- Click the blue “Update” button in the top-right corner of the screen.
To set your new Thank You page as the confirmation message for your form, go back into Confirmations within your form settings.
- Click “Edit” below the Default Confirmation.
- Next to Confirmation Type, select “Page”.
- Select the Thank You page you published earlier from the drop-down.
- Click “Save Confirmation”.
Set Notifications
Your team and the person who submitted your Store form should also get email notifications that the order was submitted successfully. You can do so through automated notification emails.
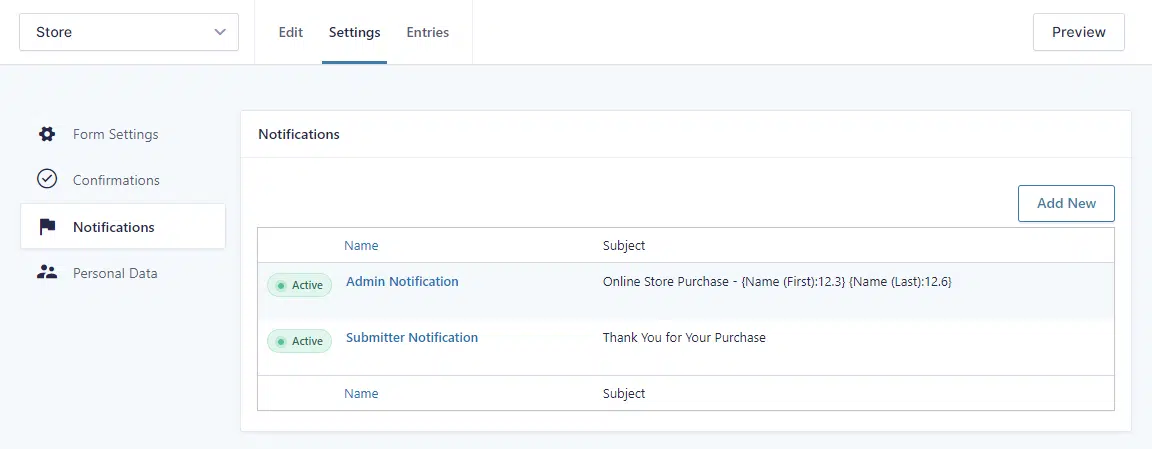
Set an Admin Notification
To set an admin notification to go to you or members of your team:
- Go to the Notifications tab within Settings.
- Under Admin Notification, click “Edit”.
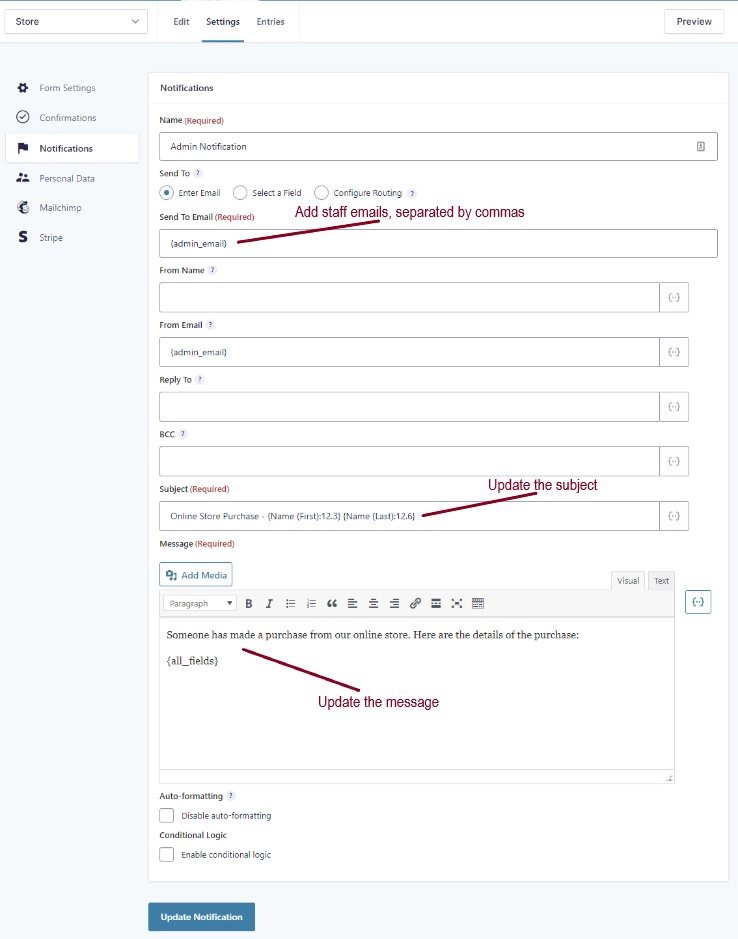
- Add to or update the Send to Email field to include all of the email addresses that Store form submission notifications should be sent to, separated by commas.
- If you’d like, you can adjust the Subject and Message fields based on your preferences. However, you’ll want to ensure that “{all_fields}” remains in the Message field to receive all of the purchase information.
Set a Submitter Notification
To set a Submitter notification, click “Edit” below the Submitter Notification.
- Within Notifications, click “Edit” below the Submitter Notification.
- Add a From Name for the email, such as the name of your organization.
- If you’d like, you can adjust the From Email to be different than the default admin email of your website. You can find the default “{admin_email}” used in the submission by going to the Settings section on the left-hand side of your screen and choosing “General”. The Email Address field displays your general site address on that screen.
- You might also wish to update the subject line for the email next to Subject.
- Customize the body of your email within the Message section. You can include any details on processing and shipping their order here. However, you’ll want to ensure that “{all_fields}” remains in the Message field so the purchaser receives all the order information.
- Don’t forget to save your notification by clicking the blue “Update Notification” button at the bottom of the page.

Add Integrations
Want your Store form to talk to the other services you use, such as a payment processor or email service? You’ll need to set up those integrations within your form settings.
Connect Your Payment Processor
To save yourself the hassle and liability of handling credit card information and payments, you’ll want to connect your form to your payment processor, such as Stripe or Authorize.Net. This connection between a form and a payment processor is referred to as a feed. See how to set up a new feed and connect it to your Store form.
Connect Your Email Service
If you’d like to connect your email service, such as Mailchimp or Constant Contact, you can set up another integration within the form to accomplish that. See how to connect your email service so that you can continue to build relationships with store shoppers down the road.
Add Your Form to a Page
Now that you’ve created your form and set up your notifications, confirmations and feeds, follow the steps below to add it to your Store page, test it and publish it.
- Open the page where the form will live and add it by using the Gravity Forms block.
- Select the Store form from the list of options.
- In the block settings, which appear in the right-hand sidebar, turn off the “Form Title” and “Form Description” settings.
- Preview the page to make sure it’s showing up in the right place.
Test Your Form
Follow steps to test your new form within the page preview. If everything looks great, publish your changes by using the blue “Publish” or “Update” button in the top right of the edit screen for the page.
View and Export Form Submissions
Once visitors begin to submit store orders through your website, you’ll be able to view and export that data for your records.
Still Have Questions?
The quickest way to get support is to reach out to us within your website’s admin dashboard. Log into your website and then fill out the Request Help form. You’ll hear back from us within one business day.