When you have important, evergreen information to share with your website visitors, use the library system to organize it into a single filterable list with individual pages for each item.
You might use the library system to:
- Connect families with guides and resources written by experts
- Educate advocates with research and impact reports
- Share a directory of trusted members or partners
Learn more about our library system and see it in action on our demo site.
FEATURE AVAILABILITY
The Library System is available for Amplify plan websites. Upgrade your plan in the Account & Billing section of your website Dashboard to unlock this feature.
Jump Ahead To
- When to Use the Library
- Where to Add a New Library Item
- Customizing a New Library Item
- Adding the Library Block to a Page
Helpful Terminology
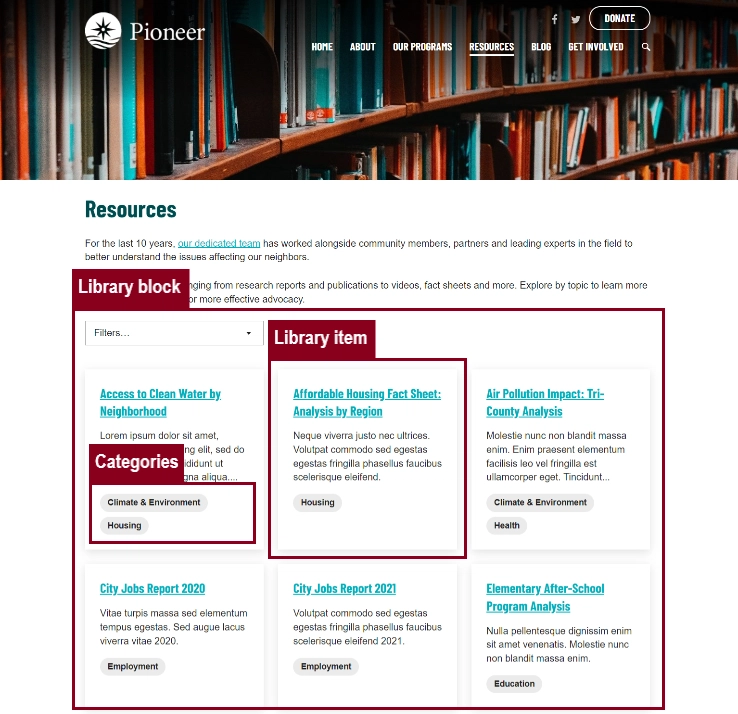
The library system is made up of a few components.
- A library item is the individual post with the details you want to share.
- Categories are assigned to each item to help keep them organized and allow users to filter them.
- The Library block pulls together all of your library items into a list for users to view and filter. The block can be added to any page of your website.
When to Use the Library
Unsure about when to use the library system instead of the blog? These features share some similarities, but there are key differences. For example, a blog is primarily organized chronologically while a library contains information that’s navigated mainly by category.
To help decide, try asking yourself a few questions:
- Have you heard from folks that they’re looking for this information on your website but are having a tough time finding it?
- Will this information still be helpful and relevant in six months?
- Is this an in-depth piece of content on a specific topic? Examples: multi-page document, webinar recording, presentation slides, etc.
- Do you need to provide a summary or background on the item, such as an abstract of an article/report or a detailed description of a partnership?
This isn’t a definitive list, but if you answered yes to these questions, keep reading to build out your library item. If the answers were no, you’ll probably want to post on your blog instead.
Where to Add a New Library Item
There are two easy ways to access your website’s library system. First, log into your website. From the Dashboard, look in the admin menu on the left side. Hover over “Library” and click “Add New Item” in the submenu.
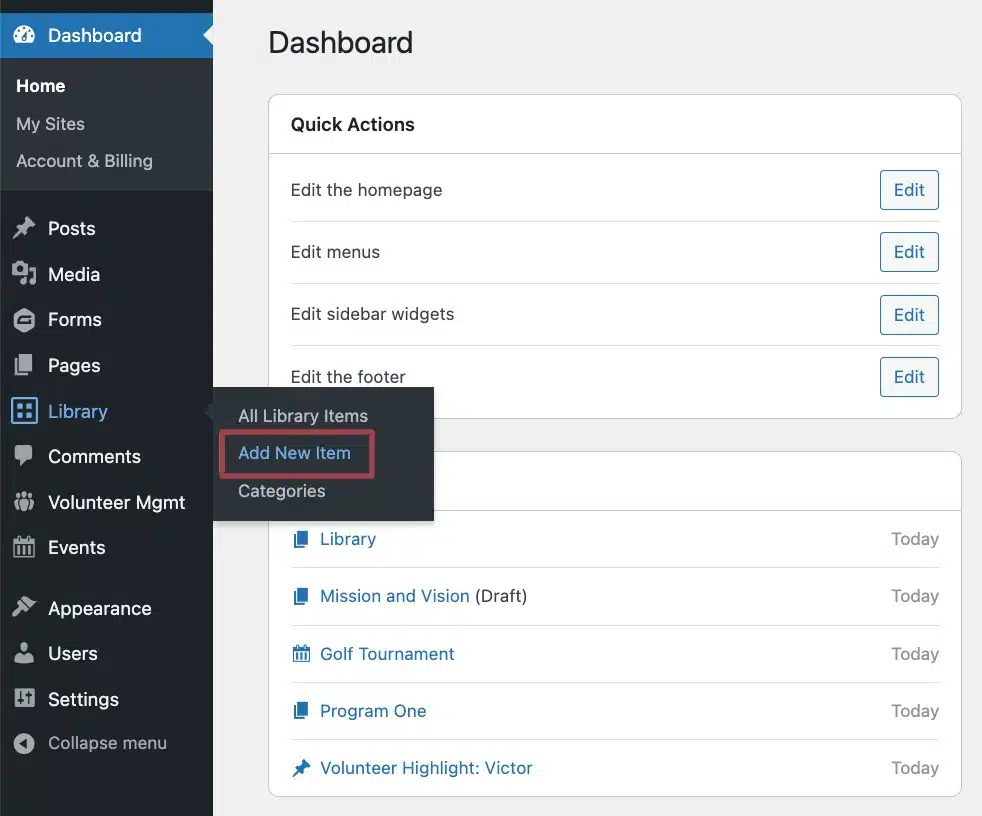
If you find yourself on the All Library Items page, you can add a library item by clicking “Add New Item” next to the Library Items page title.
The Library Items page shows you all of the published or draft items and their categories.
Customizing a New Library Item
Once you’ve created a new item, you’ll want to build it out by adding content and adjusting any settings as needed.
Add a title and category
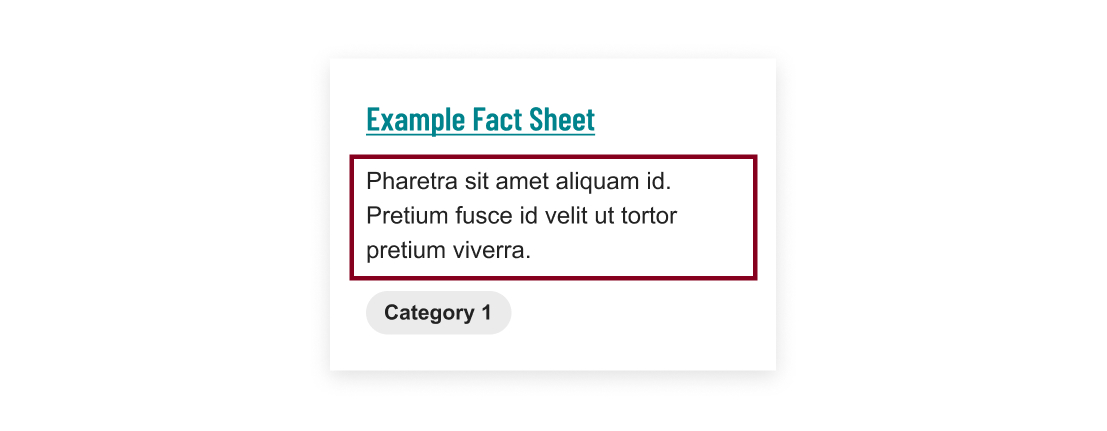
Start by giving your item a title. This should be the name of your resource, report, guide, etc.
Avoid lengthy titles whenever possible. If you have a subtitle or an excerpt, there is a space for that information.
Library items can be grouped together in categories to make it easier for visitors to find what they’re looking for when filtering. To add an item to a category:
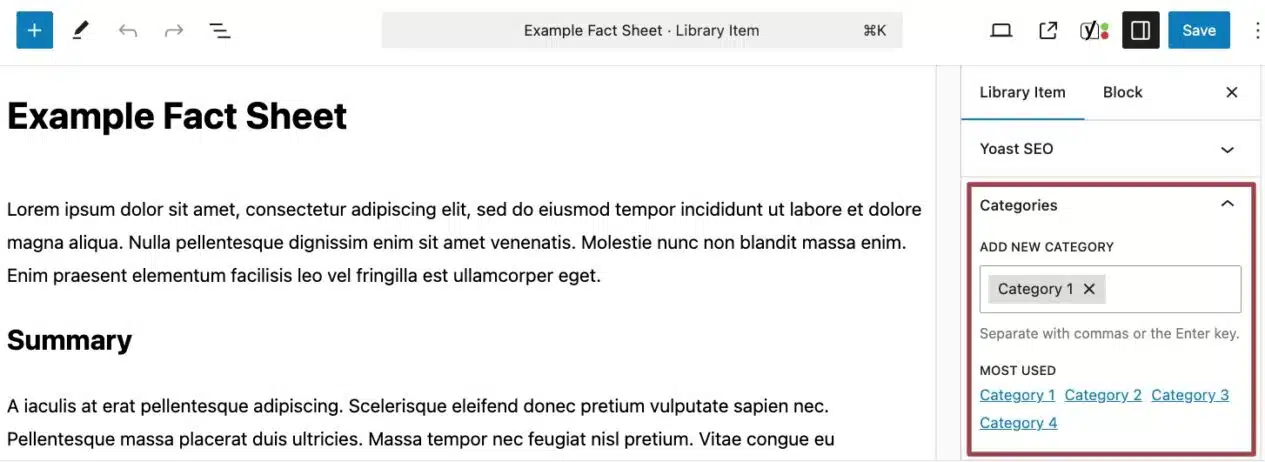
- Locate the Categories panel of the Library Item settings on the right-hand side of the editor.
- Begin typing the name of the category in the Add New Category field.
- If a category by that name already exists, it will show up as a suggestion. Click to add the category.
- For an entirely new category, type out the full name of the category and hit “Enter”.
- You can add multiple categories for an item when needed.
- Once a category has been added, you’ll see it listed in the Add New Category field. Click the “X” to remove a category.
To see a full list of categories and manage them in one place, click on the “Categories” link in the admin menu on the left side. This is a great place to go if you realize you have duplicate categories!
Add and format your content
Include any helpful information about your library item in the large editor area below the title.
You can use different blocks like you would when formatting a page. Don’t forget to use our block patterns for a head start!
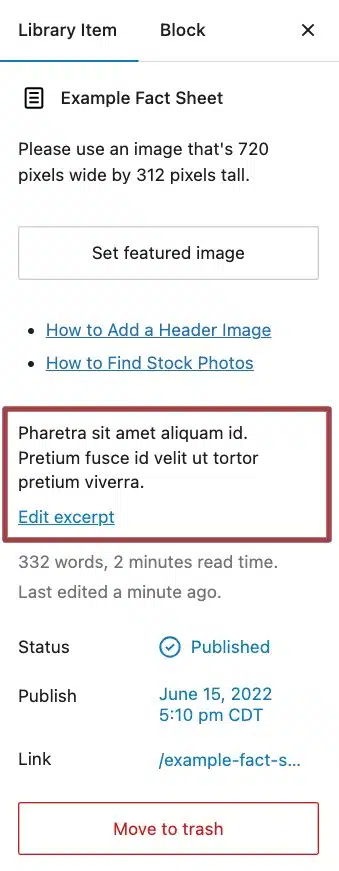
You can also add a featured image if you have one. Locate the Featured Image panel of the Library Item settings on the right-hand side of the editor. Be sure to crop your image to use the recommended dimensions for your theme.
Customize the excerpt
There are two options for controlling the snippet that’s shown as a preview for each item in the list of all library items.
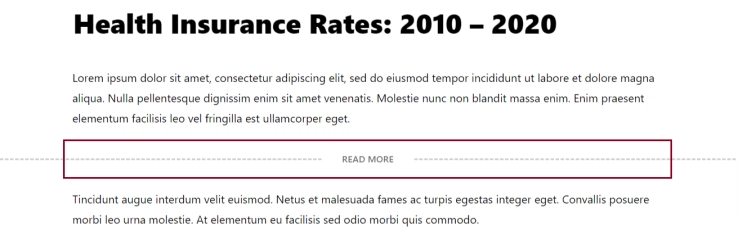
Add the More block
Adding a More block to the first sentence or two of content creates a short and simple excerpt.
- Determine where you want to cut off the text for the excerpt. It needs to be at the end of a Paragraph block.
- Add a More block. You might need to search for it.
- You’ll see a dotted line with the words “READ MORE”. This line will not be visible in the published item.
Write a Custom Excerpt
If the first few sentences of content isn’t the best summary of the library item, you can write your own excerpt.
- Locate the Excerpt section of the Library Item settings on the right-hand side of the editor.
- Add your excerpt by clicking the “Edit excerpt” option.
Add a meta description
In the Yoast SEO section at the very bottom of the page, add a meta description to serve as a short summary of your library item for search traffic.
Preview and publish the item
Preview your new library item by clicking the laptop icon in the top right-hand corner. Make any changes you’d like and continue previewing until you’re satisfied. You can also save the in-progress library item as a draft and come back to it later.
Then, click the blue Publish button in the top right-hand corner of the page. Your new library item is live!
Once published, the item will automatically show up in your library. If you haven’t done so already, you may need to add the Library block to a page, as outlined below.
Adding Library Items to a Page
Once you’re finished building out your library items, you’ll want to add them to a page using the Library block.
- Go to the page where you’d like to showcase your library items. You can use a page with or without a sidebar.
- Click the (+) symbol in the upper left corner and search for Library.
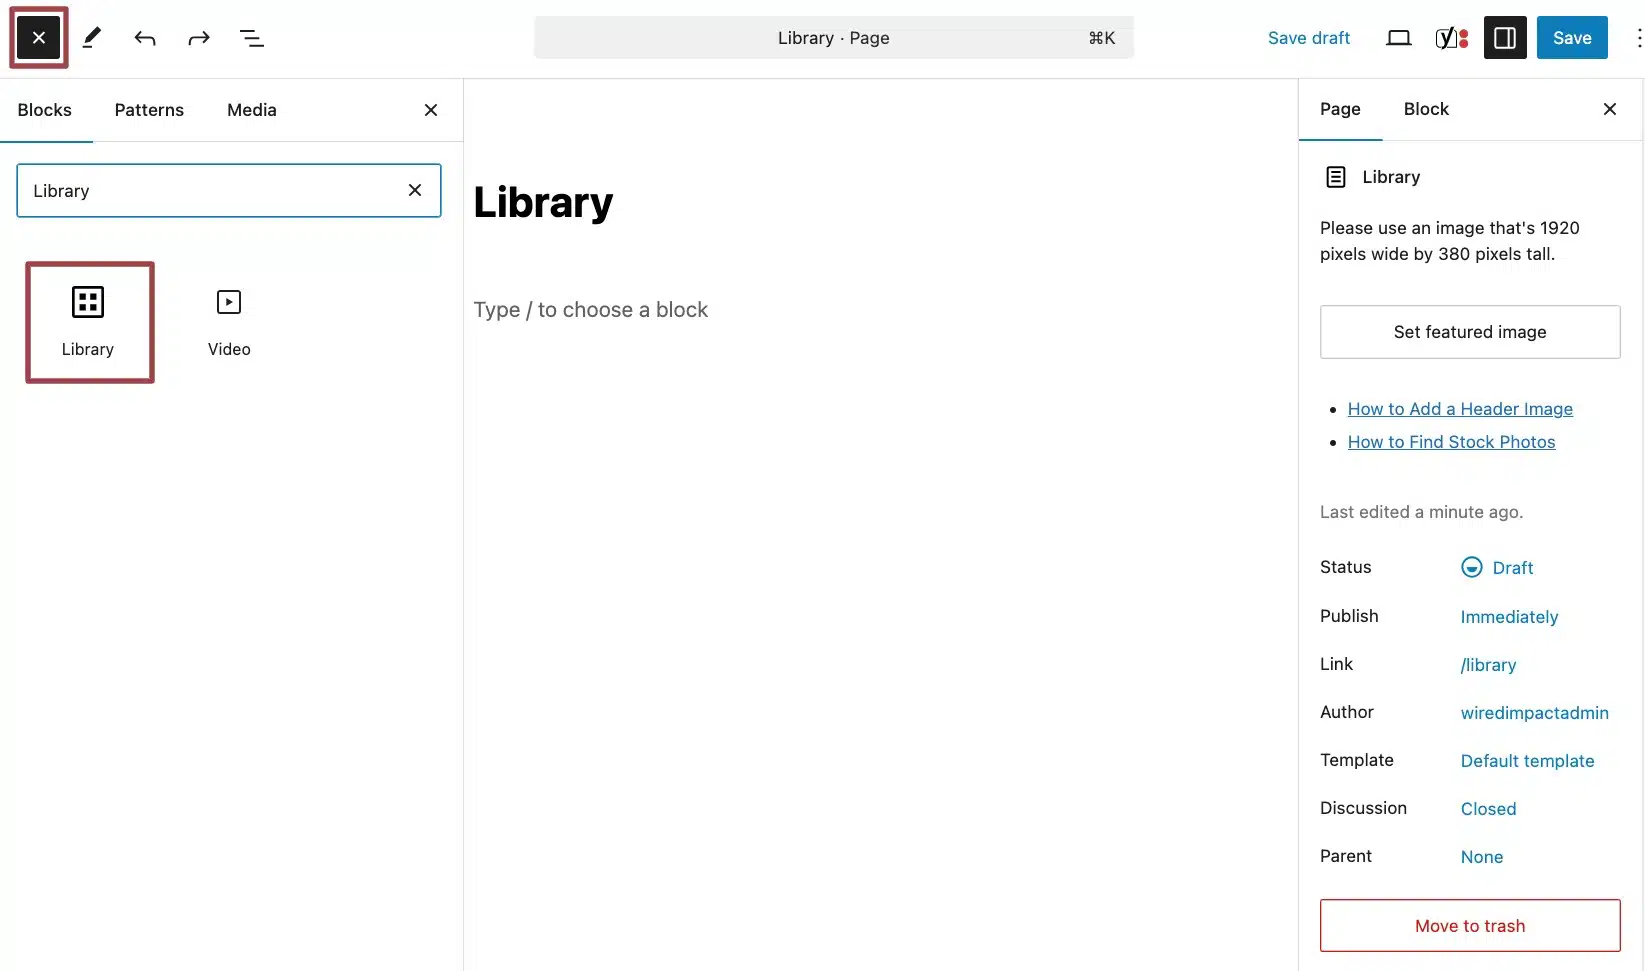
Once the block has been added, it will automatically display published library items in alphabetical order. Up to 18 items will be shown by default with the option for users to load more at the bottom.
Make sure you preview the page. Once everything looks good, save your changes by clicking the blue Publish or Save button in the upper right corner.
Still Have Questions?
The quickest way to get support is to reach out to us within your website’s admin dashboard. Log into your website and then fill out the Request Help form. You’ll hear back from us within one business day.