To keep your blog fresh and engaging, it’s important to regularly publish new posts. In this article, you’ll learn how to create, customize, and publish or schedule a blog post on your website. Once you get the hang of it, creating a new blog post will be a fun and easy way to reach your supporters with the latest news.
For more advice on managing a blog, like how to plan your posts with an editorial calendar, be sure to check out all our blogging tips. You can also find a treasure trove of blog post ideas in our free guide!
Helpful Terminology
- Unlike creating a new page, which can be added anywhere on your site, a new post will only appear on your website’s blog. This is also sometimes called the “Posts Page”.
- The sidebar is an area of a post that displays information that is not part of the main content. The sidebar is usually a vertical column on the right side of the post.
- A category is assigned to each post to help keep your blog organized by topics that your readers might be interested in.
- The featured image is the main photo associated with the post. It displays as the header image at the top of a post and along with a summary of your post on the main blog page.
- A meta description is a brief summary of a post’s content that may be displayed in search results so users know what the post is about.
How Do I Add a New Post?
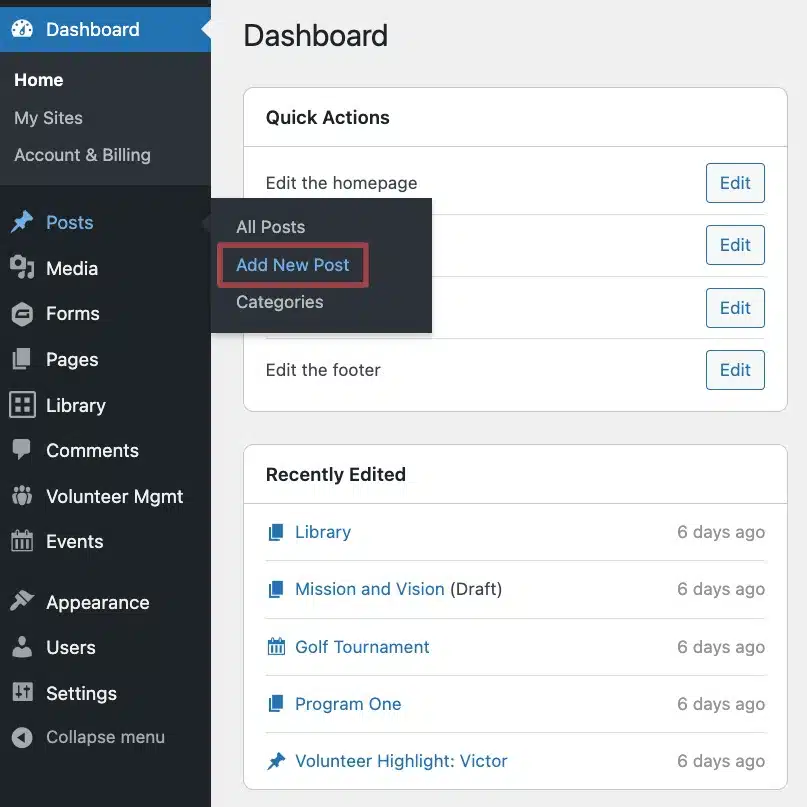
Once you’ve logged into your site, you’ll be looking at your site’s Dashboard. The easiest way to create a new post is to hover over the “Posts” item on the left-hand side and click “Add New Post”.
Customizing a New Post
Once you’ve created a new post, you’ll want to build it out by adding content and adjusting any post settings as needed.
Adding content
- Start by giving your post a title.
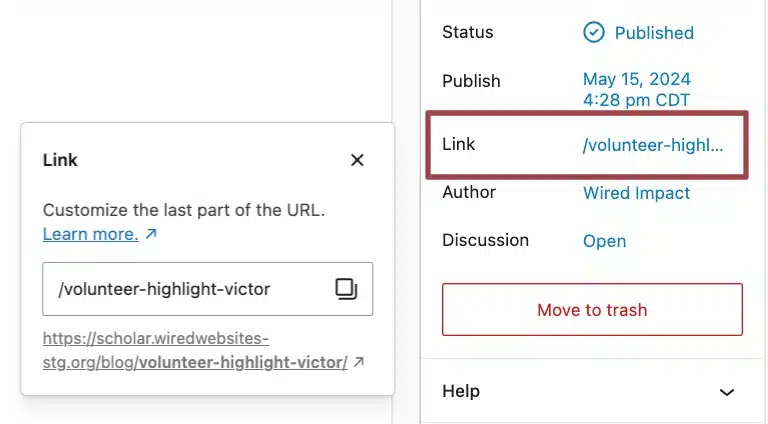
- In some cases, you may want to remove words like “a”, “the” or “and” from the URL. To update a post’s URL, find the “Link” field on the right-hand side of the editor in the Post settings.
- Now it’s time to write your post!
- To avoid starting with a blank page, use the Page Writer to help write your blog post. Answer a few quick questions and the Page Writer will generate a first draft of your post in minutes.
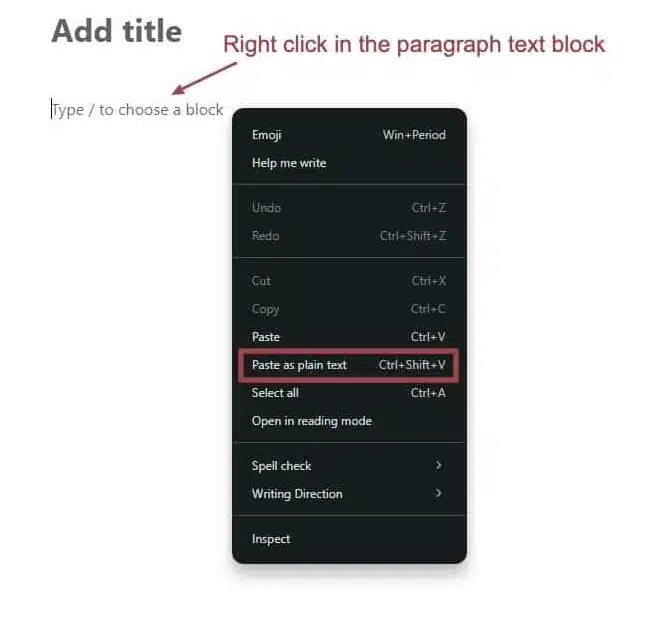
- You can also copy and paste content from an external source, such as a Microsoft Word document or Google Doc. To avoid formatting issues, right-click and use the “Paste as Plain Text” or “Paste and Match Style” option, depending on your operating system.
Check out our Formatting Text on a Page or Post article for other helpful tips.
Adjusting post settings
From there, review the Post settings on the right side of the editing screen.
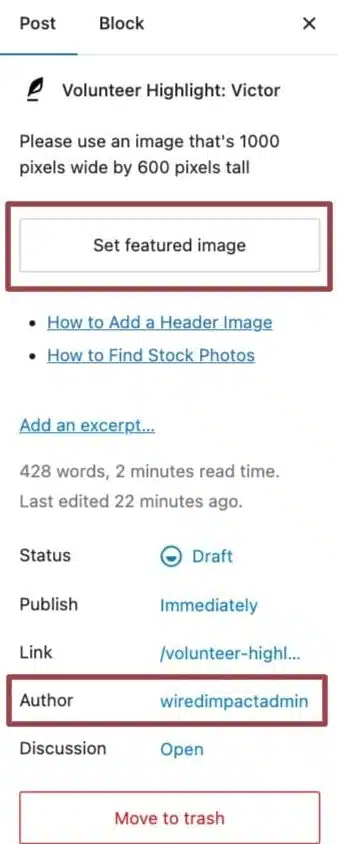
- Add a header image, if you have one. Click the “Set featured image” button to upload an image or select one from your media library.
- It’s best to crop this image to the correct size before uploading it to your site. The recommended dimensions are noted directly above the “Set featured image” button.
- If you don’t add an image, the published post will simply not show this section, and your post won’t have an image associated with it when it shows on places like the homepage or main blog page.
- Select the correct author for your post. Authors are determined by your Users settings. Learn more about adding guest authors.
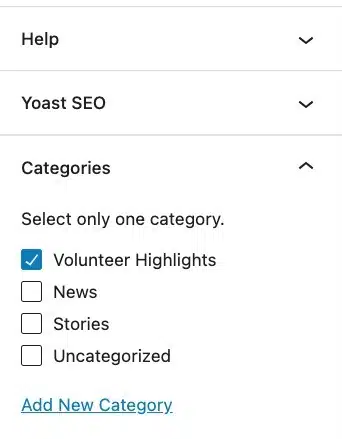
- Select an existing category for your blog post or create one by clicking the “Add New Category” link.
- Try to assign your post to only one category — the one that will be most helpful for visitors to find the information they’re looking for.
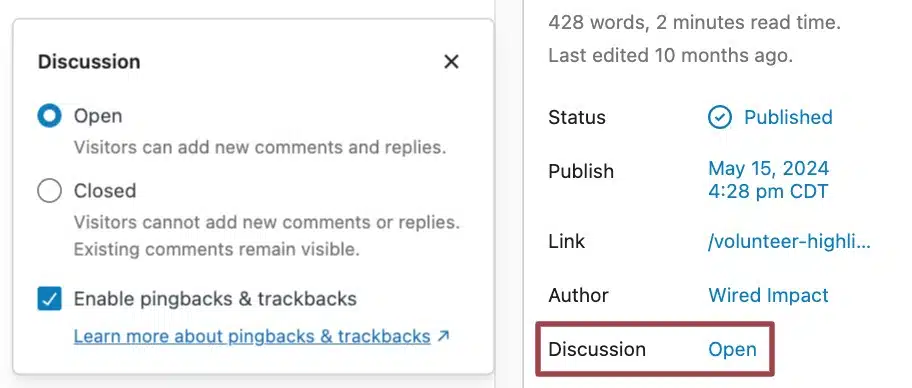
- If you’d like to open or close comments on this specific post, you can do that under Discussion. Learn why we typically encourage comments.
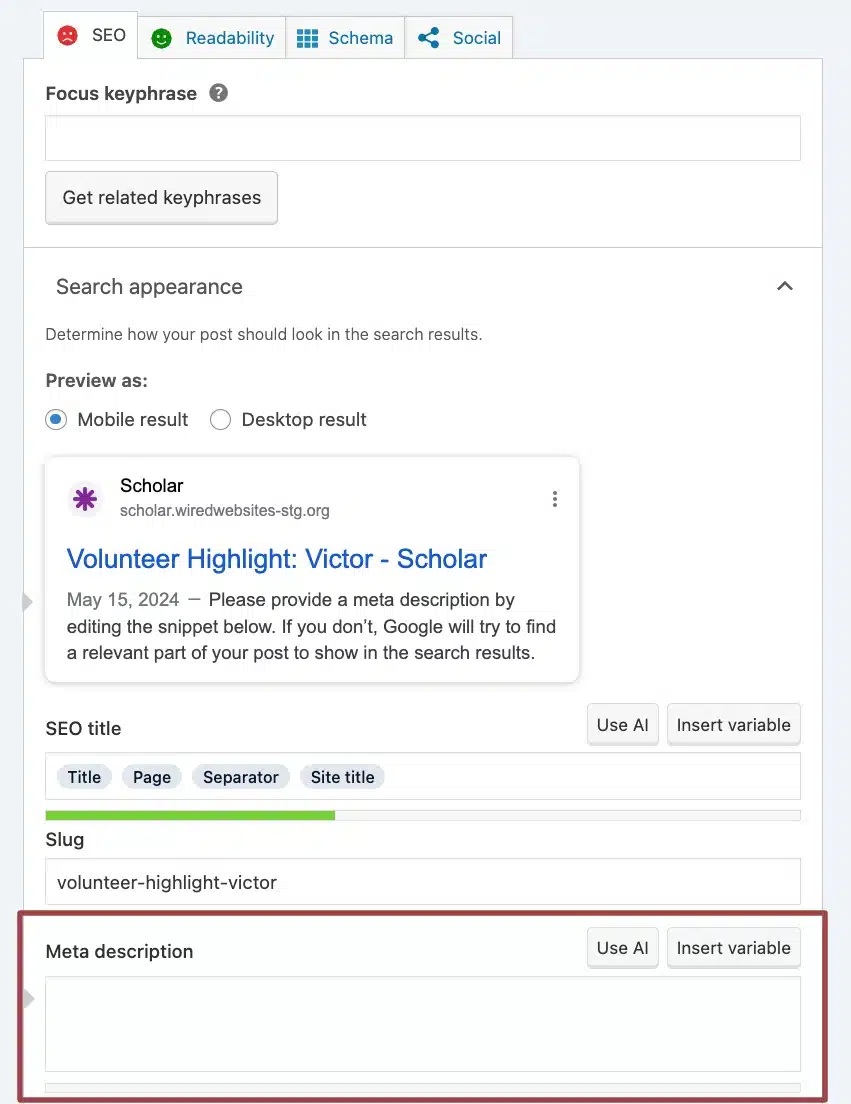
Add a Meta Description
In the Yoast SEO section at the very bottom of the page, add a meta description to serve as a short summary of your post for search traffic. Get tips for writing meta descriptions.
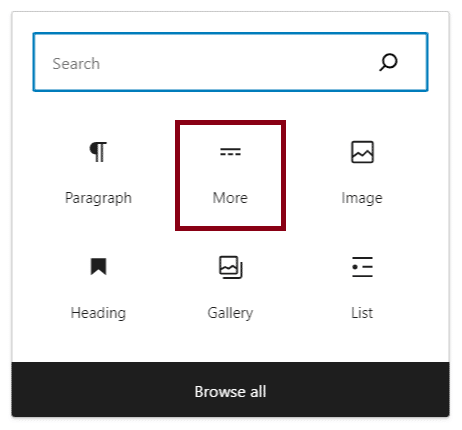
Add a More Block
Add a More block after the first few sentences of your post to create a short and simple excerpt. This excerpt appears in areas where your blog posts are displayed on the site, such as the homepage and the main blog page.
- Determine where you want to cut off the text for the excerpt.
- Click “Add block” and select the More block. You might need to search for it.
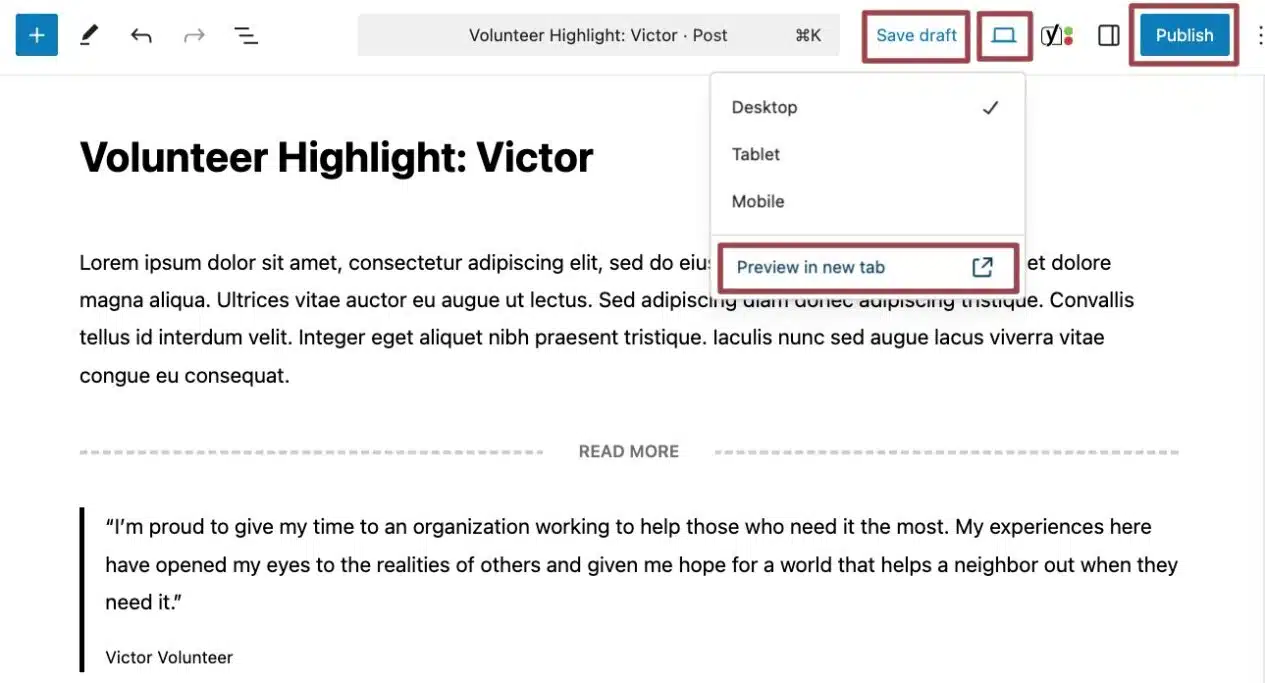
- You’ll see a dotted line with the words “READ MORE”. This line will not be visible in the published post. Here is an example of how the Read More tag appears when editing a post:
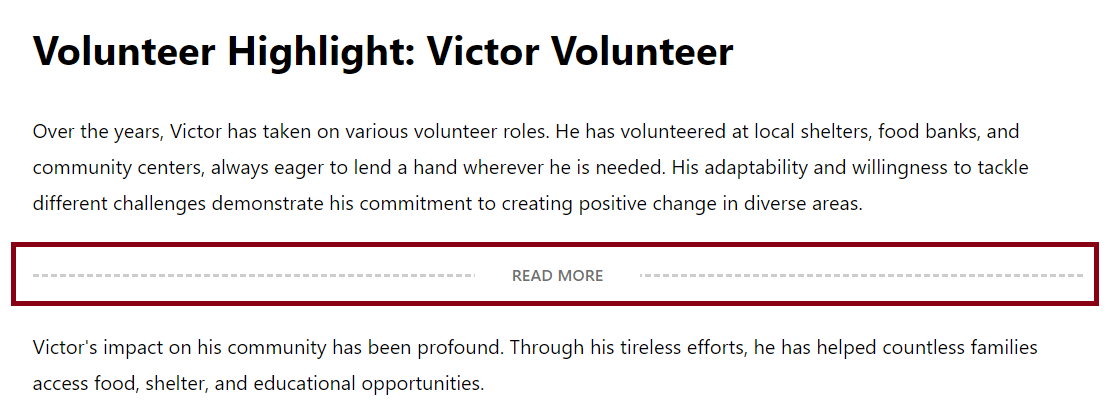
This is what an excerpt looks like on the main blog page of a site using the Pioneer theme.

Publishing a Post
Once you’ve added your content, adjusted your settings, and added a meta description, you can:
- Preview what your post looks like by clicking the laptop icon. We recommend the “Preview in new tab” option to get the most accurate preview of your new post.
- Save the post as a draft if you’re not ready to share it with visitors yet.
- Click the blue “Publish” button to make the post live and publicly accessible.
- Schedule the post to be published at a later date and time.
Schedule a post
If you don’t want your post to publish immediately, you can schedule the blog post to publish at a future date and time. The post will not be live or publicly accessible until it is published.
- In the Post settings, find the Publish option and click where it says “Immediately”
- Choose the date and time you’d like the post to be published.
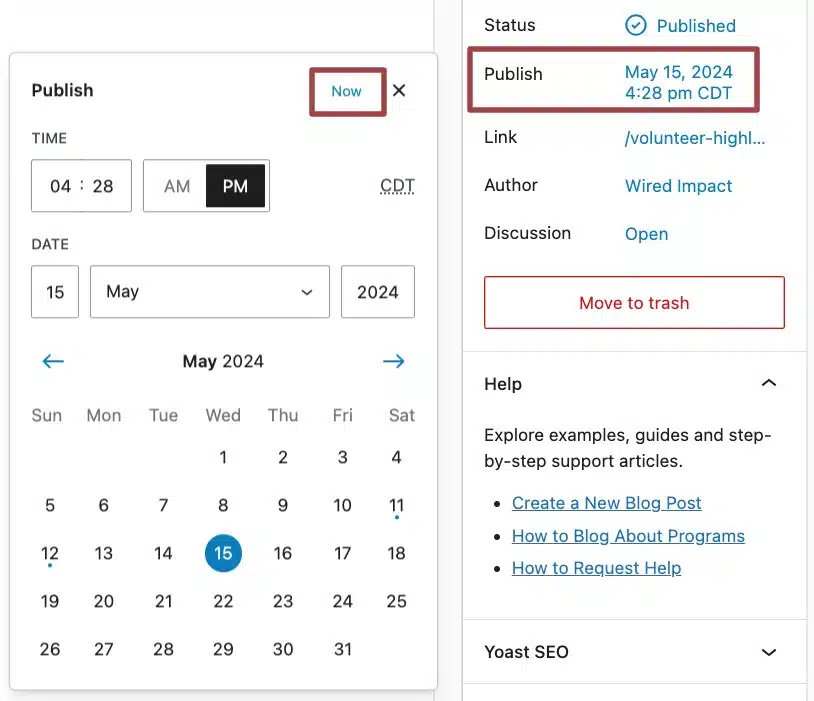
- Instead of a blue Publish button, you’ll now see a Schedule button in the top right-hand corner of the page. Click this button when you’re ready to schedule the post.
If needed, you can also use this method to backdate a post so it looks like it was published in the past.
Still Have Questions?
The quickest way to get support is to reach out to us within your website’s admin dashboard. Log into your website and then fill out the Request Help form. You’ll hear back from us within one business day.