Sponsors and partners are the backbone of many nonprofits. Whether they are like-minded organizations, funders, or corporations, it’s a great idea to showcase these supporters on your website in a way that’s consistent and easy to manage.
One of the best ways to visually highlight them is to add their logo to your site. Not only does this help show your appreciation for their support, but it also entices other companies to reach out and become partners. Use the Logo block to add them on a page, post, or event without the headache of trying to get them to look evenly spaced and aligned.
Adding Logos to a Page
Whether it’s an event sponsored by multiple companies, a blog post stating the impact of your partners, or a Partners page highlighting these relationships, you can quickly add and arrange multiple logos using the Logos block.
- Log in to the back end of your site.
- Go to the Page, Post, or Event you’d like to add the logos to.
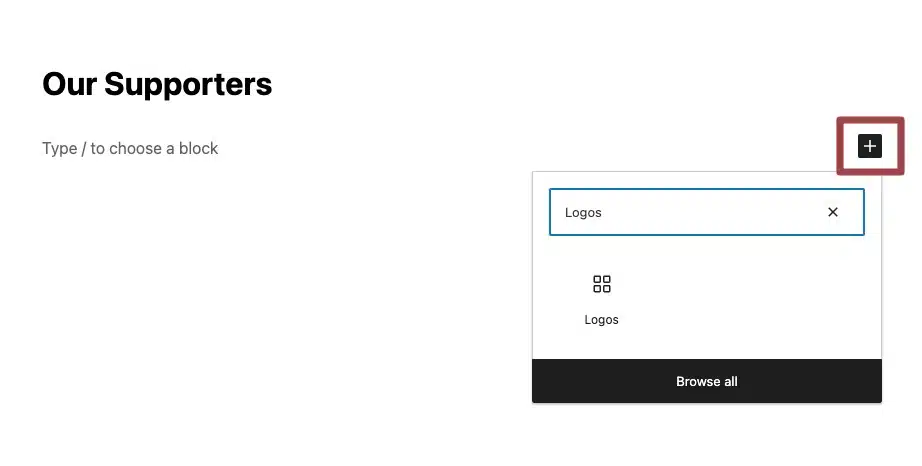
- To add the Logo block, click the + symbol in the upper left corner and search for “Logos”.
- Another option is to locate the position on the page where you’d like to add the logo, click “Add block” and choose the Logos block.
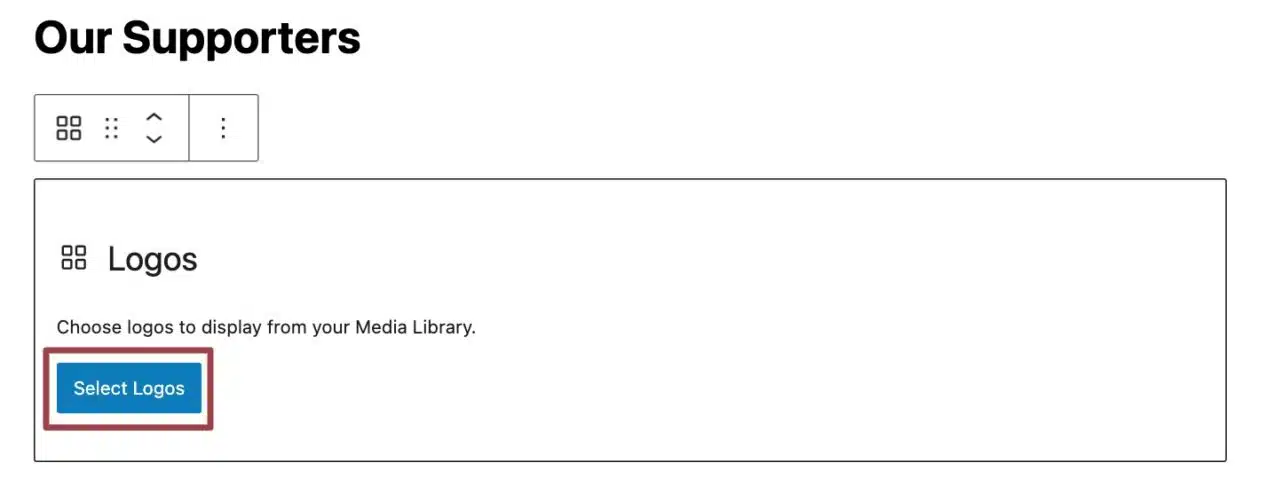
- Once the block has been added, click “Select Logos” to begin. This will take you to your Media Library where you have the option to choose an image that’s already been uploaded, or you can upload an image from your computer.
- Make sure to use an image that’s at least 114 pixels tall.
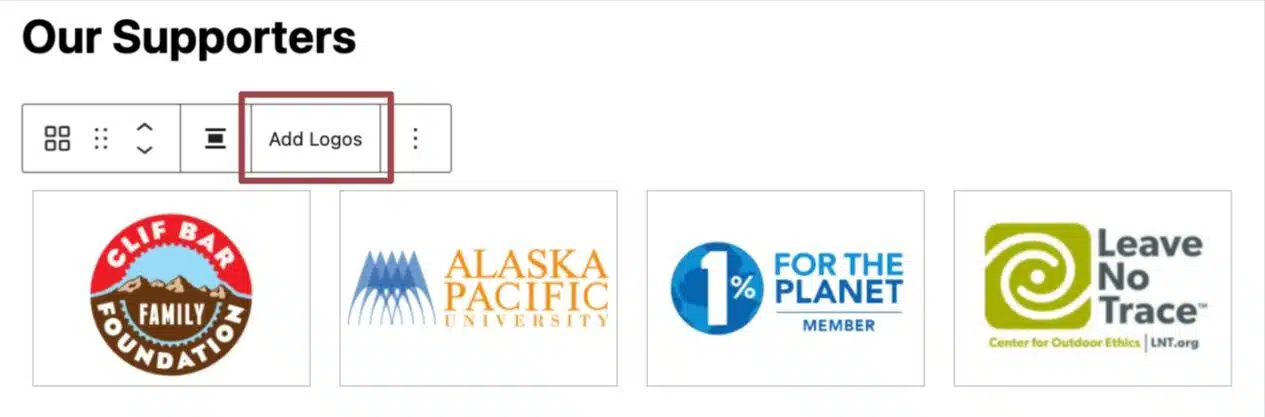
- Add more logos by clicking on the “Add Logos” button in the block toolbar.
- Note: If your page has a sidebar, each row will have a maximum of four logos before it breaks into a new line. If your page is full-width (no sidebar), the maximum will be six.
- If you want to rearrange the logos, select the logo you want to move and use the left and right arrows in the toolbar.

- You also have the option to adjust the alignment as needed by clicking the Align icon on the toolbar and selecting left, center, or right.

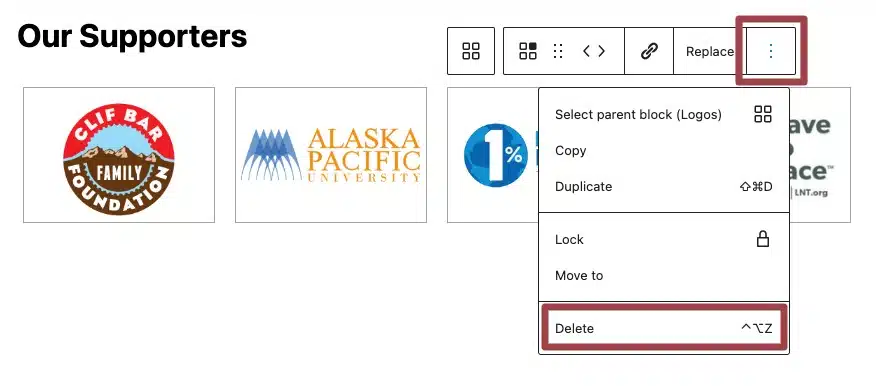
- To remove a logo, simply select the logo you want to remove, click the three vertical dots in the block toolbar to access more options, and select “Delete.”
- Make sure to click the blue “Update” button to push your changes live.
Linking Logos
To link an individual logo to go to a related page or external website, follow the steps below.
- Click on the logo.
- In the block toolbar, click on the Link icon.
- Add the URL. If linking to an external website, the link will automatically open in a new tab when clicked.
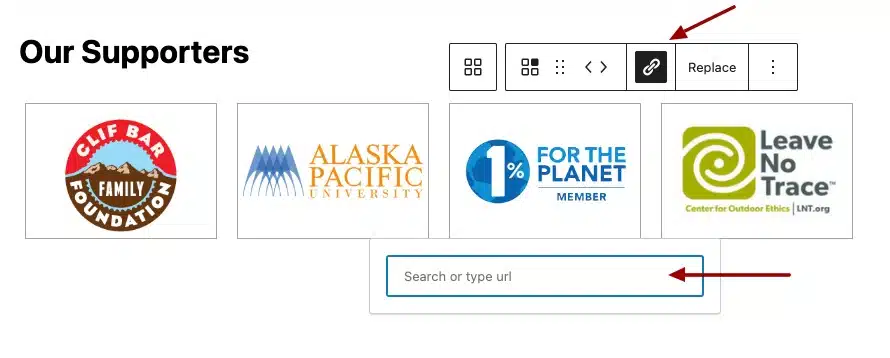
- Click the blue “Update” button to push your changes live.
Still Have Questions?
The quickest way to get support is to reach out to us within your website’s admin dashboard. Log into your website and then fill out the Request Help form. You’ll hear back from us within one business day.