Blog comments give you the opportunity to connect with your readers on a personal level, as well as the opportunity to foster deeper relationships with people interested in your organization. When you follow the best practices for moderating blog comments, they can be used to build relationships with your readers. We’ll walk through how to access and make changes to blog comments on the backend of your website.
How to Moderate Blog Comments
There are a number of different ways to moderate blog comments through your website.
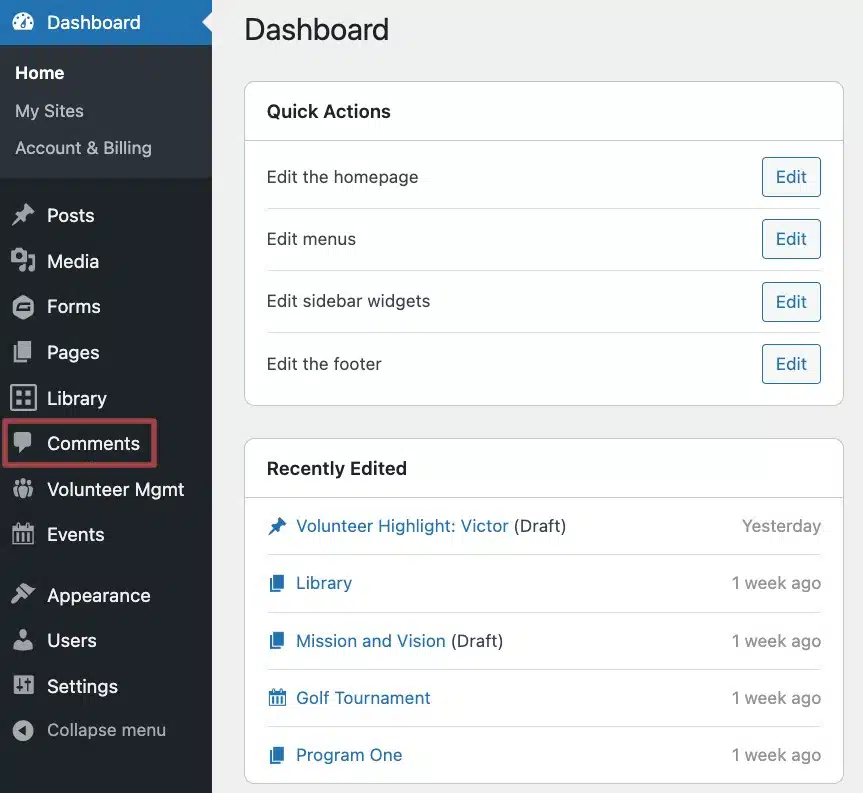
Make sure you’re signed in to the back end of your website and head over to the Comments section in the left-hand admin menu.
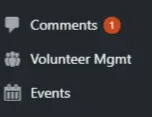
Note: when you have a new comment(s), you’ll see the number of unread notifications in the left-hand admin menu next to Comments. Below is an example of what this looks like.
At the top of the main Comments section, you’ll see six different folders: All, Mine, Pending, Approved, Spam, and Trash.

While they are all pretty self-explanatory, the one that might give you pause is “Mine,” which only shows you the comments you made. It’s also important to note that a comment can reside in numerous folders. For example, a comment that you made would be in the All, Mine and Approved folders.
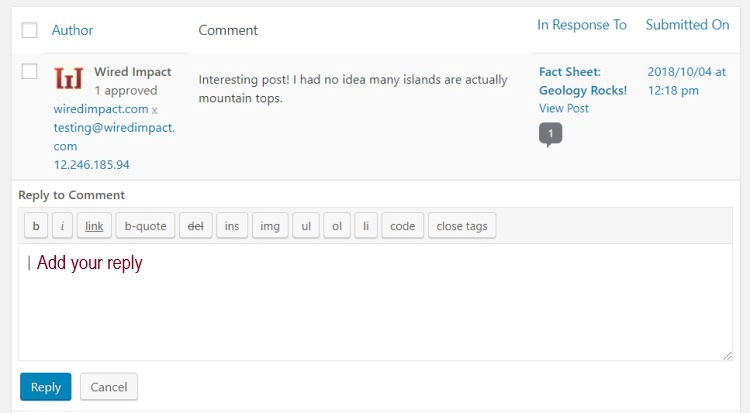
Approve comments
After you’ve had the chance to read the new comment(s), you can hover over a specific comment to see what actions you can take. These include: Approve, Reply, Quick Edit, Edit, History, Spam, and Trash. For new comments, you’ll typically choose between Approve, Spam, or Trash.
Once approved, you’ll be able to reply.
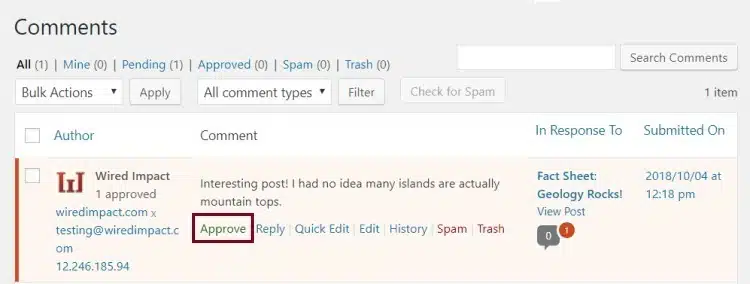
In the likelihood that you’ve got more than one blog post, you can reference which post the comment is in response to by clicking “View Post.” Knowing that can help you decide which action to take.

If you want the comment to show on the blog post, simply click “Approve.” It will appear at the bottom of the post page.
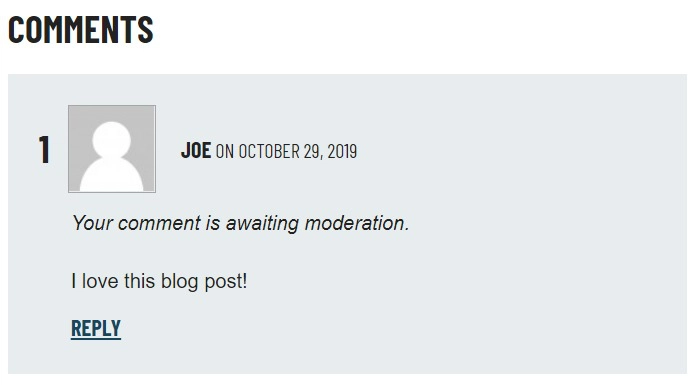
Note: while comments are awaiting approval, the submitter will see the message “Your comment is awaiting moderation.” Once it’s been approved, the comment will show as normal, without the message.
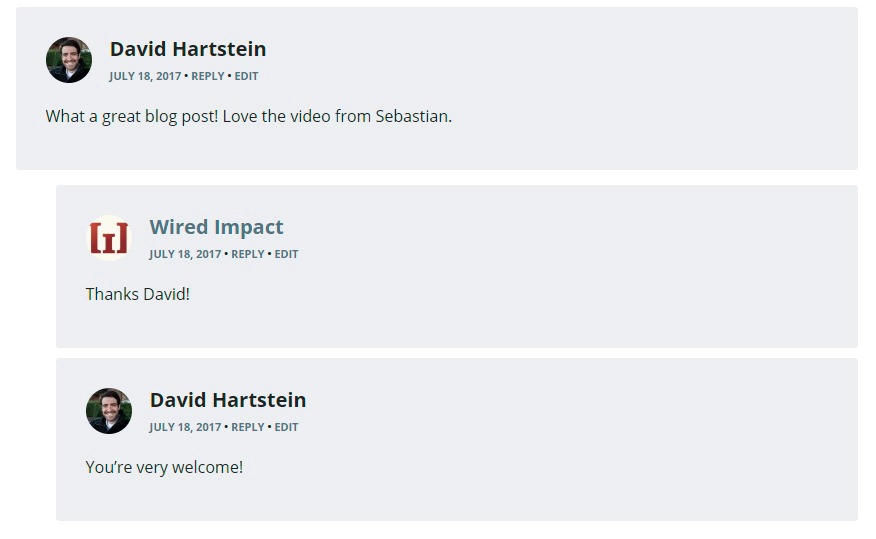
Reply to comments
Once you approve a blog post comment, it’s best practice to respond to it. When you click “Reply,” a box underneath the comment will pop up where you can type out your response. Within that window, you’ll have options to format the text in different ways such as:
- Bold
- Italics
- Links
When the response is complete, click “reply,” and it will automatically show up underneath the comment.
Edit comments
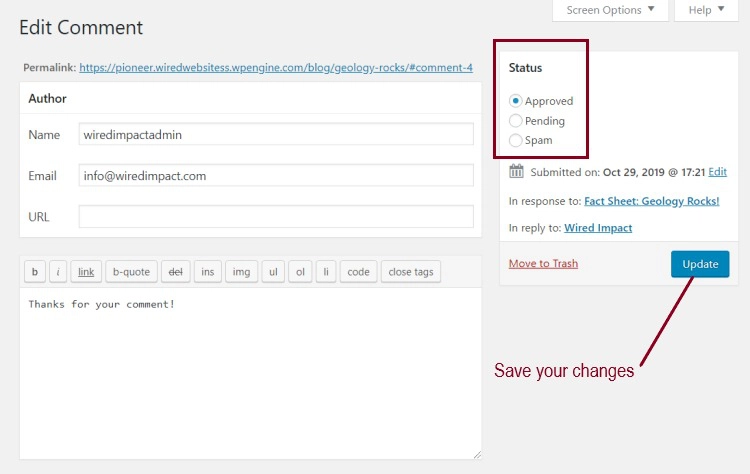
If you need to edit a comment for whatever reason, there are two options. The first being “Quick Edit,” which will allow you to edit the message and the information (name, email address and URL) without leaving the main Comments section.

If you click “Edit,” you’ll be able to edit the same information, but on a different page. This page will also show you the history and the status of the comment. The status indicates whether the comment is approved, pending or spam. Also, it notes when it was submitted, which post it’s in response to and, if it’s a reply to another comment, who it’s in reply to. Make sure for either option, “Quick Edit” or “Edit,” you click the “Update” button to ensure your changes are saved.
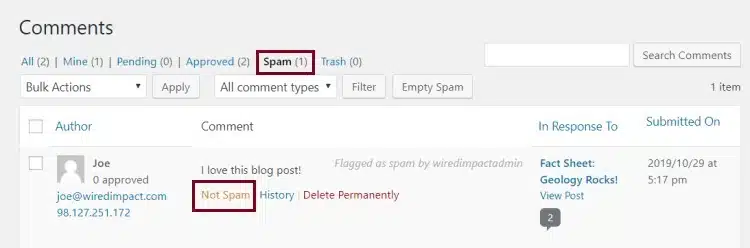
Marking a comment as spam
If you mark the comment as spam, the comment moves from the “All” folder and into the “Spam” folder and will not be published on your website. Once you mark a comment as spam, the commenting system uses that information to mark similar comments and users as spam moving forward.
If you ever need to unmark a comment as spam, you can do so by going into the “Spam” folder and clicking “Not Spam.” This will move the comment out of the “Spam” folder to the “All” folder.
Trash a comment
Lastly, you can “Trash” a comment. Clicking this will move the comment to the Trash folder, deleting it from your system. If you made a mistake in trashing a comment, you also have the option to restore it from within your “Trash” folder for 30 days. If it’s not moved out of the “Trash” folder, it will be deleted permanently at that time.
Bulk actions
You also have the option to perform “Bulk Actions” on multiple comments at one time. While in the “All” Folder, these actions include the following:
- Unapprove
- Approve
- Mark as Spam
- Move to Trash
Pings
Within the “All”, “Mine” and “Pending” Folders, you’ll also see a type of comment called a “Ping”. Pings are links to your blog posts from other websites. Rather than publishing them on your website, it’s best practice to go ahead and move those to the trash once you’ve noted the external link for your records. Within those three folders, you have the option to filter comment types by Comments or Pings.
Now that you have these tools, go forth and moderate!
How to Turn Blog Comments Off
Want to turn off blog comments on a specific post? There’s an easy way to do that.
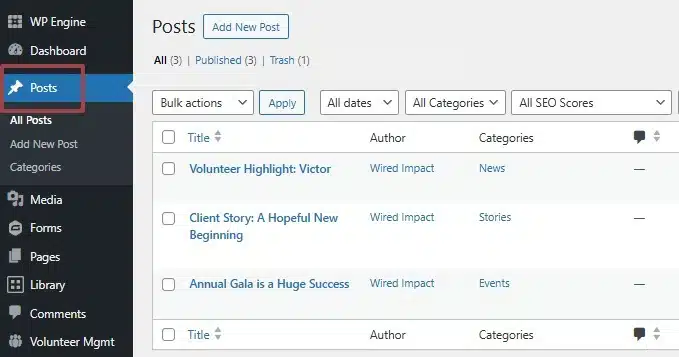
- Click the Posts section in the left-hand admin menu.
- Click the blog post that you want to turn off the comments on. If it’s a new post, create it by clicking “Add New.”
- Once in the post, click the “Discussion” field on the right-hand side of the editor under the Post settings. Then, select the “Closed” option.

- Click the blue “Save” or “Update” button to save your changes.
Still Have Questions?
The quickest way to get support is to reach out to us within your website’s admin dashboard. Log into your website and then fill out the Request Help form. You’ll hear back from us within one business day.