Do you have superstar supporters willing to fundraise for your nonprofit? Building a Start a Fundraising Campaign form on your website allows you to collect the necessary information on supporters willing to run their own fundraising campaigns and to collect donations for your nonprofit.
FEATURE AVAILABILITY
The Form Builder is available for Grow and Amplify plan websites. Change your plan in the Account & Billing section of your website Dashboard.
To help you get on the right track with less work, use our Start a Campaign form template. The base template includes the following fields, and you can customize it to fit your needs.
- First and Last Name
- Email Address
- Phone Number
- Mailing Address
- Campaign Name
- Campaign Description
- Fundraising Goal
- Start and End Dates
- Photo Upload
Once you have supporters signing up to run fundraising campaigns, consider setting up a donation form for these individual campaigns so they can easily collect donations specific to their campaign.
Jump Ahead To
Upload the Start a Campaign Form Template to Your Website
To make things easy for you, we’ve created a Start a Campaign form template that you can use as a starting point for your new form. In order to use the template, you’ll need to save this page as a JSON file (this will be the default file type). To save the page, you’ll right click and select “Save as” from the drop-down menu.
Once you’re signed in to the back end of your website, head over to the Forms section on the left-hand side of your screen.
- Under Forms, go to “Import/Export”.
- Select “Import Forms” on the left.
- Choose the WI Start a Campaign Form Template JSON file that you saved previously and click “Import”.

Edit the Start a Campaign Form
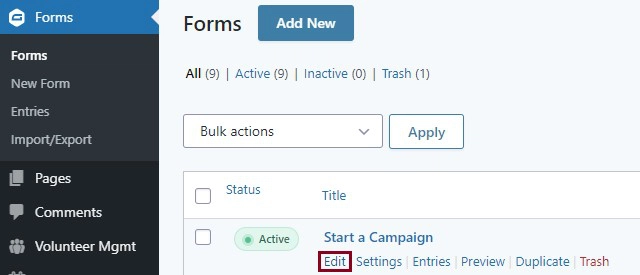
Once the form is uploaded, you’ll see a notification on the top of the page confirming a successful upload and the option to edit the form. If you click out of this screen, don’t worry! You can go to “Forms” and click “Edit” below the newly imported Start a Campaign form to make changes.
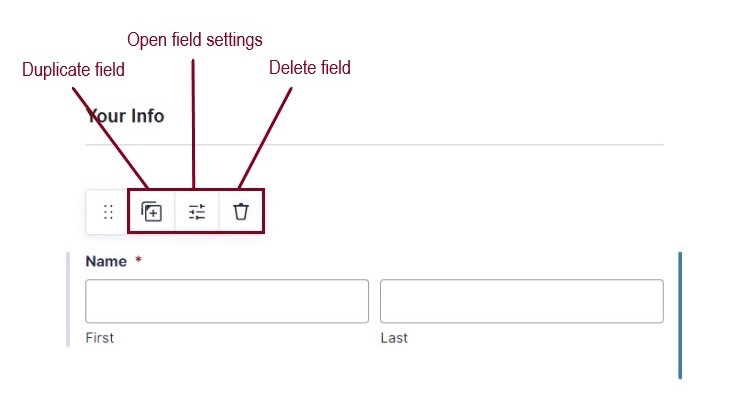
To edit the settings within individual form fields, click on the field you’d like to adjust. The Field Settings should expand to the right. You can also click on the Settings icon directly above the field.
Within that same menu above the selected field, you can:
- Delete fields that you don’t need (this makes it easier and more likely for fundraisers to complete your form)
- Duplicate a field to use for similar purposes (just be sure to update the field settings and label)
Adjust the Mailing Address field
If you aren’t able to accept donations outside of the United States, we recommend updating the Address Type setting in the Mailing Address field to save yourself the trouble of having fundraisers who live outside of the US completing your Start a Campaign form.
To do this, open the Mailing Address field settings. Under “Address Type” select “United States”. The default for this template form field is “International”.

Update the Provide a Campaign Photo field
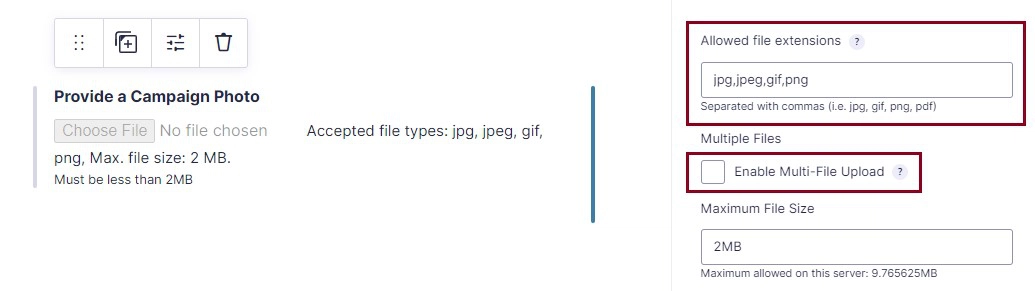
If you would like to allow (or encourage!) fundraisers to submit multiple photos through the Provide a Campaign Photo field, you can do so within the settings for that field. Simply check the box within the “Multiple Files” section to “Enable Multi-File Upload”.
You can also adjust the image type restrictions for this field. The default settings include the following file types: jpg,jpeg,gif,png. You can remove or add to those as needed through the “Allowed file extensions” section of the field settings.
Those updates and fields should be sufficient for a standard form to start a campaign. If you need to include additional form fields, explore your options on the right side of the page, and simply drag and drop the form fields you require.
For more complex form fields, such as fields using conditional logic, Gravity Forms provides great documentation and tutorials on how to use the form tool.
Once you are satisfied with the form fields, click the blue “Save Form” button.
Updating the Settings
Once all of your form fields are in place, you’ll want to review your form settings. Under Settings at the top of the form, you’ll find the following options: Form Settings, Confirmations, Notifications, Personal Data and any integrations (like an email service or payment processor) that you have in place on your website.
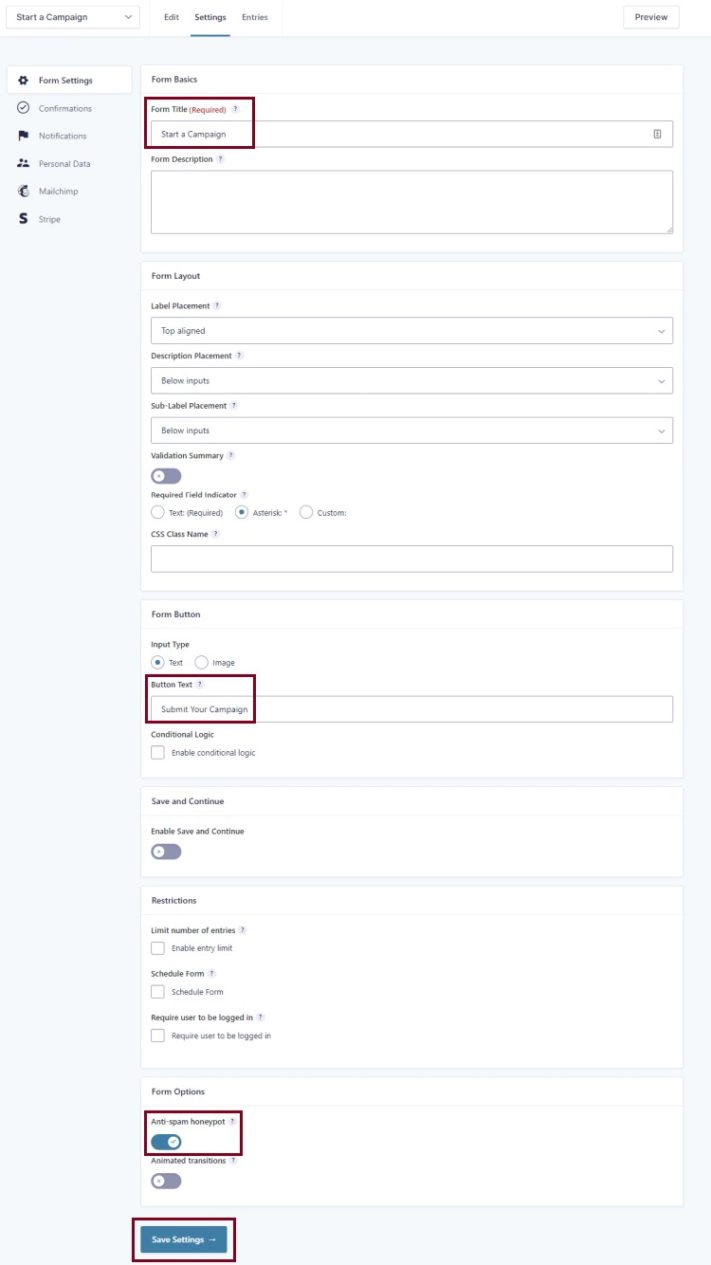
The Form Settings for your imported Start a Campaign Form allow for a few customizations for you to consider.
- If you would like to adjust the title of the form to be something other than “Start a Campaign”, now is the time. The title will appear in a heading style above the form on the page (if you opt not to turn it off), as well as in the list of “Forms” on the back-end of your website.
- You can also adjust the button text for the submit button. For example, instead of “Submit Your Campaign”, you might opt for “Start Fundraising”.
- Make sure to leave the “Enable anti-spam honeypot” box checked.
- Once you are satisfied with the Title and Button Text, click “Save Settings”.
Set Confirmations
After someone submits your Start a Campaign form, they’ll expect confirmation that their form submission was processed successfully. There will be default confirmation text imported with your form that says:
“Thank you for starting a campaign! We will reach out to you with next steps.”
While the default confirmation text works, we recommend creating a Thank You page that the fundraiser is redirected to after completing the form.
Create a Thank You page
Create a new page and name it something along the lines of “Thanks for Becoming a Fundraiser”. Include content on the page that thanks your supporters and runs through any next steps, such as tips for fundraising, a contact person on your team to answer fundraising questions, and that they will be emailed a copy of their form submission for their records. You might also highlight other content and calls to action on your site that they may be interested in, such as your About Us page, Upcoming Events or Volunteer Opportunities.
You will want to set this page to be “no index”. This means that the page will be blocked from search engine results and ensures that only visitors who complete the form will land on this page.
- Within the content editor for your Thank You page, scroll down to the section titled “Yoast SEO”.
- Find and expand the “Advanced” section.
- Under “Allow search engines to show this Page in search results?”, select “No”.
- Click the blue “Update” button in the top-right corner of the screen.
To set your new Thank You page as the confirmation message for your form, go back into “Confirmations” within your form settings.
- Click “Edit” below the “Default Confirmation”.
- Next to “Confirmation Type”, select “Page”.
- Select the Thank You page from the dropdown.
- Click “Save Confirmation”.
Set Notifications
Your team and the person who signed up to start a fundraising campaign will get email notifications that the form was processed successfully, including details of the submission. This is done through automated notification emails that will be imported with the template.
Update Admin Notifications
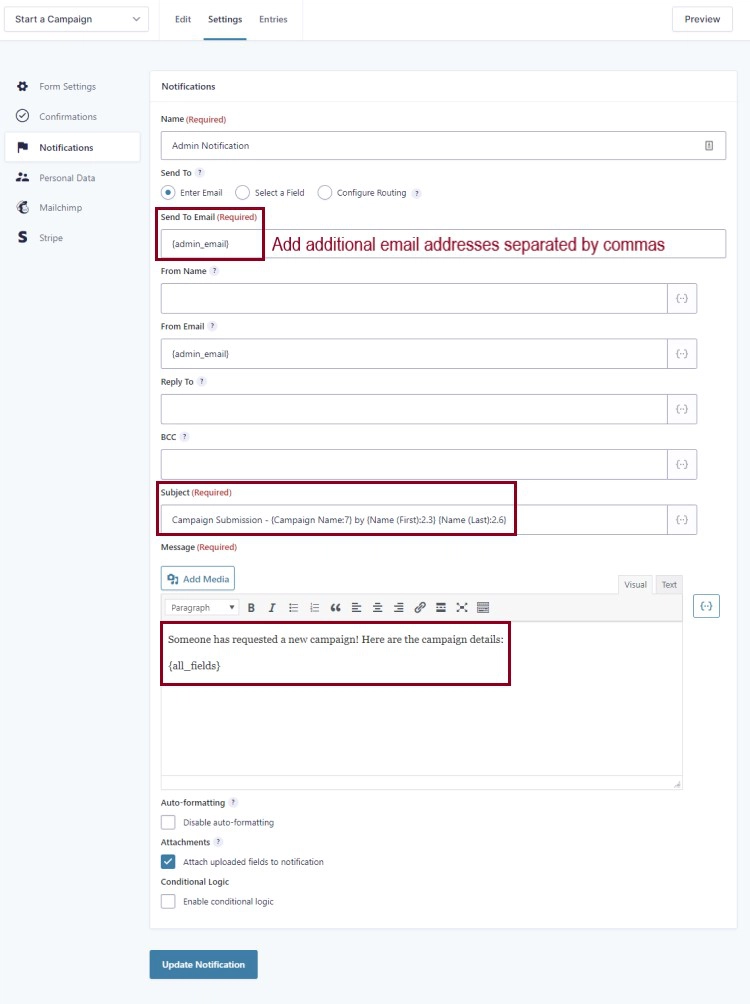
To update the admin notification to be sent to you or members of your team:
- Go to the “Notifications” tab within “Settings”.
- Under “Admin Notification”, click “Edit”.
- Add to or update the “Send to Email” field to include all of the email addresses that Start a Campaign form submission notifications should be sent to, separated by commas.
- If you’d like, you can adjust the “Subject” and “Message” fields based on your preferences. However, you’ll want to ensure that “{all_fields}” remains in the message field to receive all of the information from the submitted form.
- Click “Update Notification”.
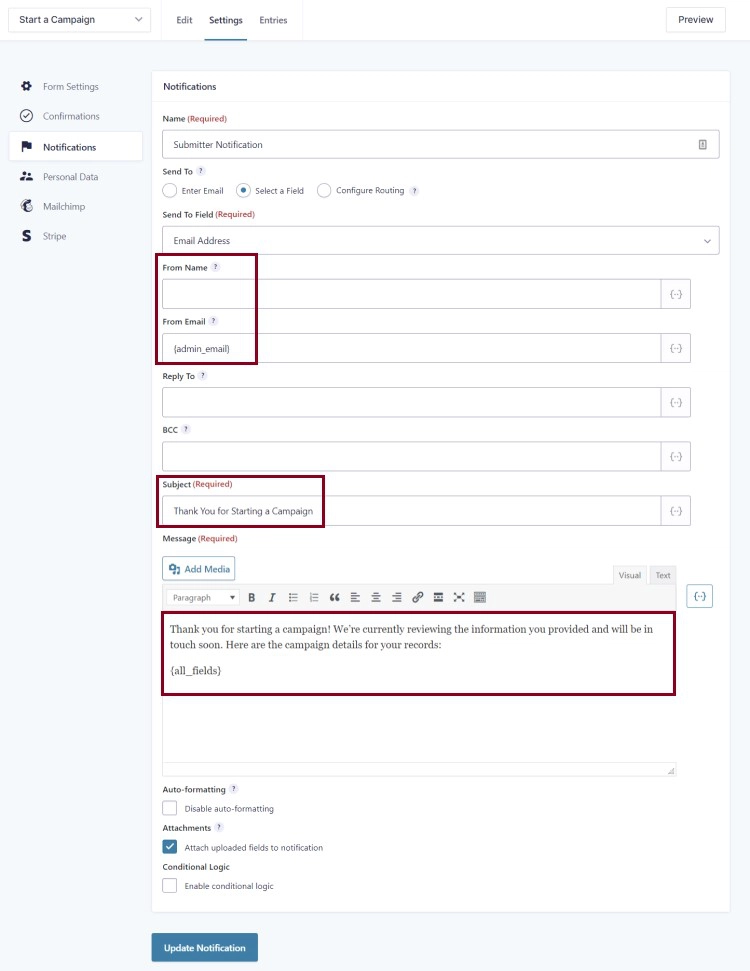
Update the Submitter Notification
To update the automated notification email to the fundraiser, customize the Submitter Notification email with more concrete details about running a fundraising campaign with your nonprofit.
- Within “Notifications”, click “Edit” below “Submitter Notification”.
- Add a “From Name” for the email, such as the contact person for peer-to-peer fundraisers at your organization.
- If you’d like, you can adjust the “From Email” to be different from the default admin email of your website.
- You might also wish to update the Subject line for the email.
- Customize the body of your email within the “Message” section. You can include any relevant details about fundraising for your organization here.
- To include a copy of the form responses for their records, use “{all_fields}” to automatically pull those into the email.
- Don’t forget to save your notification by clicking the blue “Update Notification” button at the bottom of the page.
Add Integrations
Want your form to talk to the other services you use? You’ll need to set up those integrations within your form settings.
Connect Your Email Service
If you’d like to connect your email service, such as Mailchimp or Constant Contact, you can set up another integration within the form to accomplish that. See how to connect your email service so that you can continue to build relationships with fundraisers down the road.
Add Your Form to a Page
Your Start a Fundraising Campaign page should include all of the details that potential supporters would like before fundraising for your organization. This might include:
- A contact person that they can reach out to with questions throughout their campaign
- Resources for fundraisers, like examples of past campaigns or template materials they might draw from
- Tips on who they should reach out to and how to do that
- A strong call to action to support your mission as a fundraiser
Once you have the content for your Start a Fundraising Campaign page nailed down, follow the steps below to add your new form to a page, test it and publish it.
- Open the page where the form will live and add it by using the Gravity Forms block.
- Select the Start a Campaign form from the list of options.
- In the block settings, which appear in the right-hand sidebar, turn off the “Form Title” and “Form Description” settings.
- Preview the page to make sure it’s showing up in the right place.
Test Your Form
Follow steps to test your new form within the page preview. If everything looks great, publish your changes by using the blue “Publish” or “Update” button in the top right of the edit screen for the page.
View and Export Form Submissions
Once fundraisers start submitting the Start a Campaign form through your website, you’ll be able to view and export that data for your records.
Still Have Questions?
The quickest way to get support is to reach out to us within your website’s admin dashboard. Log into your website and then fill out the Request Help form. You’ll hear back from us within one business day.