If you’re working on your website and find that you’re trying to create similar patterns of content in several places, you can now create a synced pattern to save time and energy.
A synced pattern allows you to lay out a set of blocks in a custom order, save this set of blocks, then add them anywhere on your site for easy replication.
Synced patterns come in handy if you’re:
- Repeating the same call to action throughout your site
- Setting up columns with inner blocks (like images) in more than one place on your site
- Replicating a similar layout for several pages, like program pages or team bios
Helpful Terminology
- You add content like text and photos to your page using blocks. As the name implies, blocks stack on top of each other to build a page. Blocks can also be used to format text, add columns, create a button, embed a video, and more.
- A regular pattern (or an unsynced pattern) is a saved group of blocks that can be inserted into pages or posts and edited independently in each location they’re used. This means that changes made to a pattern in one part of your site won’t affect the same pattern elsewhere. They’re ideal for scenarios where you need a consistent layout or design as a starting point but expect to tailor the details for different pages or posts.
- On the other hand, a synced pattern functions like a global template element across your site. Originally known as “reusable blocks”, these patterns maintain synchronization across all instances where they’re used. By editing a synced pattern in one area, you update it everywhere it appears on your site, saving time and effort. This feature is useful for elements that require consistency site-wide, such as contact information or calls to action.
Types of Blocks to Use
In addition to different kinds of text like paragraphs and headings, there are many types of blocks that you can combine to create synced patterns! There’s no limit to the number of items you can include:
Set Up a Synced Pattern
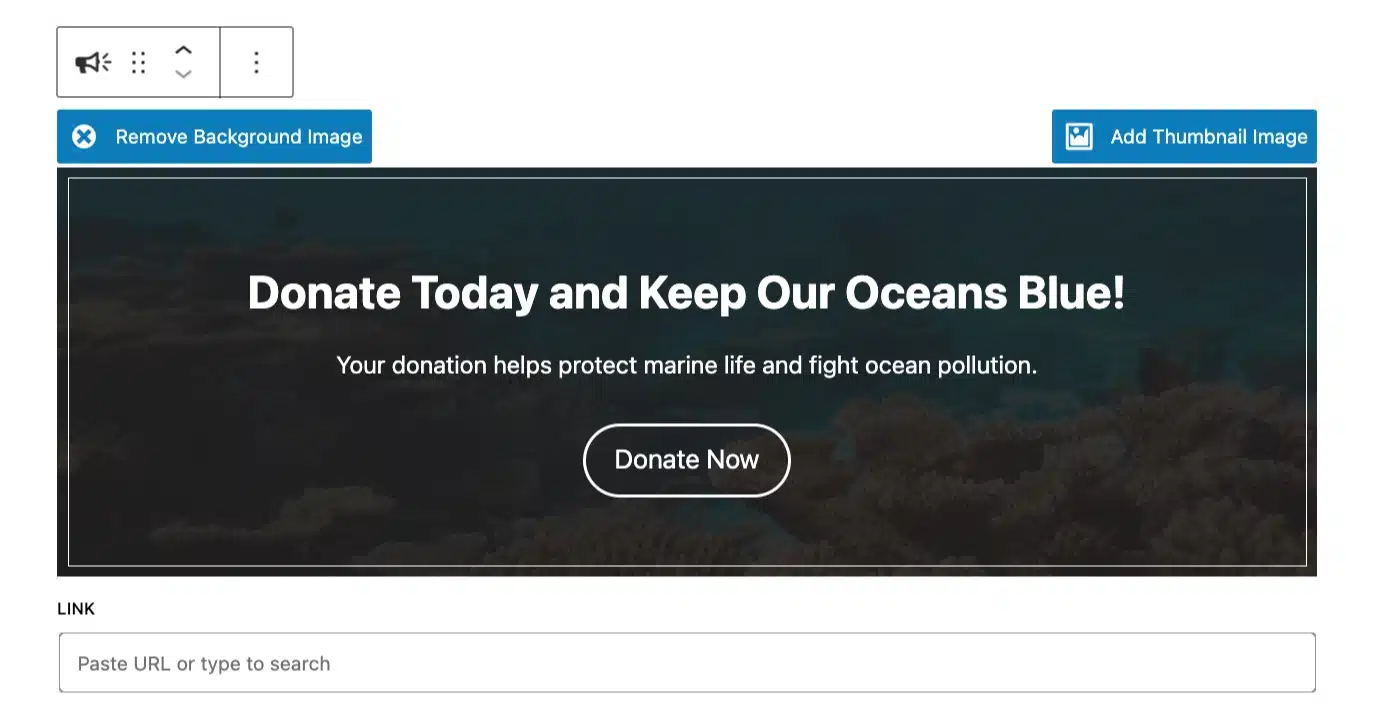
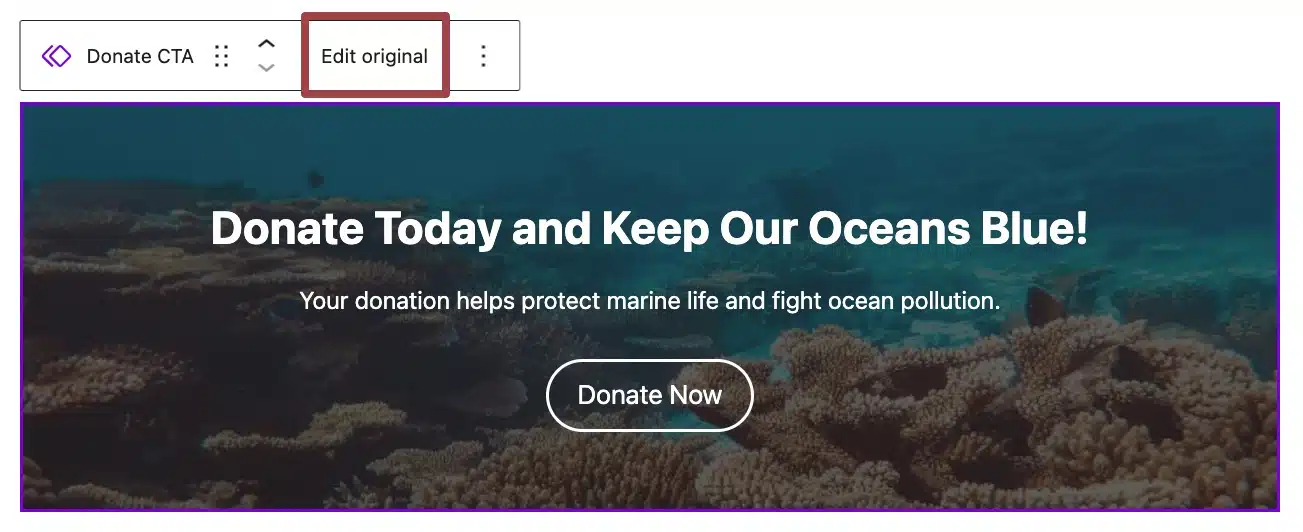
Let’s say you want to add a call to action (CTA) about donations to several pages on your site. Instead of recreating the same CTA multiple times for each page, you can create a synced pattern that will essentially copy and paste it (including all of the text and images) wherever you want in just a couple of clicks.
- Navigate to a page in the back end of your site where you’d like a Call to Action block to appear. Set it up the way you’d like for it to look across the board, as shown in the example below.
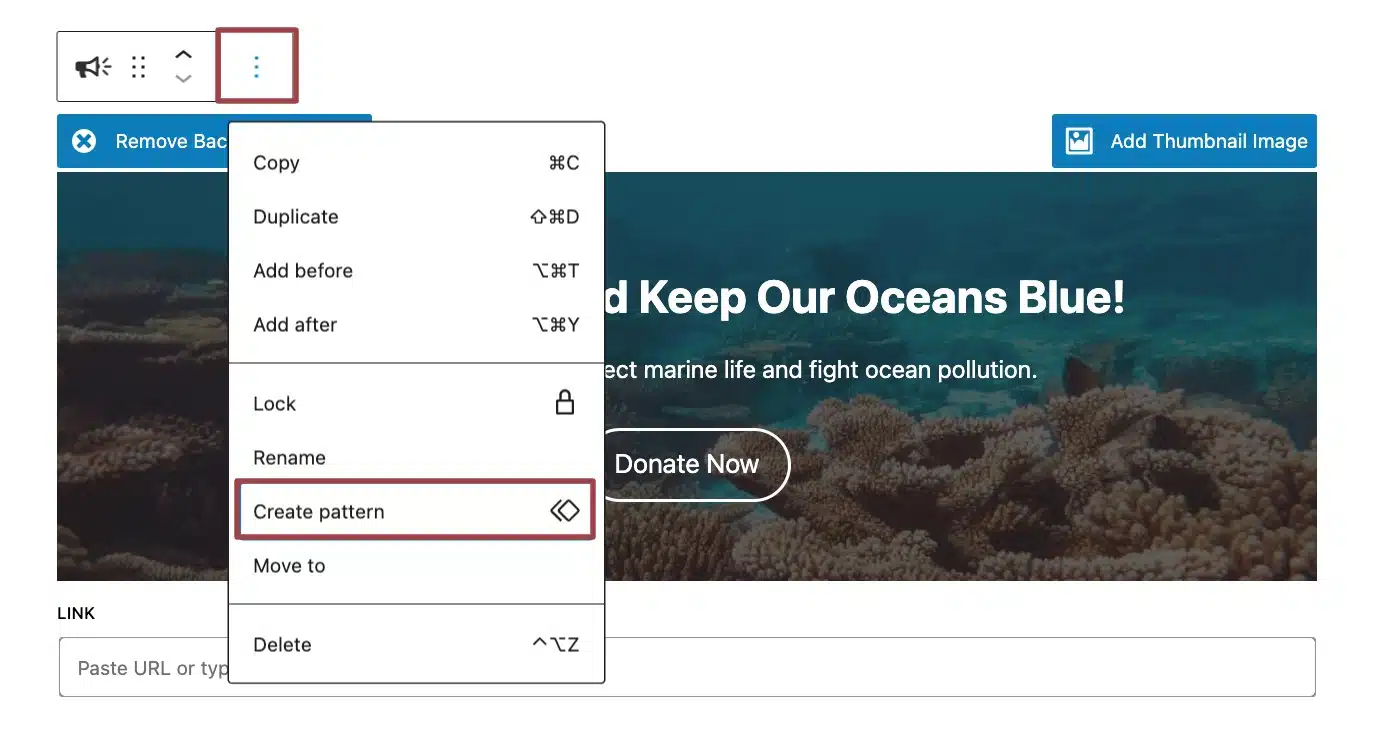
- Click the 3 vertical dots icon in the toolbar above the block you’d like to reuse.
- Select “Create pattern” in the drop-down menu.
- Give your new synced pattern a new name. This name will appear in the list of standard blocks when you build out additional pages. You can also add a category for your pattern so that it can be more easily identified.
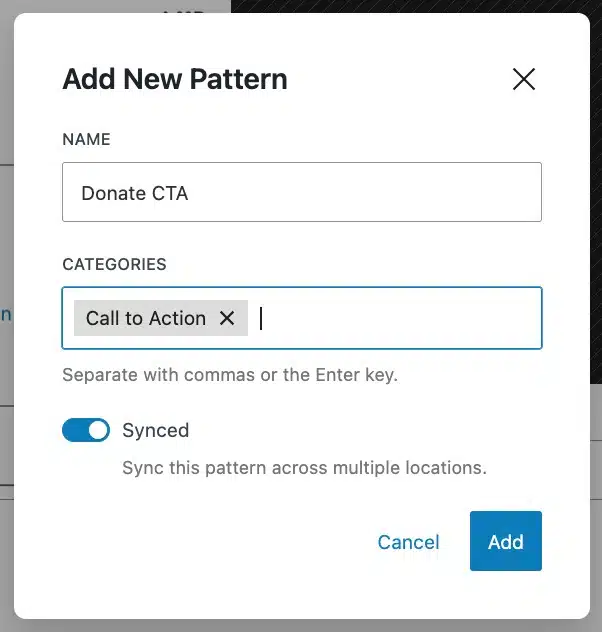
- Turn on the “Synced” option. This will ensure that any edits made to one instance of the pattern are reflected everywhere it’s used.
- Click the “Add” button to save it.
Add a Synced Pattern to a Page
You can add synced patterns in the same way as regular blocks:
- Navigate to the page and start editing.
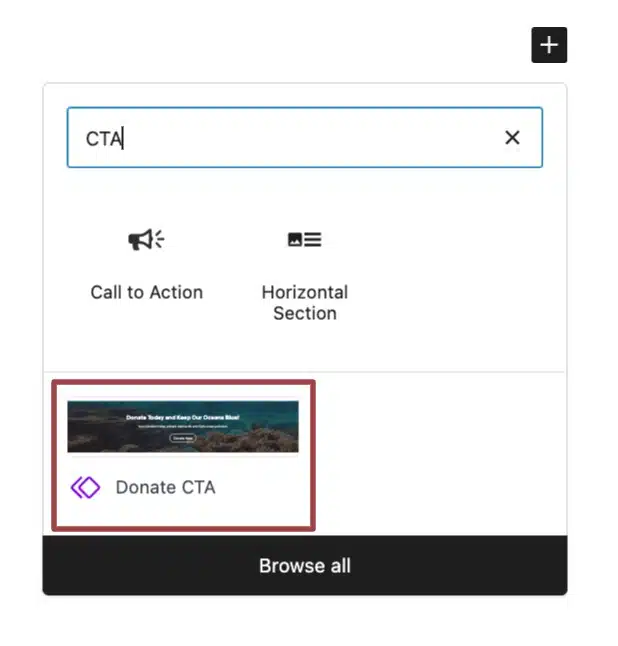
- Click the plus icon to add a new block.
- In the search box, start typing the name you gave your synced pattern.
- Click the name of the block when you see it show up to add it to your page.
- Update your page to save the changes.
There’s also a way to see all the synced patterns stored in your site:
- In the upper left-hand corner of your page editor, find and click on the plus sign to add a block.
- Find the “Patterns” tab.
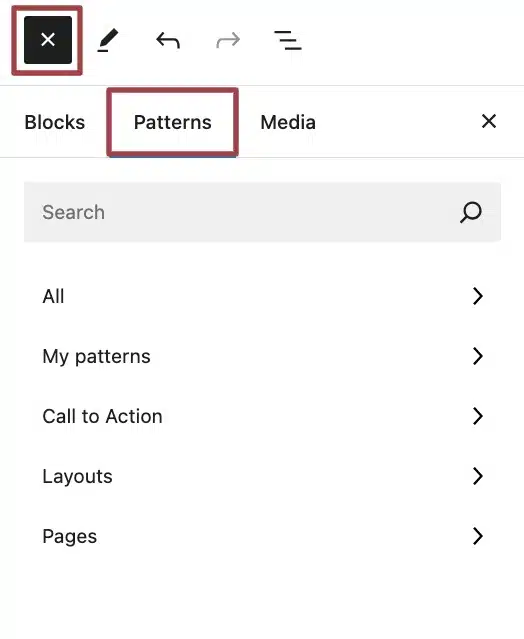
- You’ll find all your synced patterns in the My Patterns section. If you’ve assigned a category to a synced pattern, it will appear within that group, making things easier to organize and find.
Make a Global Edit to a Synced Pattern
To make global changes to a synced pattern, you can add it into any post/page and click the “Edit original” button.
Once you’re done with your changes, you’ll need to click the “Save” button at the top of the screen. Then the system will require you to confirm the changes.
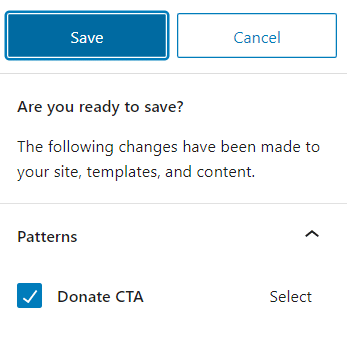
After that, the changes will be reflected any time you use the synced pattern moving forward, and it will also update any instance of it you’ve placed in the past.
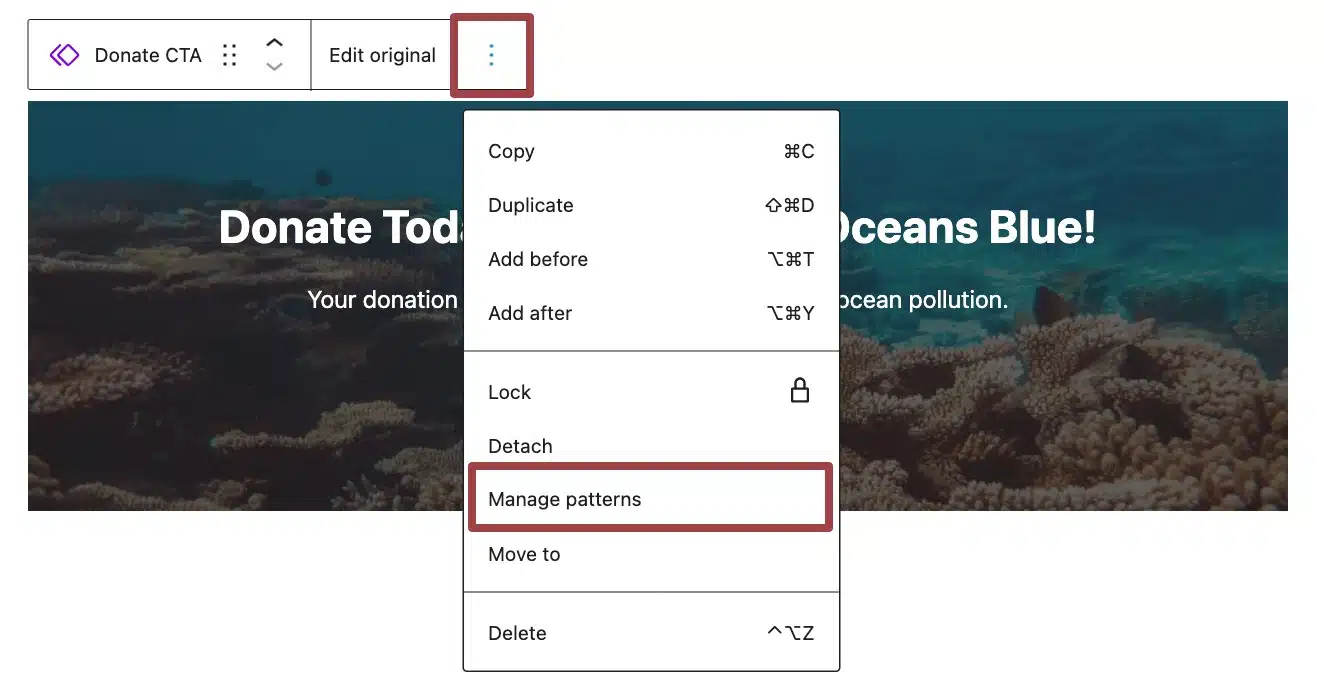
Another route to make changes to your synced patterns is to click on the three dots and then “Manage Patterns”. This will take you to a specific interface where you can directly edit them as you’d like.
From there, you can also delete patterns as you’d like.
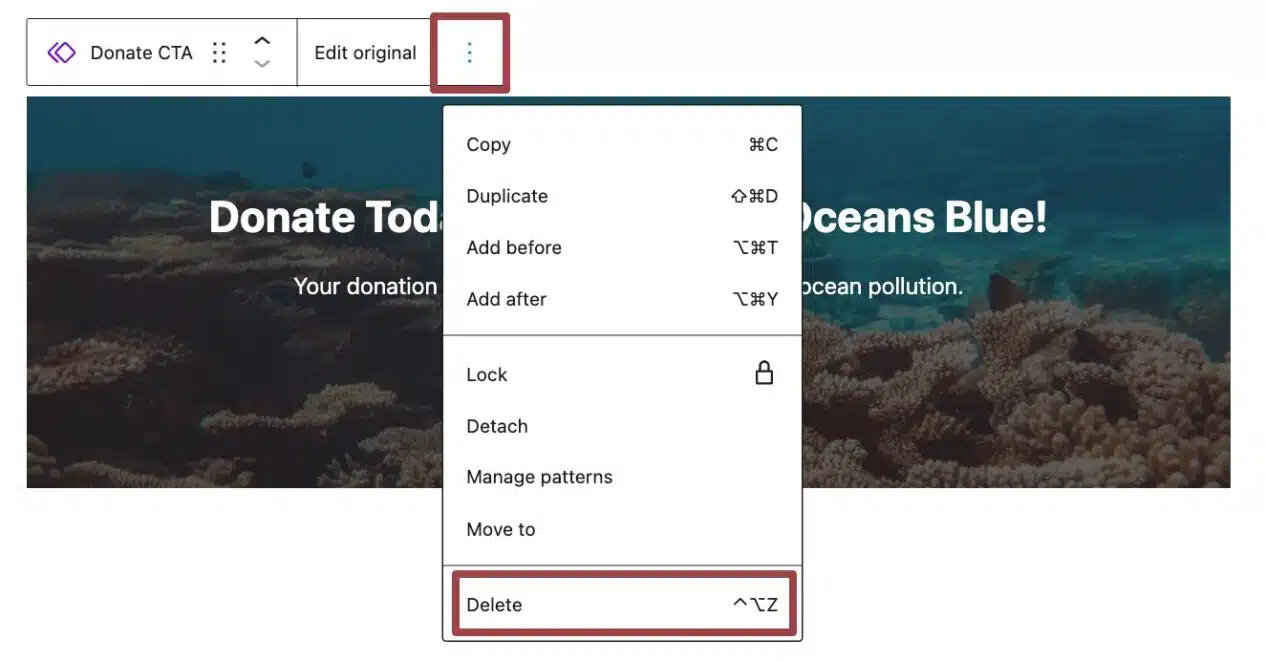
WARNING: Removing a synced pattern from the list will remove it anywhere you’ve added it on your site. If you’re contemplating removing a synced pattern and would like to retain some instances of it, you must convert them into regular blocks before you make a deletion.
If you’re looking to just remove the individual block from a specific page, select the “Delete” option instead.
Edit One Instance of a Synced Pattern
To make an edit to an individual instance of a synced pattern that won’t be applied across the site, you’ll need to transform it back into regular blocks.
- Select the synced pattern.
- Click on the three dots.
- Select “Detach”.
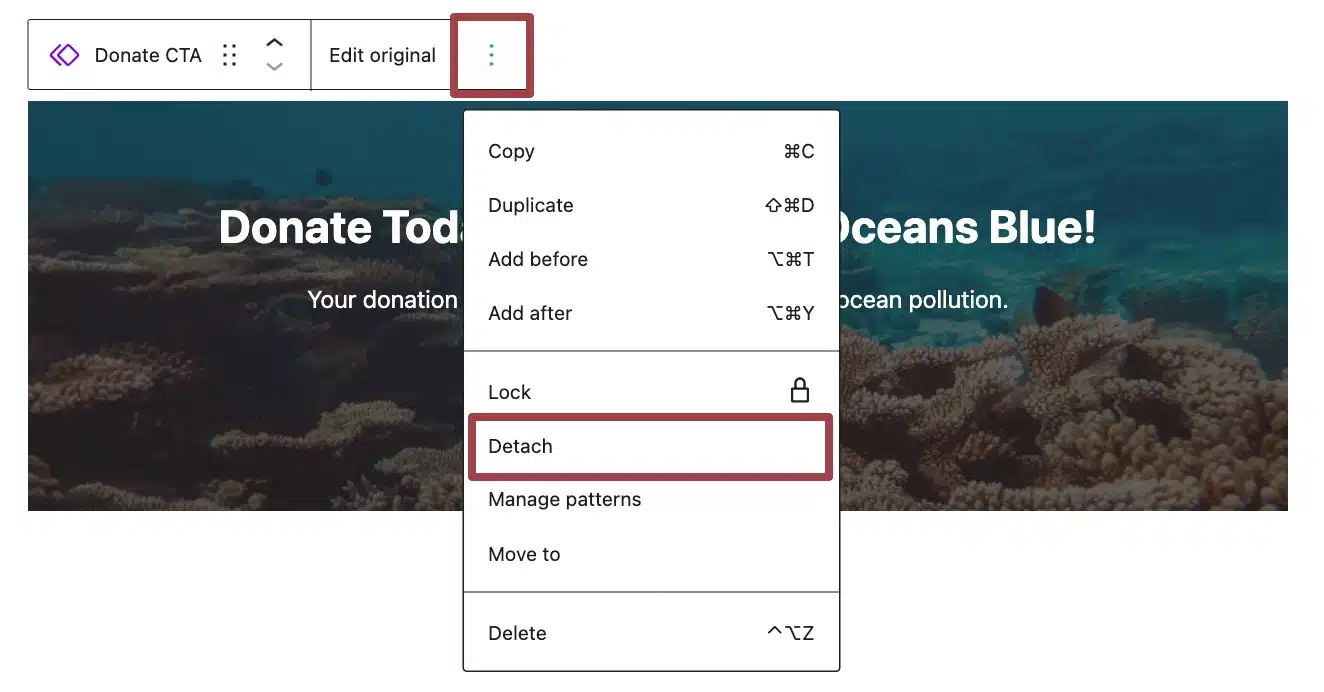
Once you do this, the changes you make will not be synced and won’t affect the rest of the instances where this pattern is used.
Still Have Questions?
The quickest way to get support is to reach out to us within your website’s admin dashboard. Log into your website and then fill out the Request Help form. You’ll hear back from us within one business day.