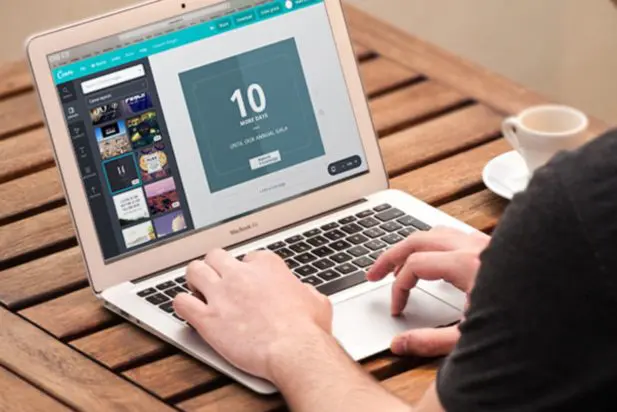
By now, it’s no secret that including visuals in your social media posts means more engagement. Facebook posts with an image get 2.3 times more engagement than those without, and Twitter posts with an image and summary are 78% more likely to get shared. Could your nonprofit use some help creating free social media graphics?
Visuals take time (and likely money) if you’re not a designer, or, if like many nonprofits, you don’t have a designer on staff. Enter Canva. Canva allows users to quickly and easily create a variety of marketing materials with well-designed templates and an intuitive interface. If you don’t have a naturally keen eye for design, Canva offers a variety of tutorials to coach you through your first attempts.
Canva even makes it easy for users to reuse one graphic for multiple purposes. With their Magic Resize tool, which is available with upgraded accounts, you can create a Facebook graphic and seamlessly resize it to the ideal Twitter graphic size with just a click of a button. And the best news yet? They offer their upgraded Canva For Work services free for nonprofits.
Create Social Media Graphics with Canva
There are many ways to go about creating graphics in Canva. In this post, we’ll talk about how to build a basic graphic using a pre-designed template. The opportunities to feature imagery across your social media accounts are limitless. You can recruit volunteers, advertise a new program, request donations, announce important dates, and even introduce staff or board members.
In the example that follows, we’ll walk through the steps of creating a graphic to countdown to a big fundraising event. Watch the video and follow along with step by step instructions!
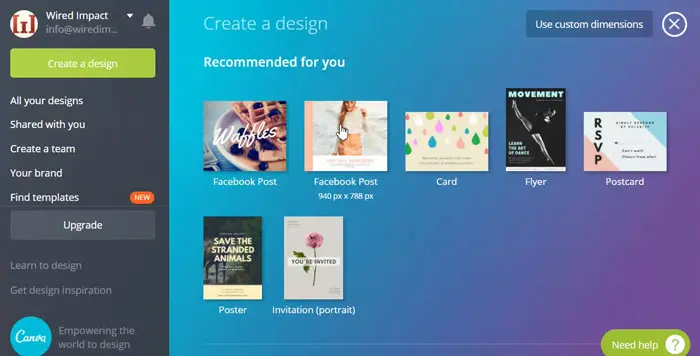
Step 1
Once you’ve signed into your account, choose the type of graphic you’d like to create. There are many pre-determined sizes and types of graphics to choose from. For example’s sake, we’ll choose the Facebook Post size.
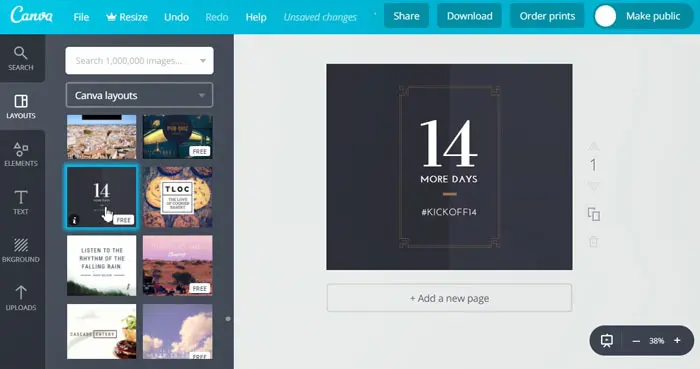
Step 2
Choose a design template. Canva offers an insane amount of template options, and even more customization once you’ve selected one. As you’re browsing, be sure to check if the template you choose is free or paid. It’s important to also keep an open mind as you’re looking through templates! If one catches your eye but the words are about Father’s Day, think about how you can edit the copy and imagery to work for your organization.
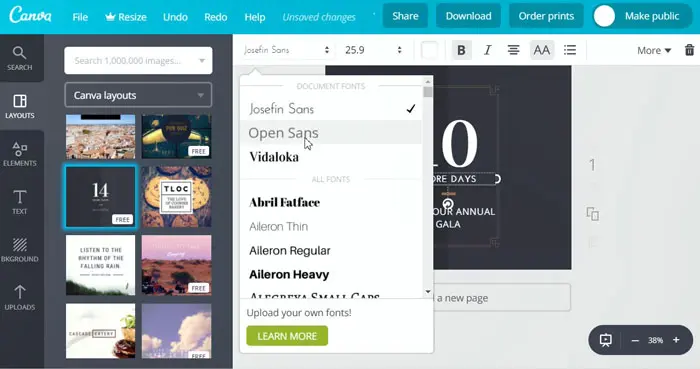
Step 3
Once you’ve chosen a design, you can customize until your heart’s content. In the image below, you can see that we’ve updated the fonts and changed the text to countdown to a gala event. Select an element in the design space to see what customization options are offered.
Next we’ll update colors. Changing the fonts and colors of a graphic can be a great way to make sure the templated imagery feels like it’s connected specifically with your nonprofit’s brand. For this example, we’ll use the imaginary nonprofit used in our live demo sites, called Nature Knowledge.
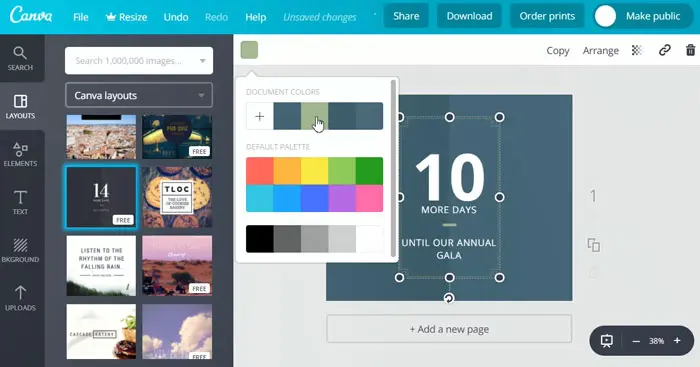
After updating fonts and colors, you can play with the layout. In the image below, we’ve made the border wider so all of the visual elements are not so concentrated in the center of the graphic.
In most cases, you’ll likely want to add your organization’s logo to the graphic as well. If you’re working on a dark background, similar to our example, you’ll want to first add a white square. Use the Shape tool under the Elements tab. Resize the square to be a much smaller rectangle, then upload your logo and add it to the design, placing it inside of the rectangle.
![]()
The customization options are virtually endless. From changing colors to adding shapes to uploading your own photos, you can create social media graphics for any occasion. Check out Canva’s tutorials to spread your design wings.
Step 4
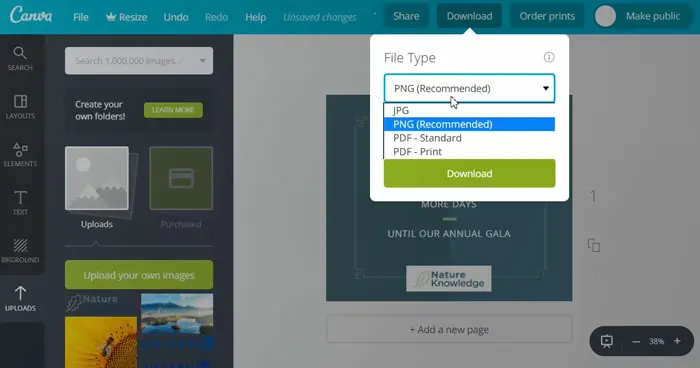
Once you’re happy with the way your graphic looks, the last step is to export the final product. As a rule of thumb, if your design is pretty minimal (mostly text and shapes), it’s best to save as a png file. If your graphic includes photos, it’s best to save as a jpg file. Canva gives you the option to download it to your computer or share it directly to your social media accounts.
How Real Nonprofits Are Using Canva
Check out the examples below to see the variety of styles and messaging you can create using the Canva platform. If you’re rarely adding imagery to your social media posts, give this a try!
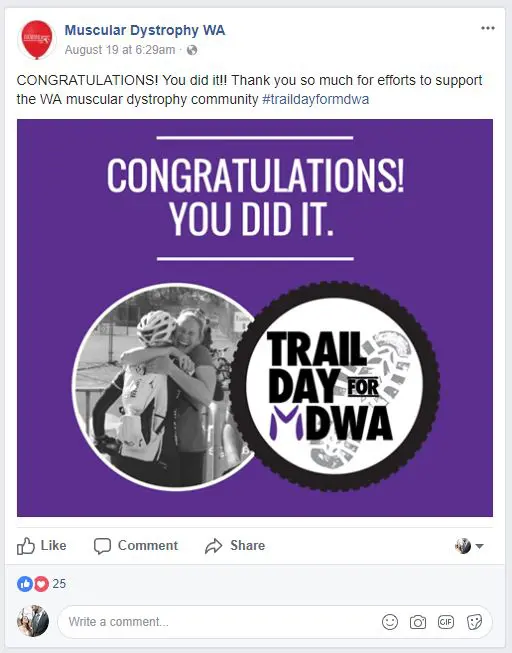
Muscular Dystrophy Western Australia used Canva to create graphics to follow up with participants after a big cycling fundraiser:
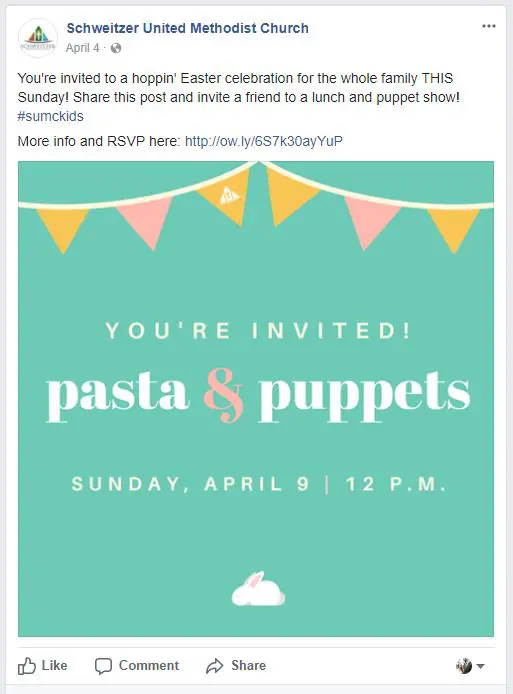
Schweitzer United Methodist Church used Canva graphics to promote an upcoming community event for families:
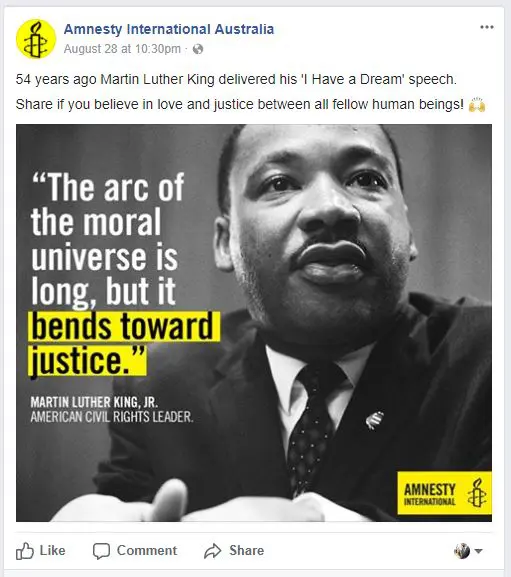
Amnesty International Australia used Canva to highlight inspirational quotes in a compelling visual way:
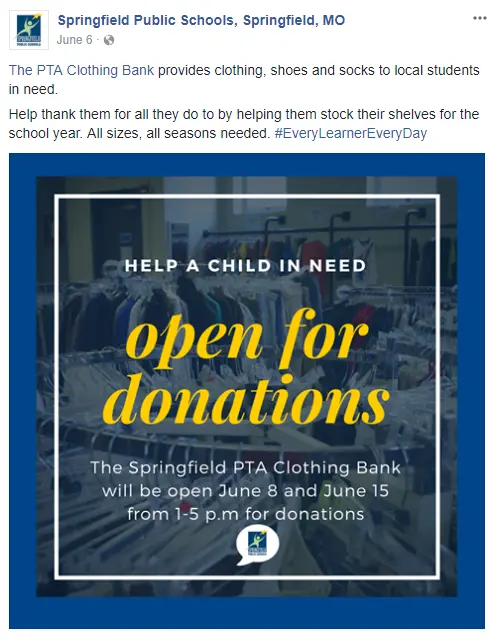
Springfield Public Schools promoted a clothing drive using Canva to help local children in need:
By consistently adding imagery in your posts, you might be surprised at how your social media engagement changes. If you’re already posting images regularly, experiment with Canva to see if it streamlines your process or gives you better results.
Have you created social media graphics for your nonprofit? What tools did you use? Do you think Canva would help (or has helped) elevate your social media game? Let us know in the comments below.
*We are not affiliated with Canva and have not been paid to write this post. It’s just a cool product.
What You Should Do Now
01. Come to Nonprofit Website Office Hours
We cover a new topic every few weeks. Plus get a live answer to any website-related question you're wrestling with.
02. Book a Website Call
Find a time to discuss your nonprofit's website needs. Discover what's worked for other nonprofits like you and see how easy building your new site can be.
03. Start a Free Website Trial
Try our nonprofit website platform for yourself. Instantly get access to every feature to see if it's the right fit for your needs. No credit card required.
Comments