The easier you make it for people to find volunteer opportunities that interest them, the more likely they are to sign up to make a difference with your organization! Using your website as a volunteer recruitment hub is a great way to attract new volunteers and simplify your work to manage these helpers.
In this article, we’ll cover how to set up the Volunteer System and create new opportunities to post on your website.
FEATURE AVAILABILITY
The Volunteer System is available for Amplify plan websites. Upgrade your plan in the Account & Billing section of your website Dashboard to unlock this feature.
Jump Ahead To
Helpful Terminology
- A one-time volunteer opportunity happens at a fixed date and time. One example might be a trivia night fundraiser where you need volunteers to help check in attendees.
- Flexible volunteer opportunities can happen on different days and times. One example might be weekly tutoring. Another example could be looking for a volunteer to help with your social media or blog.
Configure Settings
Before creating new volunteer opportunities, you’ll want to review and customize a few settings to meet your organization’s needs. This initial setup will make it easier to set up new opportunities in the future!
- Log into your website and find “Volunteer Mgmt” in the admin menu on the left side.
- Hover over “Volunteer Mgmt” and click on “Settings” in the submenu.
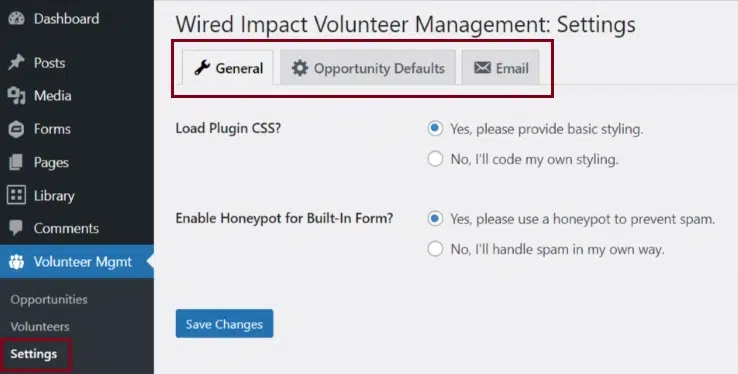
General
You’ll see several options that control the styling of opportunities and prevent spam signups. We don’t recommend making any changes to these settings.
Opportunity Defaults
In this tab, you can set up defaults that will be used for all new volunteer opportunities to save you time. This includes:
- The default contact information for the staff member who manages volunteers.
- The default location where most activities take place.
- The default form you want to show for volunteers to sign up.
Always save your changes after updating these settings.
In this tab, you can customize emails that are automatically sent to volunteers and opportunity coordinators. This includes:
- The email address and name used as the sender for these emails.
- The email to volunteers after they sign up for an opportunity.
- The email notifying admins of a new signup.
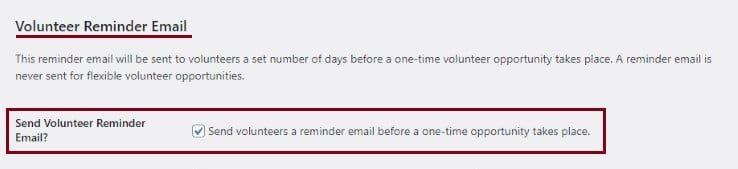
- A reminder email that’s sent before a one-time volunteer opportunity takes place.
You can disable each of these emails if you plan to communicate with volunteers using another tool. You’ll just need to uncheck the corresponding box.
Always save your changes after updating these settings.
Create a New Opportunity
If the volunteer system has been activated on your website, it’s easy to add a new volunteer opportunity.
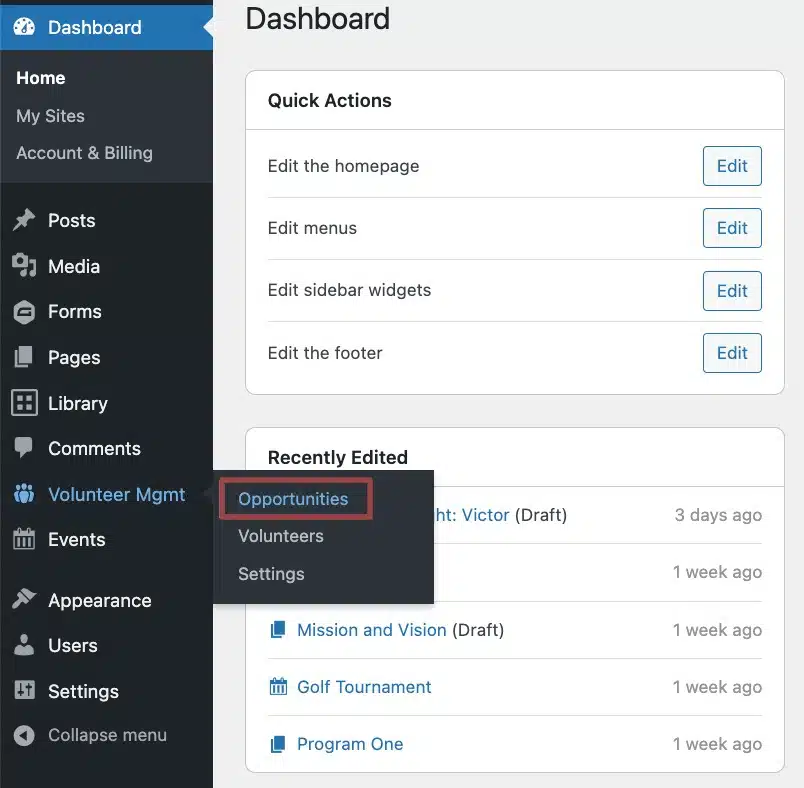
- Log into your website and find “Volunteer Mgmt” in the admin menu on the left side.
- Hover over “Volunteer Mgmt” and click on “Opportunities” in the submenu.
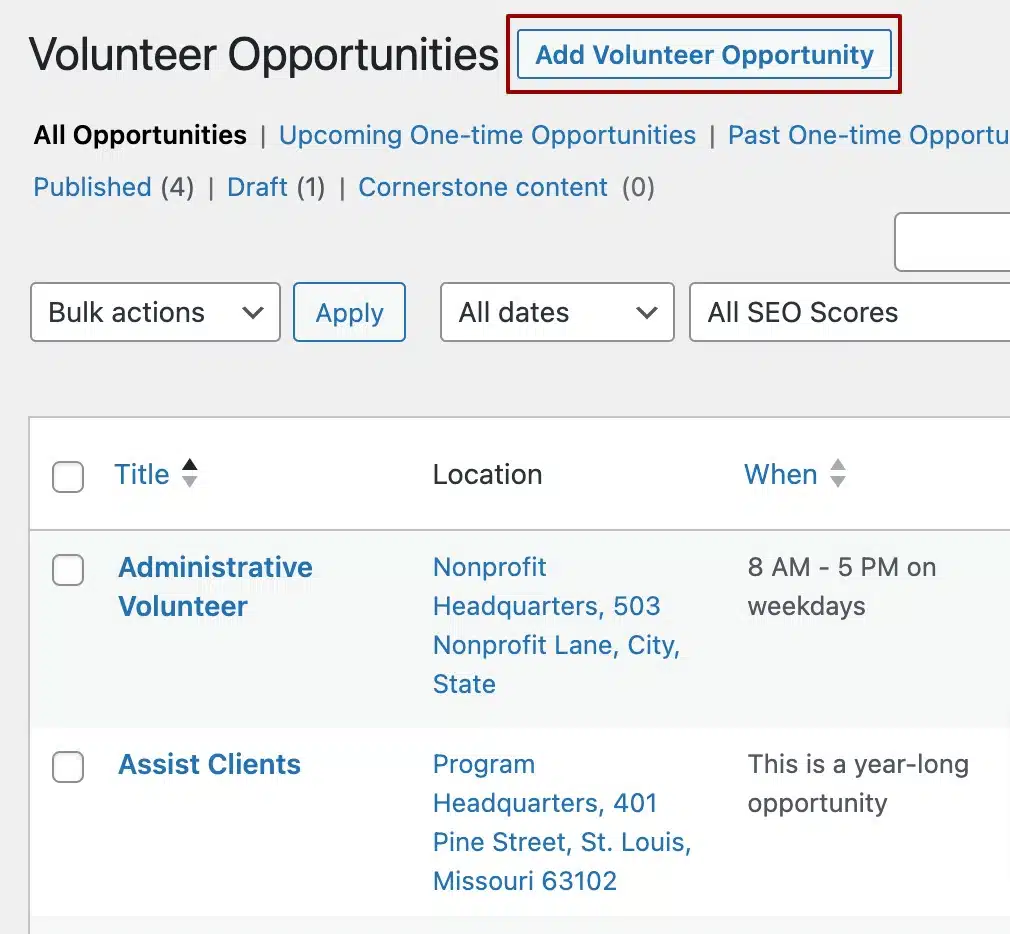
- At the top of the page, click the “Add Volunteer Opportunity” button. This will take you to a new page for the specific opportunity.
Customize the Volunteer Opportunity
Once you’ve created a new volunteer opportunity, it’s time to fill in all the necessary details.
Entering Volunteer Opportunity Information
- Add a title for your volunteer opportunity.
- Try to be descriptive so that potential volunteers are motivated to learn more.
- Include a description with the purpose of the opportunity and any tasks the volunteer(s) will be doing.
- You might also describe any required skills, the type of commitment you’re looking for and the impact that volunteering will have on your community.
- You can use blocks to format this description like a standard page.
- Choose to add a featured image to your volunteer opportunity.
- Fill out the Volunteer Opportunity Details section.
- Here, you can add contact information for your team, as well as location information, the date and time, and a volunteer limit. Some of this information may be prefilled based on your Opportunity Default settings.
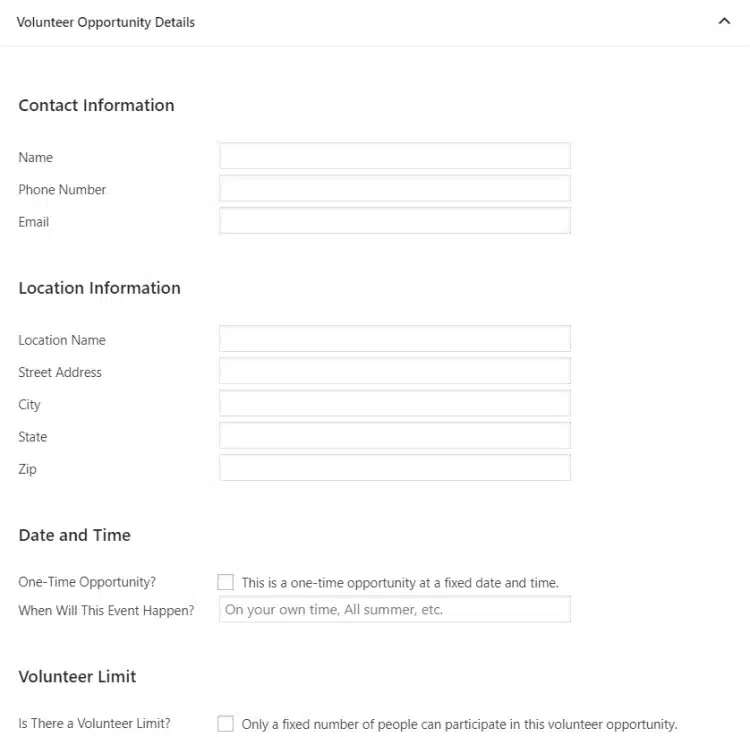
- Set whether this is a one-time volunteer opportunity at a fixed date and time or a flexible opportunity.
- If you check the box for a one-time opportunity, you will be prompted to input a start and end date and time.
- If you’re creating a flexible opportunity, you can leave the box unchecked and provide a time range for when it will occur. For example, “Summer 2024”.
Selecting the Volunteer Signup Form
- In the “Volunteer Signup Form” drop-down menu at the bottom of the page, select the type of form you’d like to show for volunteers to sign up. Your options are:
- No Form: You can link to a page with a full volunteer application or embed a form from another tool.
- Built-In Signup Form: Ask volunteers for their name, phone number and email address. Learn more.
- Custom Form: Create a custom form that you can use to collect the information you need from volunteers when they sign up for an opportunity. Learn more.
About the Built-In Signup Form Option
If you choose the Built-in Signup Form option, a simple form to collect basic contact information will be automatically added to your volunteer opportunity.
- One-Time Opportunities: A form submission for a one-time opportunity serves as an RSVP to the volunteer event.
- Flexible Opportunities: Because flexible opportunities vary, the form serves as a way for visitors to express interest in the opportunity rather than signing up immediately.
With the Built-in Signup Form, we recommend keeping the Volunteer System emails enabled.
That way, the person who submitted the form will receive an email confirming the details, and the staff member coordinating the opportunity will also receive an email that someone signed up or expressed interest.
About the Custom Form Option
If you choose the Custom Form option, you can use a form you’ve created to collect specific information from potential volunteers and tailor the signup experience to your needs. Here’s a closer look at how to make the most of the Custom Form option.
Creating a Volunteer Form Feed
- Start by creating a new form and add the fields you need for volunteer signups.
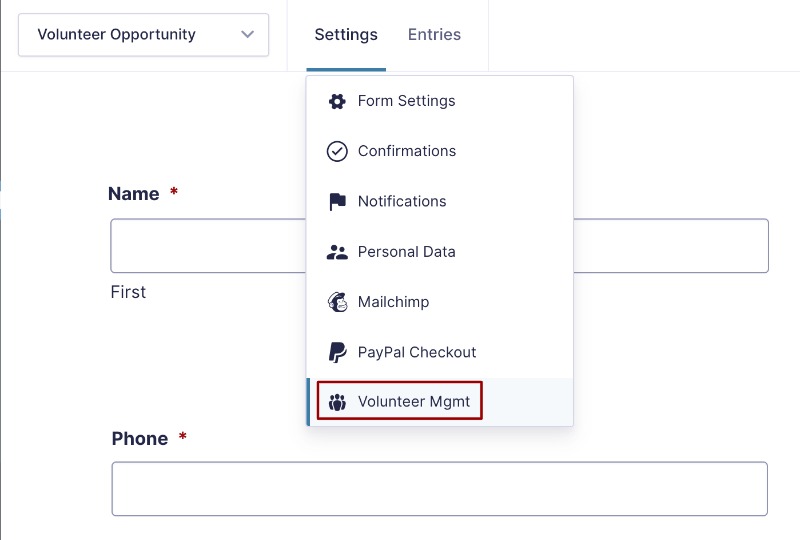
- While editing your form, hover over the Settings menu and click “Volunteer Mgmt” in the dropdown.
- Click the “Add New” button to create a new feed or edit an existing feed.
- Enter a Name for the feed. You can set this name to something generic such as “Volunteer Feed”. If you have multiple feeds that each process under specific circumstances, we’d recommend naming it something more descriptive.
- Map each field needed for the volunteer management system with the corresponding field from your form. This step is crucial to ensure that the data is passed accurately.
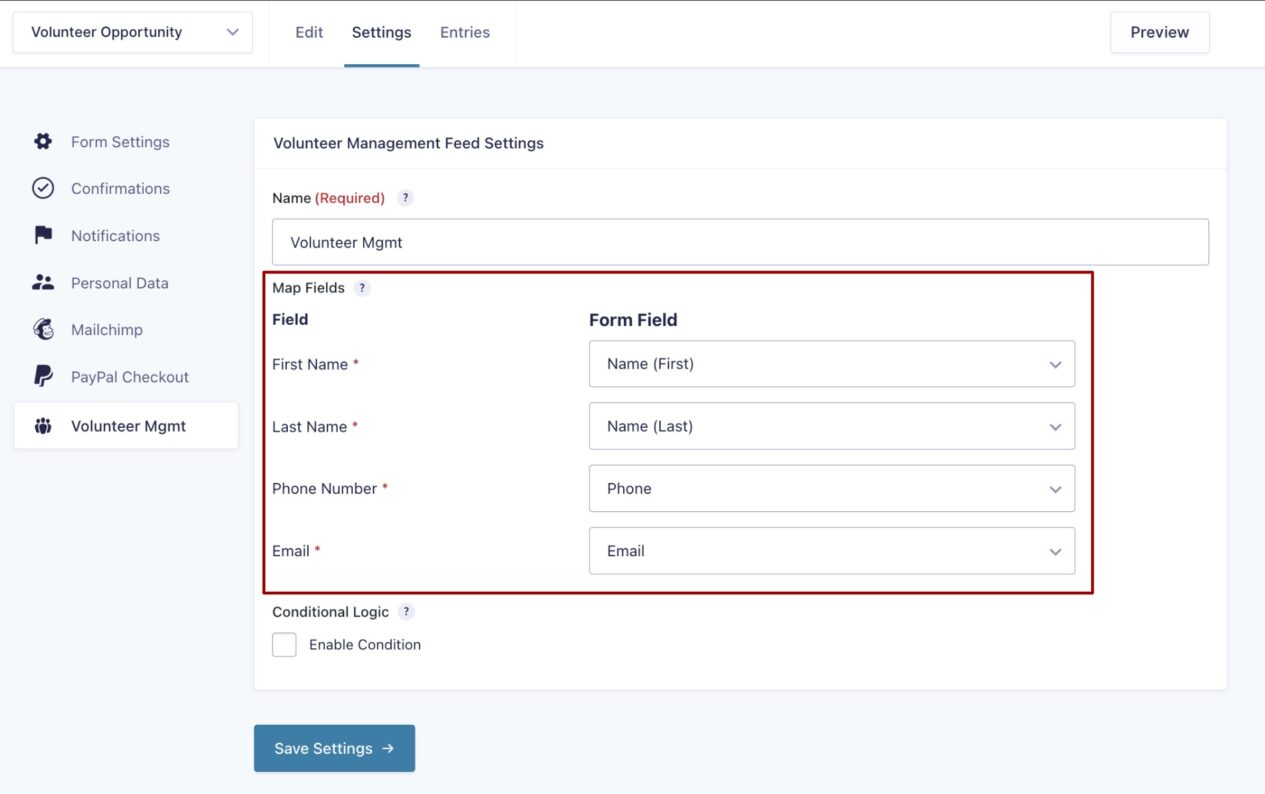
- If you’d like the feed to execute only under certain circumstances, check the box to enable Conditional Logic and add your conditions. Review your settings and click the blue “Save Settings” button at the bottom of the page to save your feed.
Customizing Your Custom Form Notifications
If you want your team to be notified via email when someone signs up for a volunteer opportunity or if you’d like to send a personalized email with specific information to the person who signed up, you can configure notifications for your custom form.
- Ensure your form is connected to the volunteer management system using a feed.
- Set up your form notifications.
- Click the Merge Tags icon {..} to insert details from the volunteer opportunity in the email, such as the Volunteer Opportunity Name, Date & Time, Location, and more. These options can be found in the “Custom” section of the Merge Tags list.
- To avoid duplicate emails, consider disabling the Volunteer System emails.
The last and most important thing to do here is to test your form to ensure submissions are passed into the volunteer management system correctly and email notifications are sent.
Preview and Publish
With all your volunteer details entered, it’s time to review.
- Click the laptop icon button in the top right-hand corner of the page to preview your new volunteer opportunity.
- Make any changes you’d like until you’re satisfied with how the volunteer opportunity looks in the preview.
- Click the blue “Publish” button in the top right-hand corner to publish the volunteer opportunity on your website.
Add Volunteer Opportunities to a Page
The Volunteer Opportunities block allows you to display either upcoming one-time or flexible opportunities on a page.
If you’ll be hosting both one-time and flexible opportunities at your organization, we recommend creating two pages: one for each type of opportunity.
Published opportunities are automatically added to the volunteer page(s) of your site through the Volunteer Opportunities block.
Here’s how you can add the Volunteer Opportunities block to a page.
- Go to the back end of the page where you’d like to list your opportunities.
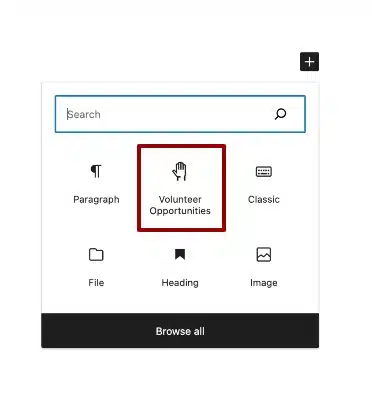
- Click the (+) symbol in the upper left corner and search for Volunteer Opportunities.
- By default, the block will display all one-time opportunities. You can change this to show flexible opportunities by selecting the calendar icon on the right.
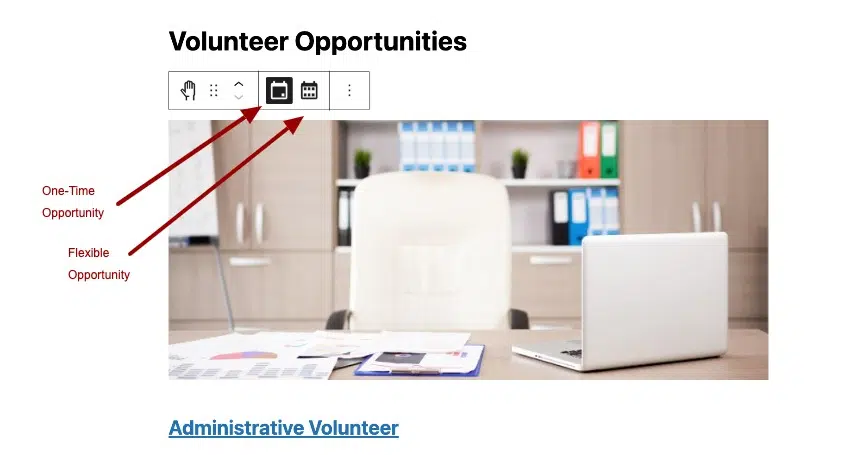
- A list of opportunities you’ve added to the volunteer system will automatically display.
- Preview the page to see your changes and publish when ready.
Other Volunteer Opportunity Features
Though you don’t need to worry about these features when creating a new opportunity, there are a few additional sections that you’ll see in the back end of each volunteer opportunity.
Volunteer Opportunity RSVPs
Here you will see a list of the people who have signed up or expressed interest in the opportunity. You have the option to remove anyone from this list.
You can also manage RSVPs by clicking on a volunteer’s name to access their profile. From there, you can view and remove their RSVP status and add notes about the volunteer. For other updates, like modifying the volunteer’s first and last name, profile picture, and more, click on “Edit Volunteer Info.”
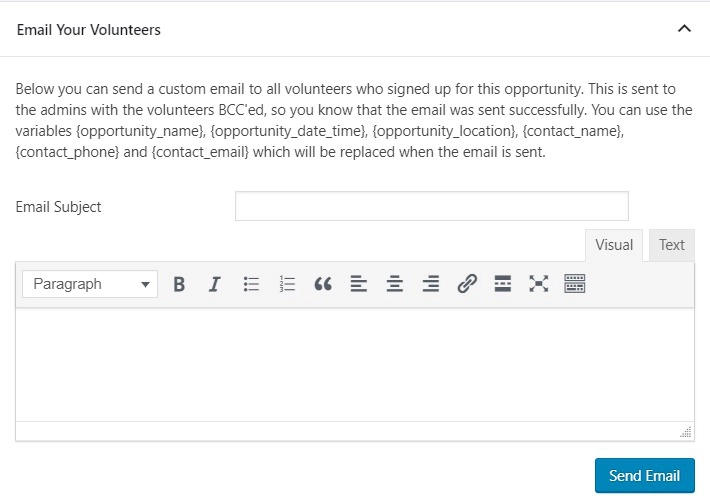
Email Your Volunteers
Here you can send a custom email to all volunteers who signed up for the opportunity. Learn more about sending emails through the volunteer management system.
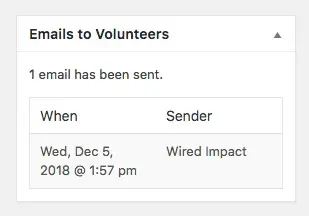
Emails to Volunteers
In the right sidebar, there is an “Emails to Volunteers” section. Here you will see any emails you previously sent to volunteers about this opportunity.
Still Have Questions?
The quickest way to get support is to reach out to us within your website’s admin dashboard. Log into your website and then fill out the Request Help form. You’ll hear back from us within one business day.